
1. Танилцуулга
This manual provides detailed instructions for installing, configuring, and maintaining your GIGABYTE GA-B150M-D3H Micro ATX motherboard. The GA-B150M-D3H is designed to support 6th Generation Intel Core Processors and features Dual Channel DDR4 memory, PCIe Gen3 x4 M.2 connector, SATA Express, and 8-channel HD audio with Audio Noise Guard.
Please read this manual thoroughly before beginning installation to ensure proper setup and operation.
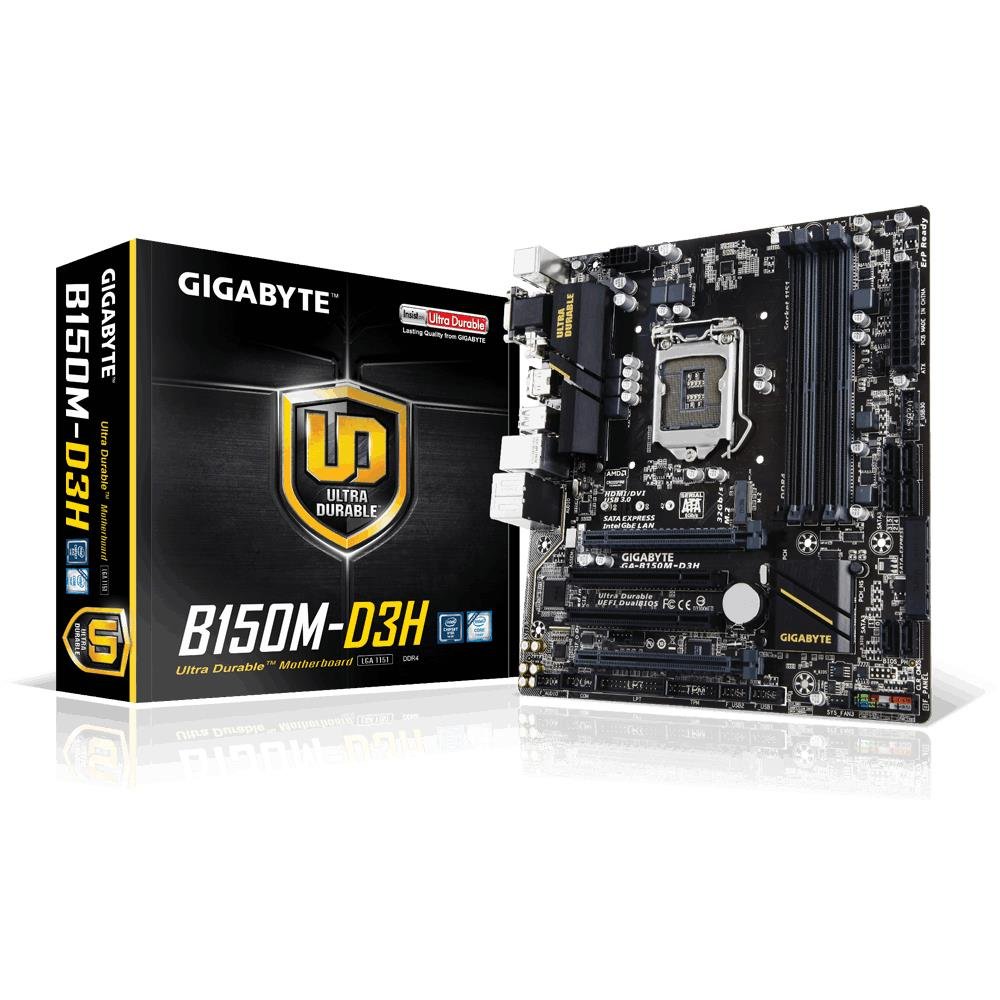
Image 1.1: GIGABYTE GA-B150M-D3H Micro ATX Motherboard. This image displays the overall layout of the motherboard, highlighting its compact Micro ATX form factor and various component slots.
2. Аюулгүй байдлын мэдээлэл
Observe the following safety precautions to prevent damage to the motherboard and injury to yourself:
- Аливаа эд ангид хүрэхээсээ өмнө цахилгааны утсыг ханын залгуураас салга.
- Статик цахилгааныг гадагшлуулахын тулд антистатик бугуйн оосор зүүх эсвэл газардуулсан металл зүйлд ойр ойрхон хүрч байх.
- Эмзэг бүрэлдэхүүн хэсгүүдэд хүрэхээс зайлсхийхийн тулд эх хавтанг ирмэгээр нь барь.
- Эх хавтанг чийг, хэт температураас хол байлга.
- Хэт халалтаас урьдчилан сэргийлэхийн тулд компьютерийн гэрийг сайн агааржуулах хэрэгтэй.
3. Багцын агуулга
Эх хавтангийн багцад бүх зүйл байгаа эсэхийг шалгана уу:
- GIGABYTE GA-B150M-D3H Motherboard
- Хэрэглэгчийн гарын авлага
- I / O Shield
- SATA кабель
- Driver CD/DVD
Note: Contents may vary slightly depending on region or revision.
4. Эх хавтангийн зохион байгуулалт
Familiarize yourself with the various components and connectors on the GA-B150M-D3H motherboard.
Image 4.1: GIGABYTE GA-B150M-D3H Motherboard Layout. This image provides a visual reference for the location of key components such as the CPU socket, DIMM slots, PCIe slots, SATA ports, and M.2 connector.
Гол бүрэлдэхүүн хэсгүүд:
- LGA 1151 CPU залгуур: For 6th Generation Intel Core Processors.
- DDR4 DIMM Slots (4): Supports Dual Channel DDR4 memory up to 2133 MHz.
- PCIe үүрүүд: Includes PCIe Gen3 x16 for graphics cards and PCIe x1 slots for expansion.
- M.2 Connector: Supports PCIe NVMe & SATA SSDs with up to 32Gb/s data transfer.
- SATA Express Connector: For up to 16Gb/s data transfer.
- SATA 6Gb/s портууд: For connecting traditional SATA storage devices.
- 24 зүүтэй ATX цахилгаан холбогч: Үндсэн цахилгаан оролт.
- 8-Pin ATX 12V Power Connector: CPU power input.
- Урд самбарын толгой: For power button, reset button, LED indicators, and USB ports.
- Аудио холбогч: 8-channel HD Audio with high quality capacitors and Audio Noise Guard.
5. Тохиргоо ба суурилуулалт
Эх хавтан болон бүрэлдэхүүн хэсгүүдээ зөв суулгахын тулд эдгээр алхмуудыг дагана уу.
5.1. CPU суулгаж байна
- LGA 1151 CPU залгуурыг олоорой.
- CPU залгуурын хөшүүргийг нээж, ачааллын хавтанг өргө.
- Carefully align the CPU with the socket, ensuring the gold triangle on the CPU matches the triangle on the socket. Do not force the CPU into the socket.
- Ачааны хавтанг буулгаж, хөшүүргээр бэхлэнэ.
5.2. Installing the CPU Cooler
Refer to your CPU cooler's instruction manual for specific installation steps. Ensure thermal paste is applied correctly between the CPU and cooler base.
5.3. Санах ой (RAM) суулгаж байна
- DDR4 DIMM үүрний хоёр төгсгөлд байгаа хавчааруудыг нээнэ үү.
- Санах ойн модулийг үүртэй зэрэгцүүлж, модуль дээрх ховил нь үүрэнд байгаа түлхүүртэй тохирч байгаа эсэхийг шалгаарай.
- Санах ойн модулийн хоёр үзүүрийг хавчааруудыг байрандаа орох хүртэл чанга дарна уу.
- For dual-channel performance, install memory modules in matching colored slots (e.g., DIMM1 and DIMM2).
5.4. Өргөтгөх картуудыг суулгаж байна
- Remove the metal bracket from the desired PCIe slot on your computer case.
- Өргөтгөх картыг PCIe үүртэй зэрэгцүүлж, зөв суулгах хүртэл чанга дарна уу.
- Secure the card with a screw to the computer case.
5.5. Хадгалах төхөөрөмжүүдийг холбох
- SATA төхөөрөмжүүд: Connect one end of the SATA data cable to a SATA 6Gb/s port on the motherboard and the other end to your hard drive or SSD. Connect the SATA power cable from your power supply to the device.
- M.2 SSD: Insert the M.2 SSD into the M.2 slot at an angle, then gently push it down and secure it with the provided screw.
- SATA Express: If using a SATA Express device, connect it to the designated SATA Express connector.
5.6. Урд талын самбарын холбогчийг холбох
Connect the cables from your computer case's front panel (power button, reset button, HDD LED, power LED, front USB, front audio) to the corresponding headers on the motherboard. Refer to the motherboard layout diagram for exact locations and pin assignments.
5.7. Цахилгаан хангамжийг холбох
- Connect the 24-pin ATX main power connector from your power supply to the 24-pin power socket on the motherboard.
- Connect the 8-pin ATX 12V CPU power connector to the 8-pin socket near the CPU.
- Ensure all power connections are secure.
6. Ашиглалтын заавар
6.1. Эхний ачаалах
After assembling all components, connect your monitor, keyboard, and mouse. Power on the system. The system should display the GIGABYTE splash screen and then enter the BIOS/UEFI setup or attempt to boot from a connected storage device.
6.2. BIOS/UEFI тохиргоо
BIOS/UEFI тохиргоонд орохын тулд товчийг дарна уу ДЭЛ key repeatedly during the boot process when the GIGABYTE logo appears. Here you can configure system settings, boot order, and monitor hardware status. The GA-B150M-D3H features GIGABYTE UEFI Dual BIOS for enhanced reliability.
6.3. Драйвер суулгах
After installing your operating system, install the necessary drivers for the motherboard components. These can be found on the included driver CD/DVD or downloaded from the official GIGABYTE website. Key drivers include chipset, audio (Realtek ALC892 codec), LAN, and any integrated graphics drivers.
6.4. Үйлдлийн систем суурилуулах
Insert your operating system installation media (USB drive or DVD) and configure the boot order in the BIOS/UEFI to boot from it. Follow the on-screen instructions to install your preferred operating system (e.g., Windows 8.1, Windows 10).
7. Засвар үйлчилгээ
7.1. Цэвэрлэгээ
Regularly clean the interior of your computer case to prevent dust buildup, which can lead to overheating. Use compressed air to remove dust from fans, heatsinks, and motherboard components. Ensure the system is powered off and unplugged before cleaning.
7.2. BIOS-ийн шинэчлэлтүүд
GIGABYTE periodically releases BIOS updates to improve system stability, compatibility, and performance. Visit the official GIGABYTE website for your motherboard model (GA-B150M-D3H) to check for the latest BIOS version and follow the provided instructions for updating. Exercise caution during BIOS updates, as an interruption can render the motherboard inoperable.
8. Алдаа засах
Энэ хэсэгт танд тулгарч болох нийтлэг асуудлуудыг авч үзэх болно.
8.1. No Power / System Does Not Turn On
- Цахилгаан хангамж эх хавтанд зөв холбогдсон эсэхийг шалгана уу (24 зүү ба 8 зүү холбогч).
- Цахилгаан хангамжийн унтраалга ON байрлалд байгаа эсэхийг шалгаарай.
- Урд талын самбарын цахилгаан товчлуурын кабель эх хавтангийн толгой хэсэгт зөв холбогдсон эсэхийг шалгана уу.
- Цахилгаан хангамжийг өөр систем эсвэл цахилгаан хангамжийн шалгагчаар шалгана уу.
8.2. Дэлгэцийн гаралт байхгүй
- Ensure the monitor is connected to the correct graphics output (either integrated graphics on the motherboard or a dedicated graphics card).
- График карт болон санах ойн модулиудыг дахин суулгана уу.
- Try booting with only one memory module installed.
- Дэлгэц асаалттай байгаа эсэхийг шалгаад зөв оролтын эх үүсвэрт тохируулна уу.
8.3. Системийн тогтворгүй байдал / гацалт
- Аюулгүй ажиллагааны хязгаарт байгаа эсэхийг шалгахын тулд CPU болон GPU температурыг шалгана уу.
- Verify that all drivers are installed and up to date.
- Санах ойн оношилгооны хэрэгслүүдийг ажиллуулж, алдаатай RAM-г шалгана уу.
- Ensure the power supply provides sufficient and stable power to all components.
9. Техникийн үзүүлэлтүүд
Detailed technical specifications for the GIGABYTE GA-B150M-D3H motherboard:
| Онцлог | Тодорхойлолт |
|---|---|
| Загварын нэр | GA-B150M-D3H |
| Form Factor | Micro ATX (24.4см x 22.5см) |
| CPU залгуур | LGA 1151 |
| Тохиромжтой процессорууд | 6th Generation Intel Core Processors |
| Чипсет | Intel B150 Express чипсет |
| Санах ойн технологи | DDR4 |
| Санах ойн оролт | 4 x DDR4 DIMM sockets (Dual Channel) |
| Хамгийн их санах ойн багтаамж | 16 ГБ |
| Санах ойн цагийн хурд | 2133 МГц |
| PCIe Slots | 1 x PCI Express x16, 1 x Total PCIe Ports |
| Хадгалах интерфэйсүүд | PCIe Gen3 x4 M.2, SATA Express, SATA 6Gb/s |
| Аудио кодлогч | Realtek ALC892 кодек, 8 сувагтай HD аудио |
| USB портууд | Нийт 8 USB порт (USB 2.0-г оруулаад) |
| Үндсэн цахилгаан холбогч | 24-Pin ATX |
| CPU цахилгаан холбогч | 8-Pin ATX 12V |
| Өвөрмөц онцлог | GIGABYTE UEFI Dual BIOS, Audio Noise Guard with LED Trace Path Lighting, App Center (Easy Tune, Cloud Station) |
10. Баталгаат хугацаа ба дэмжлэг
For warranty information, please refer to the warranty card included in your product package or visit the official GIGABYTE webсайт. Баталгаат нөхцөл, нөхцөл бүс нутгаас хамаарч өөр өөр байж болно.
For technical support, driver downloads, BIOS updates, and further product information, please visit the GIGABYTE official support webсайт:
https://www.gigabyte.com/Support
When contacting support, please have your motherboard model (GA-B150M-D3H) and serial number ready.