
1. Танилцуулга
This manual provides detailed instructions for the installation, operation, and maintenance of your Phanteks Eclipse P500 Air Mid Tower Computer Case. Please read this manual thoroughly before beginning assembly or use to ensure proper functionality and safety.
The Phanteks Eclipse P500 Air is a mid-tower chassis designed for high airflow performance and versatile component support, including ATX, Micro ATX, Mini ITX, and E-ATX motherboards. It features a steel chassis with a tempered glass side panel and comes with three pre-installed 140mm D-RGB fans in the front.

Зураг 1: Урд view of the Phanteks Eclipse P500 Air Mid Tower Computer Case.
2. Тохиргоо ба суурилуулалт
Follow these steps to install your computer components into the Phanteks Eclipse P500 Air chassis.
2.1 Сав баглаа боодол, анхны үзлэг
- Явах эд ангийг савлагаанаас нь болгоомжтой салга.
- Inspect the chassis for any signs of damage during transit.
- Ensure all accessories (screws, cable ties, manual) are present.

Зураг 2: Тэсэрсэн view showing removable panels and components for assembly.
2.2 Removing Side Panels
The tempered glass side panel is hinged and secured with magnets. Gently pull the panel open to access the interior. The solid side panel can be removed by unscrewing the thumbscrews at the rear and sliding it off.
2.3 Эх хавтангийн суурилуулалт
- Install the necessary motherboard standoffs for your motherboard form factor (ATX, Micro ATX, Mini ITX, E-ATX).
- Эх хавтангаа тулгуур дээр болгоомжтой байрлуулж, боолтоор бэхлээрэй.

Зураг 3: Дотоод засал view of the chassis, illustrating motherboard mounting area and fan locations.
2.4 Хадгалах хөтч суурилуулах
The case supports up to 10 x 3.5" internal bays and 3 x 2.5" internal bays.
- 3.5 инчийн хөтчүүд: Utilize the drive cages located in the PSU shroud area or behind the motherboard tray.
- 2.5 инчийн хөтчүүд: Mount 2.5" SSDs/HDDs to the dedicated brackets behind the motherboard tray.

Зураг 4: Арын дотоод засал view, highlighting cable management channels and 2.5" drive mounts.
2.5 Цахилгаан хангамжийн суурилуулалт
Install your ATX power supply into the dedicated compartment at the bottom rear of the chassis. Secure it with screws from the rear.
2.6 График карт болон өргөтгөлийн картын суулгалт
- Remove the necessary PCI slot covers from the rear of the chassis.
- Insert your graphics card or other expansion cards into the motherboard's PCIe slots and secure them with screws.
- The case supports 7+3 PCI slots, allowing for vertical GPU mounting with an optional riser cable (not included).

Figure 5: Rear exterior view, detailing the PCI expansion slots and rear fan mount.
2.7 Кабелийн менежмент
Utilize the integrated Velcro straps and cable ties provided to route and secure cables behind the motherboard tray. This improves airflow and aesthetics.
3. Үйл ажиллагаа
The Phanteks Eclipse P500 Air features convenient front I/O ports and integrated D-RGB lighting controls.
3.1 Урд талын оролт гаралтын самбар
The top front panel provides access to essential controls and ports:
- Цахилгаан товч: Системийг асаах эсвэл унтраахын тулд.
- LED горимын товчлуур: Cycles through various D-RGB lighting effects.
- LED Color Button: Changes the color of the D-RGB lighting.
- 2 x USB 3.0 порт: USB 3.0 төхөөрөмжүүдийг холбох зориулалттай.
- Микрофоны Жак: Аудио оролтын хувьд.
- Чихэвчний Жак: Аудио гаралтын хувьд.

Figure 6: Close-up of the top front I/O panel, showing USB ports, audio jacks, and LED controls.
3.2 D-RGB Lighting Control
The three pre-installed 140mm D-RGB fans are controlled via the integrated D-RGB controller. Use the LED Mode and LED Color buttons on the front I/O panel to customize the lighting. The D-RGB lighting can also be optionally synchronized with compatible motherboards and software.
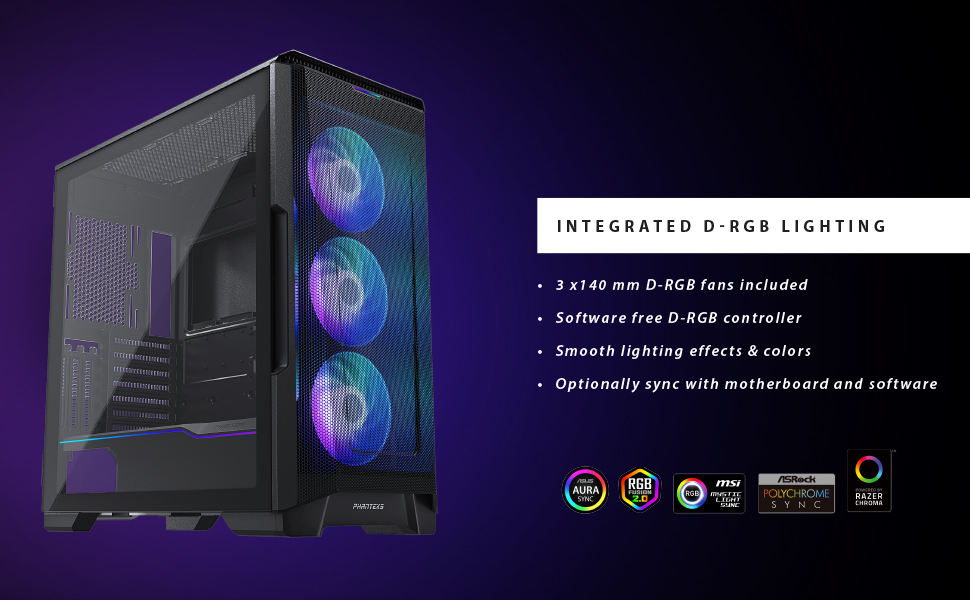
Figure 7: Illustration of the integrated D-RGB lighting effects on the front fans.
4. Засвар үйлчилгээ
Тогтмол засвар үйлчилгээ нь таны компьютерын хамгийн сайн ажиллагаатай, удаан эдэлгээтэй байдлыг хангахад тусална.
4.1 Тоосны шүүлтүүр цэвэрлэх
The Eclipse P500 Air features integrated dust filters on the front, top, and bottom (PSU intake) to prevent dust buildup. Regularly clean these filters to maintain optimal airflow.
- Урд шүүлтүүр: The front mesh panel acts as a dust filter. It can be removed for cleaning.
- Дээд шүүлтүүр: The magnetic top filter can be easily lifted off for cleaning.
- Доод шүүлтүүр: The PSU intake filter slides out from the rear for cleaning.
Use compressed air or a soft brush to remove accumulated dust. Do not use harsh chemicals or abrasive materials.
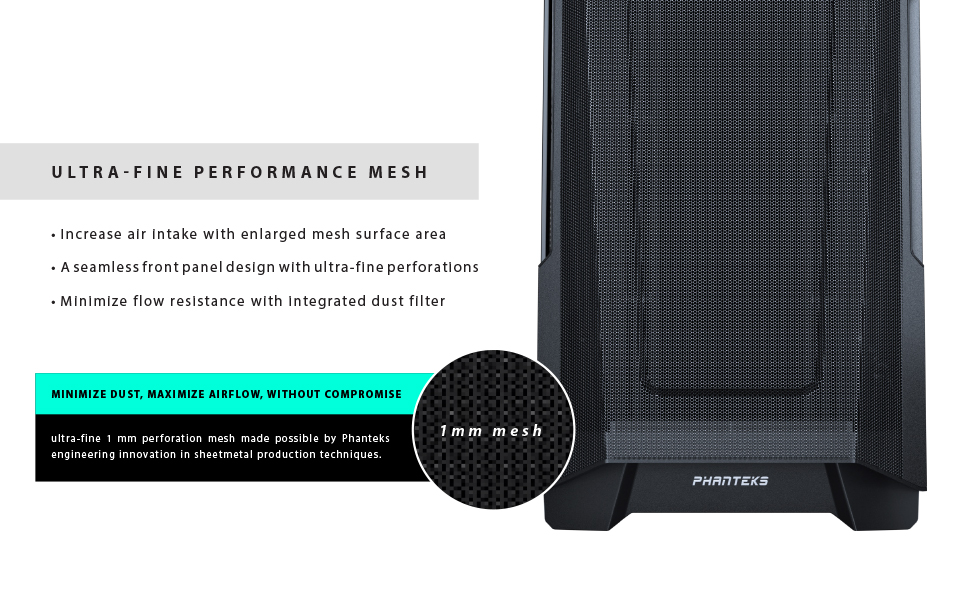
Figure 8: Detail of the ultra-fine mesh front panel, designed for dust filtration and airflow.
4.2 Ерөнхий цэвэрлэгээ
Хэргийн гадна талын гадаргууг зөөлөн, damp cloth. Avoid direct contact with electronic components inside the case.
5. Алдаа засах
This section addresses common issues you might encounter during the setup or operation of your Phanteks Eclipse P500 Air case.
- Систем асахгүй байна:
- Ensure the power supply is properly connected to the wall outlet and switched on.
- Эх хавтангийн урд самбарын толгой хэсэгт цахилгаан шилжүүлэгчийн кабель зөв холбогдсон эсэхийг шалгана уу.
- Check all internal power connections (24-pin ATX, 8-pin CPU, PCIe power for GPU).
- D-RGB Fans Not Lighting Up:
- Confirm that the D-RGB cables from the fans are correctly connected to the integrated D-RGB controller or your motherboard's D-RGB header.
- Press the LED Mode and LED Color buttons on the front I/O panel to cycle through effects and colors.
- Хэрэв эх хавтантай холбогдсон бол эх хавтангийн RGB програм хангамжийг зөв суулгаж, тохируулсан эсэхийг шалгаарай.
- Агаарын урсгал муу/Өндөр температур:
- Бүх тоосны шүүлтүүрийг (урд, дээд, доод) цэвэрлэ.
- Ensure fans are oriented correctly for optimal airflow (front intake, rear/top exhaust).
- Verify that no cables are obstructing airflow inside the case.
- Front USB Ports Not Functioning:
- Check that the USB 3.0 header cable from the case is securely connected to the corresponding header on your motherboard.
6. Техникийн үзүүлэлтүүд
Below are the detailed specifications for the Phanteks Eclipse P500 Air Mid Tower Computer Case (PH-EC500ATG_DWT01).
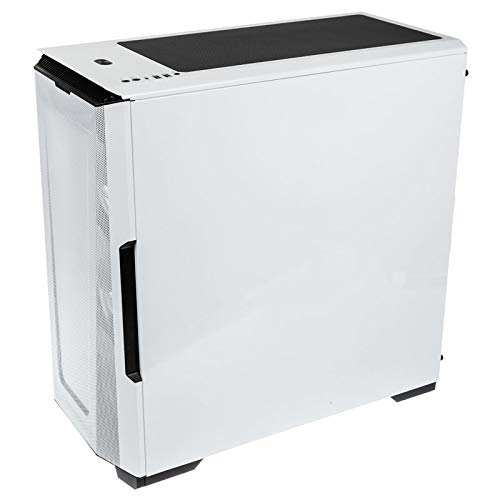
Figure 9: Manufacturer's specification table for the Eclipse P500 Air.
| Онцлог | Дэлгэрэнгүй |
|---|---|
| Загварын дугаар | PH-EC500ATG_DWT01 |
| Form Factor | Дунд цамхаг |
| Хэмжээ (LxWxH) | 240 x 510 x 505 мм (9.45 x 20.1 x 19.9 инч) |
| Материал | Steel Chassis, Tempered Glass |
| Эх хавтангийн дэмжлэг | E-ATX (up to 280mm wide), ATX, Micro ATX, Mini ITX, Mini ITX |
| Урд талын I/O | 2 x USB 3.0, Microphone, Headphone, Power Button, LED Mode Button, LED Color Button |
| Internal 3.5" Bay | 10 (2x included, also supports 2.5" drives) |
| Internal 2.5" Bay | 3 (3x included) |
| PCI үүр | 7 + 3 (vertical) |
| Урьдчилан суулгасан фенүүд | 3 x 140mm D-RGB fans (Front) |
| Сэнсний тулгуур (урд) | 3 х 120 мм эсвэл 3 х 140 мм |
| Сэнсний тулгуур (Дээд талд) | 3 х 120 мм эсвэл 2 х 140 мм |
| Сэнсний тулгуур (Арын) | 1 х 120 мм эсвэл 1 х 140 мм |
| Радиаторын тулгуур (урд) | Up to 360mm or 420mm |
| Радиаторын дэмжлэг (дээд) | Up to 360mm or 280mm |
| Радиаторын тулгуур (Арын) | 120мм эсвэл 140мм |
| GPU цэвэрлэгээ | 435 мм / 17.2 инч |
| CPU хөргөгчийн өндөр | 190 мм / 7.5 инч |
| PSU урт | 195 mm (250 mm if 2 HDD brackets are removed) |
| Цэвэр жин | 8 кг / 17.6 фунт |
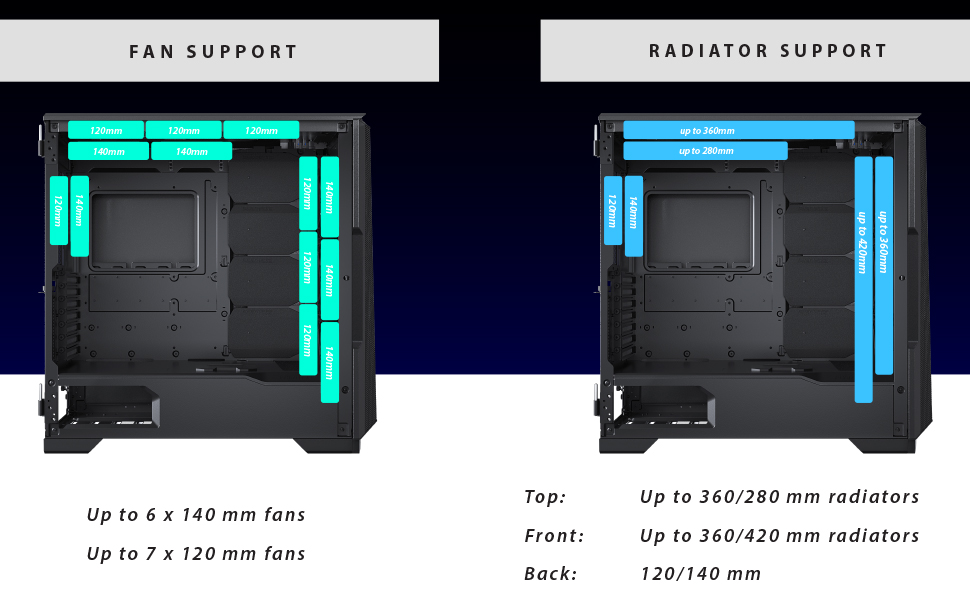
Figure 10: Visual representation of fan and radiator mounting options within the chassis.
7. Баталгаат хугацаа ба дэмжлэг
Phanteks provides a manufacturer's warranty for this product.
- Баталгаат хугацаа: 5 Years Manufacturer Warranty.
- For warranty claims or technical support, please contact Phanteks customer service or visit their official webсайт.
- Баталгаат хугацааг баталгаажуулахын тулд худалдан авалтын баримтаа хадгална уу.
For further assistance, refer to the official Phanteks webсайт эсвэл тэдний тусламжийн сувгаар холбогдоно уу.