
1. Танилцуулга
The FLYDIGI Vader 2 Pro is a versatile wireless game controller designed for an enhanced gaming experience across multiple platforms. This manual provides essential instructions for setting up, operating, and maintaining your controller.
The controller is compatible with Nintendo Switch, iOS, PC, and Android devices, offering a seamless transition between your preferred gaming systems.
2. Бүтээгдэхүүн дууссанview
The Vader 2 Pro controller integrates advanced features to optimize gameplay. Key components include dual vibration motors, a 6-axis gyroscope for motion sensing, and customizable RGB lighting.

Зураг 2.1: Урд view of the FLYDIGI Vader 2 Pro Game Controller, showcasing түүний эргономик дизайн, товчлуурын зохион байгуулалт.
Гол онцлогууд:
- Олон платформын нийцтэй байдал: Supports Nintendo Switch, iOS, PC, and Android.
- Хос чичиргээт мотор: Provides immersive haptic feedback with 3 adjustable levels.
- 6 тэнхлэгийн гироскоп: Enables precise motion sensing for compatible games.
- Тохируулах боломжтой RGB гэрэлтүүлэг: Personalize the controller's aesthetic with millions of color options.
- Configurable Buttons: Four additional M1-M4 buttons on the rear for personalized controls.
- Олон холболтын горим: Bluetooth, 2.4GHz wireless (with dongle), and wired USB connection.

Image 2.2: The Vader 2 Pro controller shown with various compatible devices including a Nintendo Switch, PC laptop, iOS phone, and Android phone, illustrating its multi-platform support.

Image 2.3: The controller highlighting its built-in 6-axis gyro sensor for motion control.
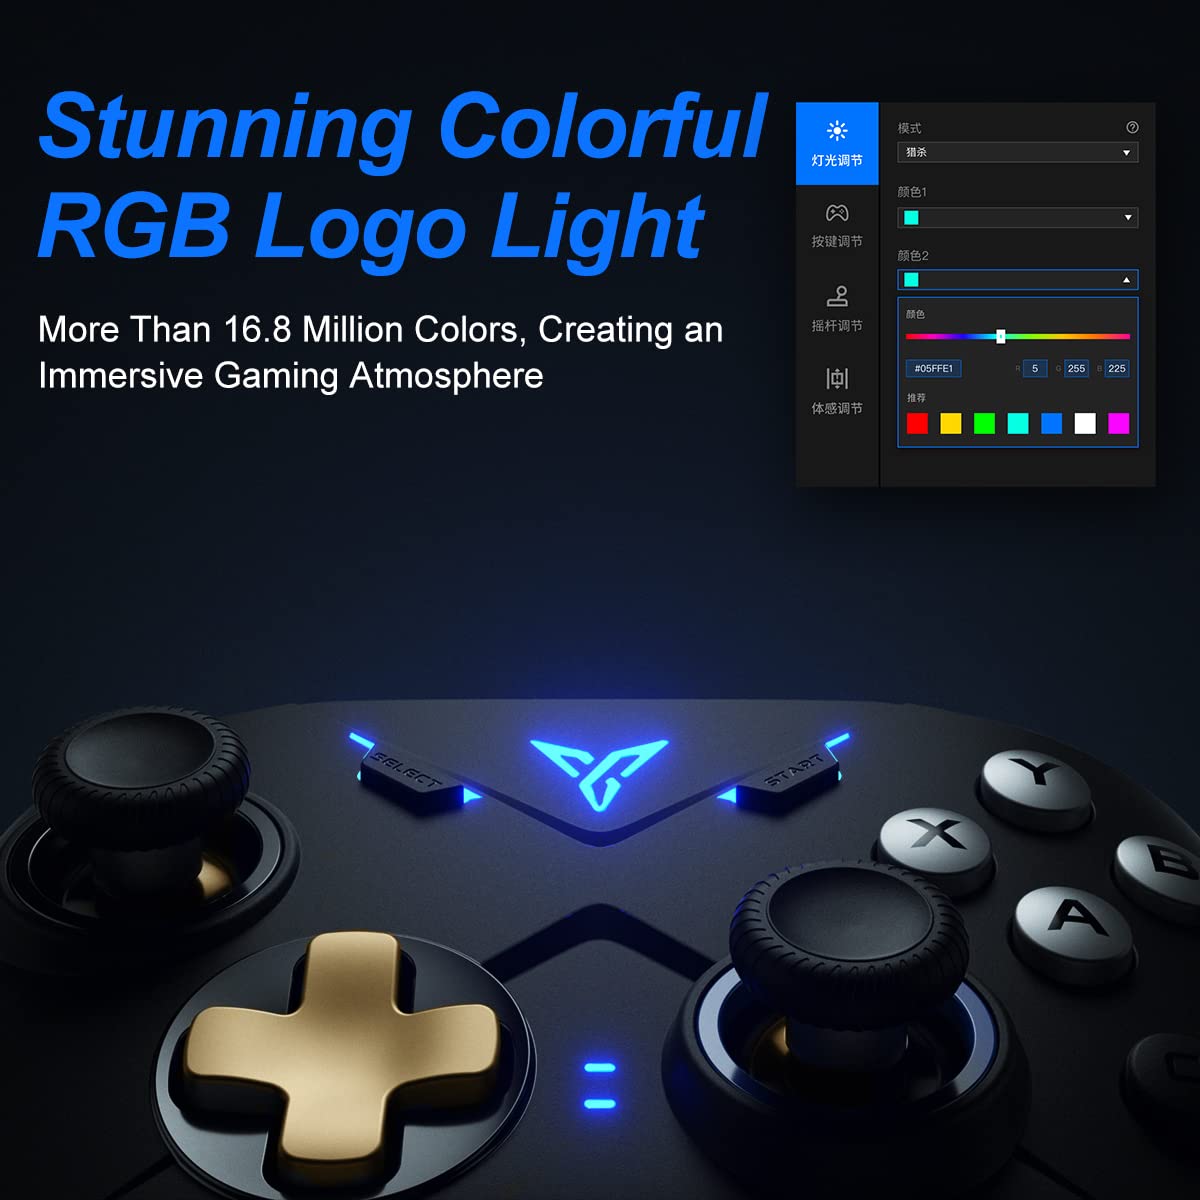
Image 2.4: Close-up of the controller's RGB logo light, demonstrating its customizable color options.

Зураг 2.5: Ар талд view of the controller, showing the M1-M4 configurable buttons for personalized gameplay.

Image 2.6: Illustration of the controller's asymmetric dual motor design, indicating vibration feedback.
3. Тохиргоо ба холболт
The Vader 2 Pro controller offers multiple connection methods depending on your gaming platform. Refer to the table below for specific instructions.

Image 3.1: A table detailing connection instructions for Phone/Tablet, PC/Mac, and Nintendo Switch.
Холболтын заавар:
| Заавар | Connect to Phone/Tablet | Connect to PC/Mac | Switch-д холбогдоно уу |
|---|---|---|---|
| Шилжүүлэх арга | Press "+" and "B" buttons simultaneously for 3 seconds. | Press "+" and "A" buttons simultaneously for 3 seconds. | Press "+" and "X" buttons simultaneously for 3 seconds. |
| Холболтын арга | Bluetooth холболт | 2.4GHz connector connection or USB wired connection | Bluetooth холболт |
| Дэмжих горим | Bluetooth горим | 360 mode, Android mode (Press "+" and "SELECT" to switch) | Солих горим |
| Заагч гэрлийн төлөв | No. 1 Indicator light on blue | No. 1 Indicator light on white (No. 2 red for Android mode) | No. 1 Indicator light on orange |
Additional Connection Notes:
- For PC/Mac, a 2.4GHz USB dongle is included for wireless connection. A USB-C to A cable is also provided for wired play.
- Ensure your device's Bluetooth is enabled when connecting wirelessly to phones, tablets, or Nintendo Switch.
- For iOS devices running iOS 13.4 or higher, follow the specific pairing instructions: Press and hold '+' and 'C' until the first light blinks orange and the second light stays red. Then, long press '+' for more than 3 seconds until the first light flashes orange. Go to your iOS Bluetooth settings and select the device to connect.

Image 3.2: The included USB wireless dongle and USB-C charging/data cable.
4. Ашиглалтын заавар
4.1. Button Mapping and Customization
The FLYDIGI Vader 2 Pro controller supports extensive customization through the dedicated FLYDIGI PC Space Station software. This software allows you to:
- Remap buttons, including the M1-M4 rear buttons.
- Adjust joystick curves for precision control.
- Fine-tune motion sensing sensitivity.
- Program macro combos for complex actions.
- Change RGB light settings and effects.
Up to 4 sets of custom configurations can be saved directly on the controller. Download the software from the official FLYDIGI webсайт: flydigi.com/index/down?nav_id=2
4.2. Motion Sensing
The integrated 6-axis gyroscope provides accurate motion control in games that support this feature, enhancing your interactive experience.
4.3. Чичиргээний хариу үйлдэл
The asymmetric dual vibration motors offer tactile feedback. You can adjust the vibration intensity to one of three levels to suit your preference.
4.4. RGB гэрэлтүүлэг
The controller features a customizable RGB logo light, offering over 16.8 million colors. Use the FLYDIGI PC Space Station software to select your preferred lighting modes and colors.
5. Цэнэглэх ба зайны ашиглалтын хугацаа
The Vader 2 Pro controller is equipped with a rechargeable battery designed to provide up to 80 hours of gameplay on a single charge. To charge the controller, connect it to a USB power source using the provided USB-C cable.

Image 5.1: The controller positioned above a charging indicator, symbolizing its rechargeable battery.
Жич: Actual battery life may vary based on usage patterns, vibration intensity, and RGB lighting settings.
6. Алдаа засах
If you encounter issues with your FLYDIGI Vader 2 Pro controller, refer to the following common solutions:
- Хянагч холбогдоогүй байна:
- Ensure the controller is in the correct switching mode for your platform (Phone/Tablet, PC/Mac, Switch) as per Section 3.
- Verify that Bluetooth is enabled on your device or that the 2.4GHz dongle is properly inserted into your PC/Mac.
- Хянагч болон төхөөрөмжөө хоёуланг нь дахин эхлүүлээд үзээрэй.
- For PC connections, if Bluetooth fails, try using the 2.4GHz dongle or a wired USB connection.
- Buttons Not Responding/Mapping Issues:
- Ensure the FLYDIGI PC Space Station software is correctly installed and updated.
- Check your custom profiles within the software to ensure buttons are mapped as intended.
- Reset the controller to factory settings if custom mappings are causing issues (refer to software documentation for this process).
- Батерейны богино хугацаа:
- Ашиглахаасаа өмнө хянагч бүрэн цэнэглэгдсэн эсэхийг шалгаарай.
- Reduce vibration intensity or RGB lighting brightness/effects to conserve battery power.
- Хэрэв батерейны ашиглалтын хугацаа цаг хугацааны явцад мэдэгдэхүйц буурвал хэрэглэгчийн дэмжлэгтэй холбогдоно уу.
- Unstable Wireless Connection:
- Ensure there are no significant obstructions or sources of interference between the controller and your device/dongle.
- Keep the controller within the recommended operating range.
- Update controller firmware via the FLYDIGI PC Space Station software.
7. Техникийн үзүүлэлтүүд
| Онцлог | Дэлгэрэнгүй |
|---|---|
| Загварын дугаар | VADER2PRO |
| ASIN | B09LCYB48V |
| Бүтээгдэхүүний хэмжээс | 3.5 x 7.59 x 5.5 инч |
| Зүйлийн жин | 15.84 унц |
| Холболт | Bluetooth, 2.4GHz утасгүй, USB утастай |
| Тохиромжтой байдал | Nintendo Switch, iOS, PC, Android |
| Онцлог шинж чанарууд | Dual Vibration Motors, 6-Axis Gyroscope, RGB Lighting, Configurable M1-M4 Buttons |
| Зайны ашиглалт | 80 цаг хүртэл (ойролцоогоор) |
| Эхний боломжтой огноо | 21 оны арванхоёрдугаар сарын 2021 |
8. Засвар үйлчилгээ
To ensure the longevity and optimal performance of your FLYDIGI Vader 2 Pro controller, follow these maintenance guidelines:
- Цэвэрлэгээ: Удирдагчийг цэвэрлэхийн тулд зөөлөн, хуурай даавуу ашиглана уу. Химийн хатуу бодис, зүлгүүрийн материал ашиглахаас зайлсхий.
- Хадгалах: Удирдагчийг нарны шууд тусгал, хэт температураас хол, сэрүүн, хуурай газар хадгална.
- Харьцуулах: Дотоод эд ангиудыг гэмтээж болзошгүй тул хянагчийг унагаах эсвэл хүчтэй цохилтод өртөхөөс зайлсхий.
- Цэнэглэж байна: Do not overcharge the battery. Disconnect the charging cable once the controller is fully charged.
9. Баталгаат хугацаа ба дэмжлэг
For warranty information, technical support, or further assistance, please visit the official FLYDIGI webсайт эсвэл харилцагчийн үйлчилгээтэй холбогдоно уу. Баталгаат зарга авахын тулд худалдан авалтын баримтаа хадгална уу.
Official FLYDIGI Webсайт: www.flydigi.com