
1. Танилцуулга
Худалдан авалт хийсэнд баярлалааasing the Klipsch Reference Premiere RP-1400SW 14-inch High Excursion Subwoofer. This subwoofer is designed to deliver powerful and accurate low-frequency sound, enhancing your home theater or music listening experience. This manual provides essential information for proper setup, operation, and care of your new subwoofer.

Figure 1.1: Klipsch Reference Premiere RP-1400SW Subwoofer (Grille Removed)
2. Аюулгүй байдлын чухал мэдээлэл
Please read all safety instructions before operating this product. Keep these instructions for future reference.
- Эрчим хүчний эх үүсвэр: Connect the subwoofer only to a power supply of the type described in the operating instructions or as marked on the appliance.
- Агааржуулалт: Зөв агааржуулалтыг хангах. Агааржуулалтын нүхийг хааж болохгүй. Үйлдвэрлэгчийн зааврын дагуу суурилуулна.
- Дулаан: Радиатор, халаалтын төхөөрөмж, зуух болон бусад төхөөрөмж (үүнд ampөргөгч) дулаан үүсгэдэг.
- Ус ба чийг: Энэ төхөөрөмжийг ус эсвэл чийгийн ойролцоо бүү ашигла.
- Цэвэрлэгээ: Зөвхөн хуурай даавуугаар цэвэрлэ.
- Үйлчилгээ: Бүх үйлчилгээг мэргэшсэн үйлчилгээний ажилтнуудад шилжүүлээрэй. Төхөөрөмж нь цахилгаан тэжээлийн утас, залгуур гэмтсэн, шингэн асгарсан, эд зүйл унасан, бороо, чийгэнд өртсөн, хэвийн ажиллахгүй байгаа тохиолдолд засвар үйлчилгээ хийх шаардлагатай. , эсвэл хасагдсан.
- Хүнд объект: This subwoofer is heavy (85 lbs). Exercise caution when moving to prevent injury.
3. Хайрцагт юу байна
Бүх бүрэлдэхүүн хэсгүүд байгаа эсэхийг шалгана уу:
- Klipsch Reference Premiere RP-1400SW Subwoofer
- Цахилгааны утас
- Хэрэглэх заавар (энэ баримт бичиг)
4. Тохиргоо
4.1 Сабвуфер байрлуулах
The Klipsch RP-1400SW features a front-firing driver and Aerofoil front slot port, allowing for flexible placement within your room. Experiment with different locations to find the optimal bass response for your listening environment. Generally, corner placement can enhance bass output, while placement along a wall can provide a more balanced sound. The shock-absorbing rubber feet help isolate the subwoofer from the floor.

Figure 4.1: Front-Firing Driver and Aerofoil Front Slot Port

Figure 4.2: Subwoofer Design Features (Rounded Corners, Shock-Absorbing Feet)
4.2 холболт
Your RP-1400SW subwoofer offers both wired and wireless connectivity options.

Figure 4.3: Subwoofer Rear Panel Connections and Controls
- Wired Connection (RCA/LFE):
Connect an RCA cable from the LFE output of your AV receiver to the LFE input on the subwoofer's rear panel. If your receiver does not have an LFE output, use a standard RCA stereo cable to connect the receiver's pre-out (subwoofer output) to both the left and right RCA inputs on the subwoofer.
- Wireless Connection (Optional WA-2 Kit):
For wireless operation, you can connect your subwoofer with a Klipsch WA-2 Wireless Subwoofer Kit (sold separately). This allows for flexible placement without the need for long RCA cables. Refer to the WA-2 kit's instructions for pairing and setup.

Figure 4.4: Wireless Connectivity with Optional WA-2 Kit
- Эрчим хүчний холболт:
Once audio connections are made, plug the supplied power cord into the subwoofer's power inlet and then into a suitable wall outlet.
5. Operating Your Subwoofer
5.1 хяналтview
The rear panel of your subwoofer features several controls to fine-tune its performance:

Figure 5.1: Easy-to-Use Controls on Rear Panel
- GAIN (Volume): Сабвуферын гаралтын түвшинг тохируулна. Бага тохиргооноос эхэлж, басс нь үндсэн чанга яригчтай төгс зохицох хүртэл аажмаар нэмэгдүүлнэ.
- LOW-PASS (Crossover): This control sets the upper frequency limit for the subwoofer. If using an AV receiver with LFE output, set this to LFE (or bypass if available on your receiver). If connecting via stereo RCA, adjust this to blend with your main speakers' low-frequency cutoff.
- ҮЕ ШАТ (0°/180°): Үндсэн чанга яригчтай харьцуулахад сабвуферын гаралтын фазыг тохируулна. Хамгийн нөлөө бүхий, уялдаа холбоотой басс өгдөг тохиргоог олохын тулд хоёр тохиргоог туршиж үзээрэй.
- POWER (ON/AUTO/OFF):
- АСААЛТ: Subwoofer remains continuously on.
- АВТО: Subwoofer automatically turns on when an audio signal is detected and enters a low-power standby mode after a period of inactivity.
- Унтрааж байна: Сабвуфер унтарсан байна.
The 1/2-watt standby mode in AUTO setting ensures exceptional efficiency and reduces energy costs.
5.2 Initial Power On and Adjustment
- Бүх холболт найдвартай эсэхийг шалгаарай.
- Set the GAIN control to its minimum position.
- Set the LOW-PASS control to LFE if using an AV receiver, or to a suitable frequency (e.g., 80Hz) if connecting via stereo RCA.
- Set the PHASE switch to 0°.
- Set the POWER switch to AUTO.
- Play some audio with significant bass content. Gradually increase the GAIN control until the subwoofer output blends with your main speakers.
- Experiment with the PHASE switch (0° vs. 180°) to determine which setting provides the most impactful and seamless bass response in your listening position.
For optimal performance, consider using your AV receiver's automatic room correction system (if available) after initial setup.
5.3 Product Video: Reference Premiere Subwoofers
Video 5.1: An official Klipsch video showcasing the features and design of the Reference Premiere Subwoofers, including the RP-1400SW. This video highlights advanced acoustics, balanced performance, front-firing Cerametallic woofers, high-efficiency Class D amplifier, front-firing slot port, detailed design, and easy-to-use controls.
6. Засвар үйлчилгээ
To ensure the longevity and optimal performance of your Klipsch RP-1400SW subwoofer, follow these simple maintenance guidelines:
- Цэвэрлэгээ: Dust the cabinet regularly with a dry, soft cloth. Avoid using abrasive cleaners, solvents, or strong detergents, as these can damage the ebony vinyl finish.
- Байршил: Avoid placing the subwoofer in direct sunlight or near heat sources, which can cause discoloration or damage to the cabinet.
- Агааржуулалт: Ар талд байгаа эсэхийг шалгаарай amplifier panel has adequate airflow. Do not block the heat sink.
- Сараалж: The durable woven cloth grille can be gently cleaned with a soft brush or vacuum cleaner attachment to remove dust.
7. Алдаа засах
If you experience issues with your subwoofer, consult the following table for common problems and solutions:
| Асуудал | Боломжит шалтгаан | Шийдэл |
|---|---|---|
| Сабвуферээс дуу гарахгүй байна |
|
|
| Сул эсвэл гажсан басс |
|
|
| Subwoofer hums or buzzes |
|
|
If the problem persists after trying these solutions, please contact Klipsch customer support.
8. Техникийн үзүүлэлтүүд
Key technical specifications for the Klipsch Reference Premiere RP-1400SW Subwoofer:
| Онцлог | Дэлгэрэнгүй |
|---|---|
| Загварын дугаар | RP-1400SW |
| Брэнд | Клипш |
| Чанга яригчийн төрөл | Сабвуфер |
| Woofer диаметр | 14 инч |
| Аудио драйверын төрөл | Dynamic Driver (Cerametallic) |
| Чанга яригчийн хамгийн их гаралтын чадал | 600 ватт |
| RMS цахилгаан | 500 ватт |
| Давтамжийн хариу үйлдэл | 20Hz - 1kHz (approximate, based on A+ content) |
| Холболтын технологи | Wired RCA, LFE, and WA-2 Wireless Port |
| Аудио гаралтын горим | Стерео, Хүрээлэн буй орчны дуу |
| Суурилуулах төрөл | Шал зогсож байна |
| Хаалтны материал | Мод |
| Өнгө | Хар мод |
| Эрчим хүчний эх үүсвэр | Утастай цахилгаан |
| Хэмжээ (D x W x H) | 25.67"D x 20"W x 21.34"H |
| Зүйлийн жин | 85 фунт |
| UPC | 743878047424 |
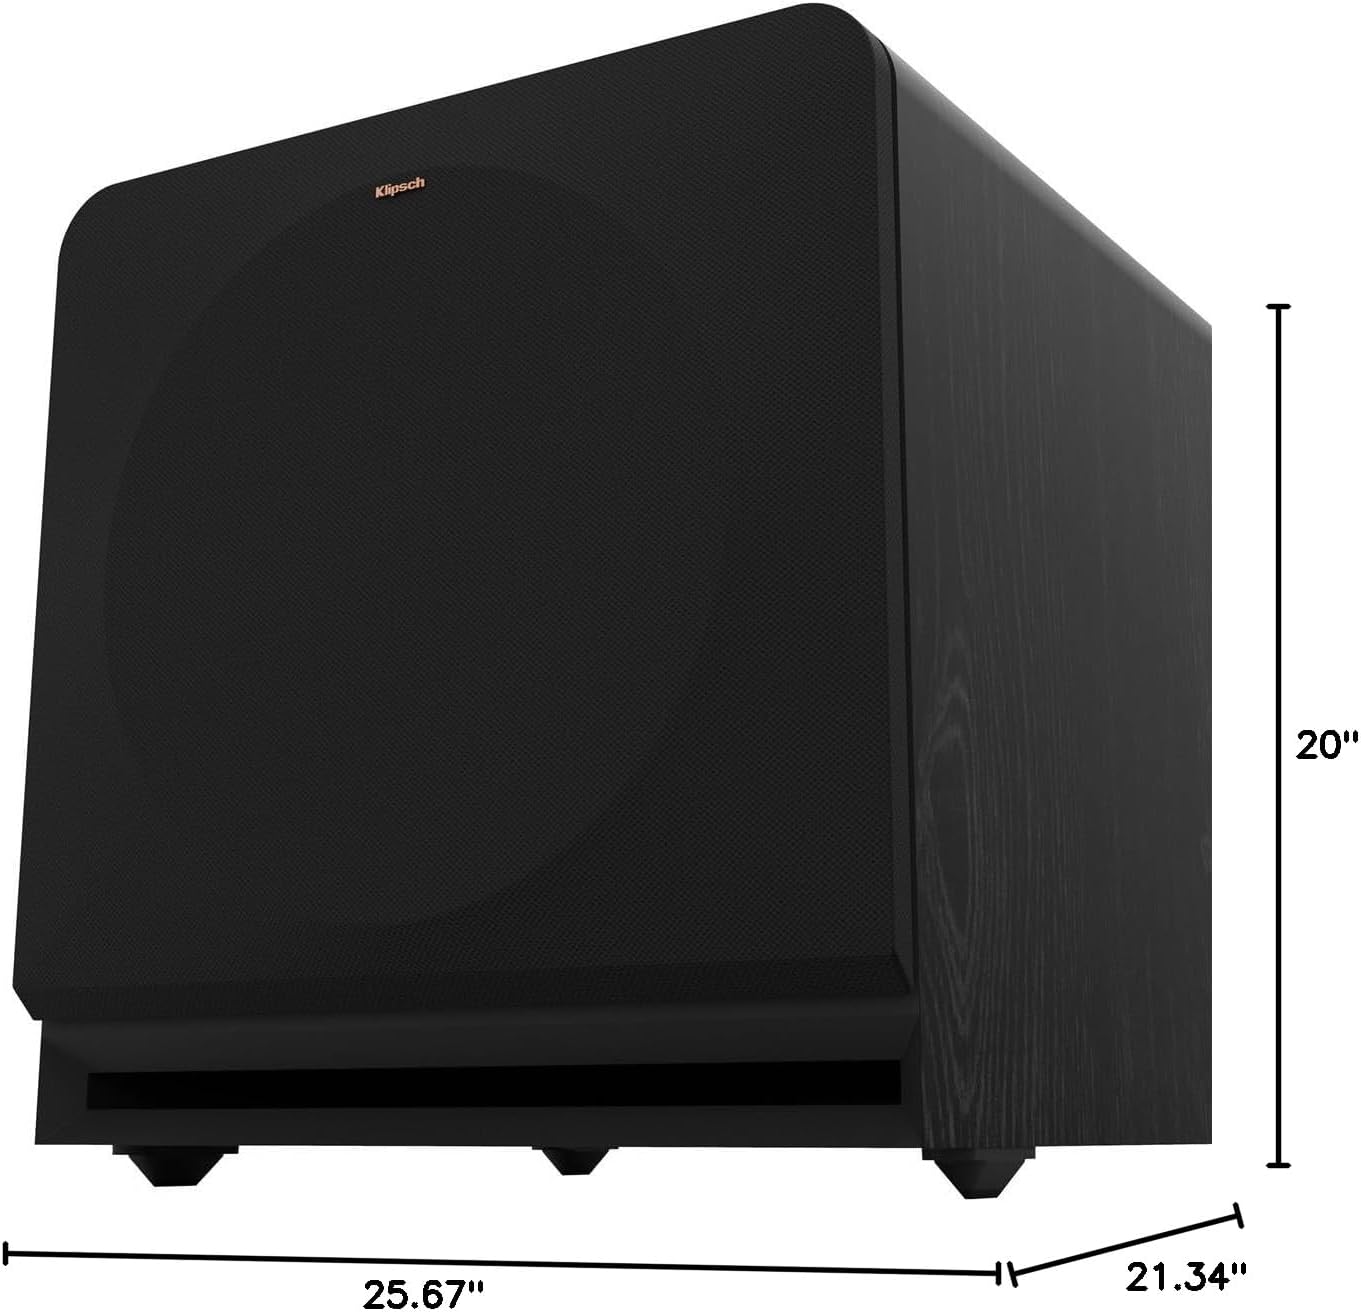
Figure 8.1: Subwoofer Dimensions
9. Баталгаат хугацаа ба дэмжлэг
9.1 Баталгаат хугацааны мэдээлэл
The Klipsch Reference Premiere RP-1400SW Subwoofer comes with a limited warranty:
- Электрон бараа: Хоёр (2) жил
- Woofer, Cabinet, and Non-Electrical Mechanics: Таван (5) жил
Please retain your proof of purchase for warranty claims. For full warranty terms and conditions, refer to the official Klipsch webсайт эсвэл хэрэглэгчийн дэмжлэгтэй холбоо барина уу.
9.2 Хэрэглэгчийн дэмжлэг
For further assistance, technical support, or warranty inquiries, please visit the official Klipsch website or contact their customer service department. Contact details can typically be found on the Klipsch web"Дэмжлэг" эсвэл "Бидэнтэй холбоо барих" хэсэгт байрлах сайт.