1. Танилцуулга
The DFROBOT UNIHIKER M10 is a versatile single-board computer designed for AI and IoT development. It features a 2.8-inch color LCD touchscreen, integrated WiFi and Bluetooth connectivity, and a rich set of expansion interfaces. This device supports Python and visual programming, making it accessible for a wide range of projects from data visualization to smart home automation and robotics.
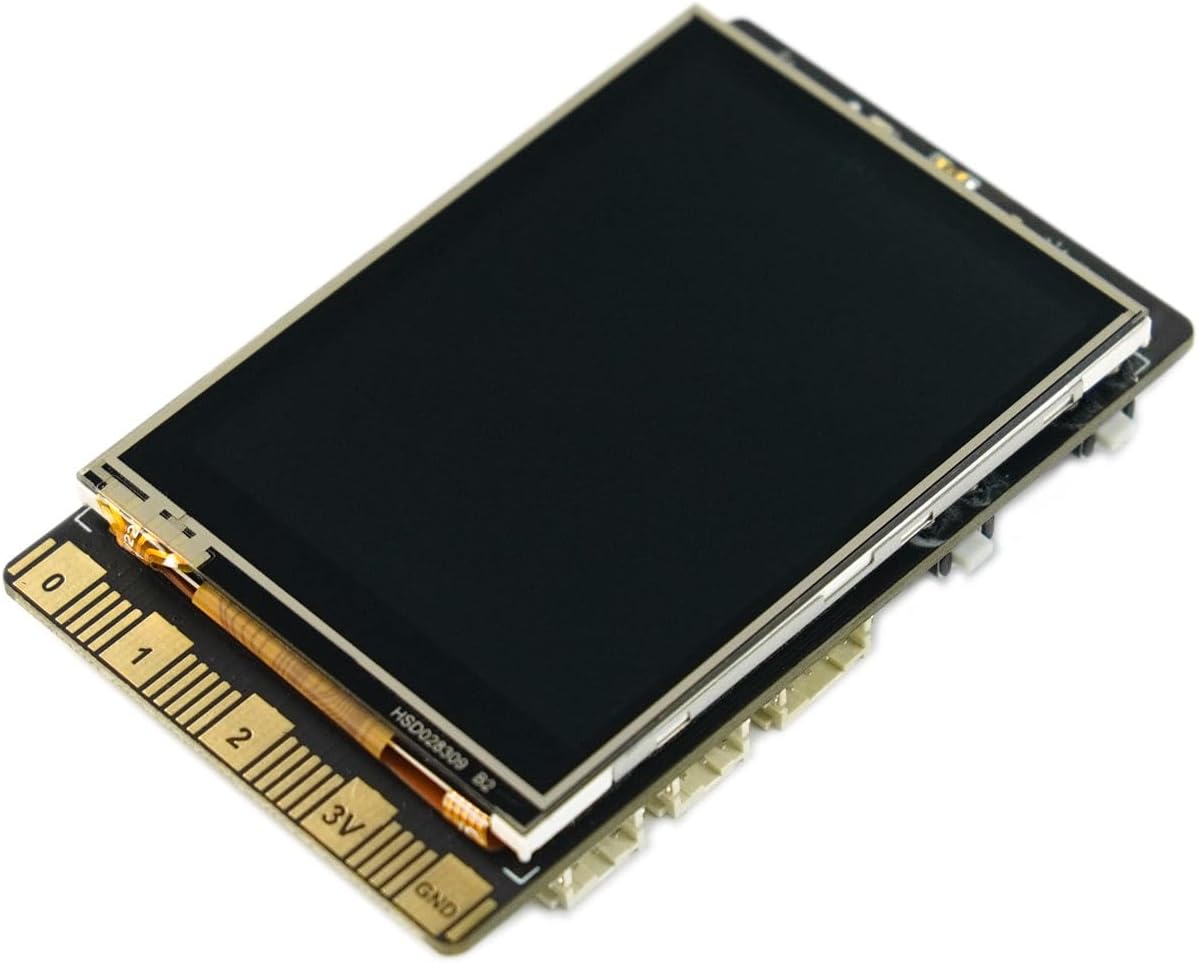
Зураг 1: Урд view of the UNIHIKER M10 AI Development Board.
2. Хайрцагт юу байна
The UNIHIKER M10 package includes the following components:
- UNIHIKER Single Board Computer x1
- Type-C USB кабель x1
- Double Sided PH2.0-3P white 20cm silicone wire x4
- Double Sided PH2.0-4P white 20cm silicone wire x2

Image 2: Contents of the UNIHIKER M10 package.
3. Тохиргоо ба анхны хэрэглээ
The UNIHIKER M10 is designed for a fast start, coming with pre-installed software and an integrated Jupyter Notebook. This allows for programming directly via a web browser on a smartphone, tablet, or computer.
3.1 Анхны холболт
- Connect the UNIHIKER M10 to your computer using the provided Type-C USB cable.
- The device will power on and display connection information, including an IP address.
- Нээлттэй a web browser on your computer, smartphone, or tablet and enter the displayed IP address to access the integrated Jupyter Notebook environment.
Видео 1: Дууслааview of UNIHIKER M10 features and initial connection process.
3.2 Мэдрэгчтэй дэлгэцийн харилцан үйлчлэл
The 2.8-inch touchscreen allows for direct interaction with the device, visualizing sensor data, and navigating menus. It supports touch input for various controls and displays.
Video 2: Demonstration of touchscreen functionality and user interface on a 2.8-inch display.
4. Ашиглалтын заавар
4.1 Programming Environment
The UNIHIKER M10 runs on a Debian-based Linux operating system, offering flexibility for various programming methods. It comes with pre-installed tools and supports popular coding software.
- Python Programming: Utilize the built-in PinPong library to manage connected sensors and actuators directly using Python.
- Jupyter Notebook: Access the integrated Jupyter Notebook for web-based programming, allowing you to write and execute Python code from any device with a browser.
- Visual Programming: Mind+ is supported for drag-and-drop visual programming, simplifying project development.
- Other Software: Compatible with popular development environments like Visual Studio Code, VIM, and Thonny.

Image 3: Connecting UNIHIKER M10 to a computer for programming via Jupyter Notebook.
4.2 IoT Service and Data Management
The integrated SIoT service facilitates data storage via the MQTT protocol and provides real-time web data access. A key advantage is on-device data storage, ensuring data security and privacy.

Image 4: UNIHIKER M10's built-in IoT service for data storage and access.
4.3 Sensor and Actuator Control
The versatile coprocessor supports communication with a wide range of analog, digital, I2C, UART, and SPI sensors and actuators, enabling complex interactions with the physical world.

Image 5: Detailed layout of UNIHIKER M10 interfaces and onboard components.
5. ЭксampПрограмууд
The UNIHIKER M10's rich interfaces and high expandability make it a powerful tool for various projects:
- Ухаалаг гэрийн системүүд: Create smart speakers or central control hubs for managing smart home devices.
- Робот техник: Integrate the UNIHIKER M10 as the AI brain for robots, enabling advanced functionalities like face detection and motion tracking.
- Data Exploration: Transform it into a portable instrument for collecting and visualizing data from various sensors.
Video 3: Demonstrating AI vision models including face, cat/dog, and QR code detection on a UNIHIKER board.
Видео 4: Өмнөхamples of projects that can be built with a DFRobot starter kit, showcasing various electronic components and their applications.
6. Засвар үйлчилгээ
To ensure the longevity and optimal performance of your UNIHIKER M10 AI Development Board, follow these general maintenance guidelines:
- Цэвэр байлгах: Regularly clean the board and screen with a soft, dry cloth. Avoid using liquids or abrasive cleaners.
- Болгоомжтой харьцах: Avoid dropping the device or exposing it to excessive force, which can damage internal components or the screen.
- Хадгалах: Store the device in a cool, dry place away from direct sunlight and extreme temperatures. Use the provided case for protection when not in use.
- Эрчим хүчний хангамж: Always use a compatible power supply (Type-C USB) to prevent electrical damage.

Image 6: The UNIHIKER M10 in its protective case, highlighting proper storage.
7. Алдаа засах
If you encounter issues with your UNIHIKER M10, consider the following common troubleshooting steps:
- Төхөөрөмж асахгүй байна: Ensure the Type-C USB cable is securely connected to both the UNIHIKER and a power source. Try a different cable or power adapter.
- Дэлгэц байхгүй: Check the power connection. If the device powers on but the screen remains blank, try restarting the device.
- Connection Issues (WiFi/Bluetooth): Verify that the WiFi network is active and the password is correct. For Bluetooth, ensure the device you are trying to connect to is in pairing mode.
- Програмчлалын алдаанууд: Double-check your code for syntax errors, indentation issues, or incorrect library calls. Refer to the official DFROBOT documentation or online communities for specific library usage.
- Мэдрэгчийн эвдрэл: Ensure sensors are correctly wired to the appropriate pins. Check sensor documentation for proper initialization and data reading procedures.
8. Техникийн үзүүлэлтүүд
| Онцлог | Тодорхойлолт |
|---|---|
| Процессор | 1.2 GHz ARMv7 (4 cores) |
| RAM | 512 MB DDR SDRAM |
| Санах ойн хадгалах багтаамж | 16 ГБ |
| Дэлгэц | 2.8-inch Color LCD Touchscreen |
| Утасгүй төрөл | 802.11bgn (WiFi), Bluetooth |
| Үйлдлийн систем | Дебиан |
| Зүйлийн жин | 6.7 унц |
| Бүтээгдэхүүний хэмжээс | 3.27 x 2.03 x 0.51 инч |
| Өнгө | Хар |
| Үйлдвэрлэгч | DFROBOT |
9. Баталгаат хугацаа ба дэмжлэг
For warranty information, technical support, and additional resources, please visit the official DFROBOT webсайт эсвэл харилцагчийн үйлчилгээтэй холбогдоно уу. Баталгаат зарга авахын тулд худалдан авалтын баримтаа хадгална уу.
DFROBOT Store: Visit the DFROBOT Store on Amazon


