
1. Танилцуулга
This manual provides detailed instructions for the installation, operation, and maintenance of your VBESTLIFE Z490 GAMING PLUS ATX Motherboard. Designed for DIY computer enthusiasts, this motherboard supports 10th and 11th generation Intel Core, Pentium Gold, and Celeron processors with an LGA 1200 socket. Please read this manual thoroughly before proceeding with installation to ensure proper setup and optimal performance.

Зураг 1.1: Дууслааview of the VBESTLIFE Z490 GAMING PLUS Motherboard.
2. Үндсэн шинж чанарууд
- Процессорын дэмжлэг: Compatible with 10th and 11th Generation Intel Core, Pentium Gold, and Celeron processors for LGA 1200 sockets.
- Санах ой: Features two DDR4 memory slots, supporting up to 64GB of dual-channel DDR4 RAM.
- Хадгалах: Includes a full-speed M.2 interface supporting 32GB/s data transfer for NVMe SSDs, and four Serial ATA 3.0 ports for traditional storage devices.
- График гаралт: Integrated DP, HDMI, and VGA video ports for versatile display connectivity.
- Өргөтгөх үүрүүд: One PCIe Gen 3.0 x16 slot for graphics cards and one PCIe X1 slot for other expansion cards.
- Сүлжээ: Integrated 1000Mbps Gigabit LAN for high-speed network connectivity.
- Аудио: Utilizes an independent Realtek HiFi Sound card for enhanced audio experience.
- USB холболт: Multiple USB 3.2 Gen1 and USB 2.0 interfaces, including front panel headers.
- Бат бөх дизайн: Features pre-installed I/O shielding and stable solid-state components for extended motherboard lifespan and protection against electrostatic discharge.
3. Тохиргоо ба суурилуулалт
Before beginning installation, ensure your system is powered off and disconnected from the power source. Handle the motherboard by its edges to avoid static discharge. It is recommended to wear an anti-static wrist strap.
3.1. Processor (CPU) Installation
- Эх хавтан дээрх LGA 1200 CPU залгуурыг олоорой.
- Gently push down the load lever and pull it away from the socket to open the CPU socket cover.
- CPU дээрх гурвалжин тэмдгийг залгуур дээрх харгалзах тэмдэгтэй зэрэгцүүлнэ. CPU-г хүчлэхгүйгээр залгуурт болгоомжтой хийнэ үү.
- Сокетийн тагийг хааж, ачааны хөшүүргийг товших хүртлээ буцааж байранд нь оруулаарай.

Зураг 3.1: Ойролцоогоор view of the LGA 1200 CPU socket, ready for processor installation.
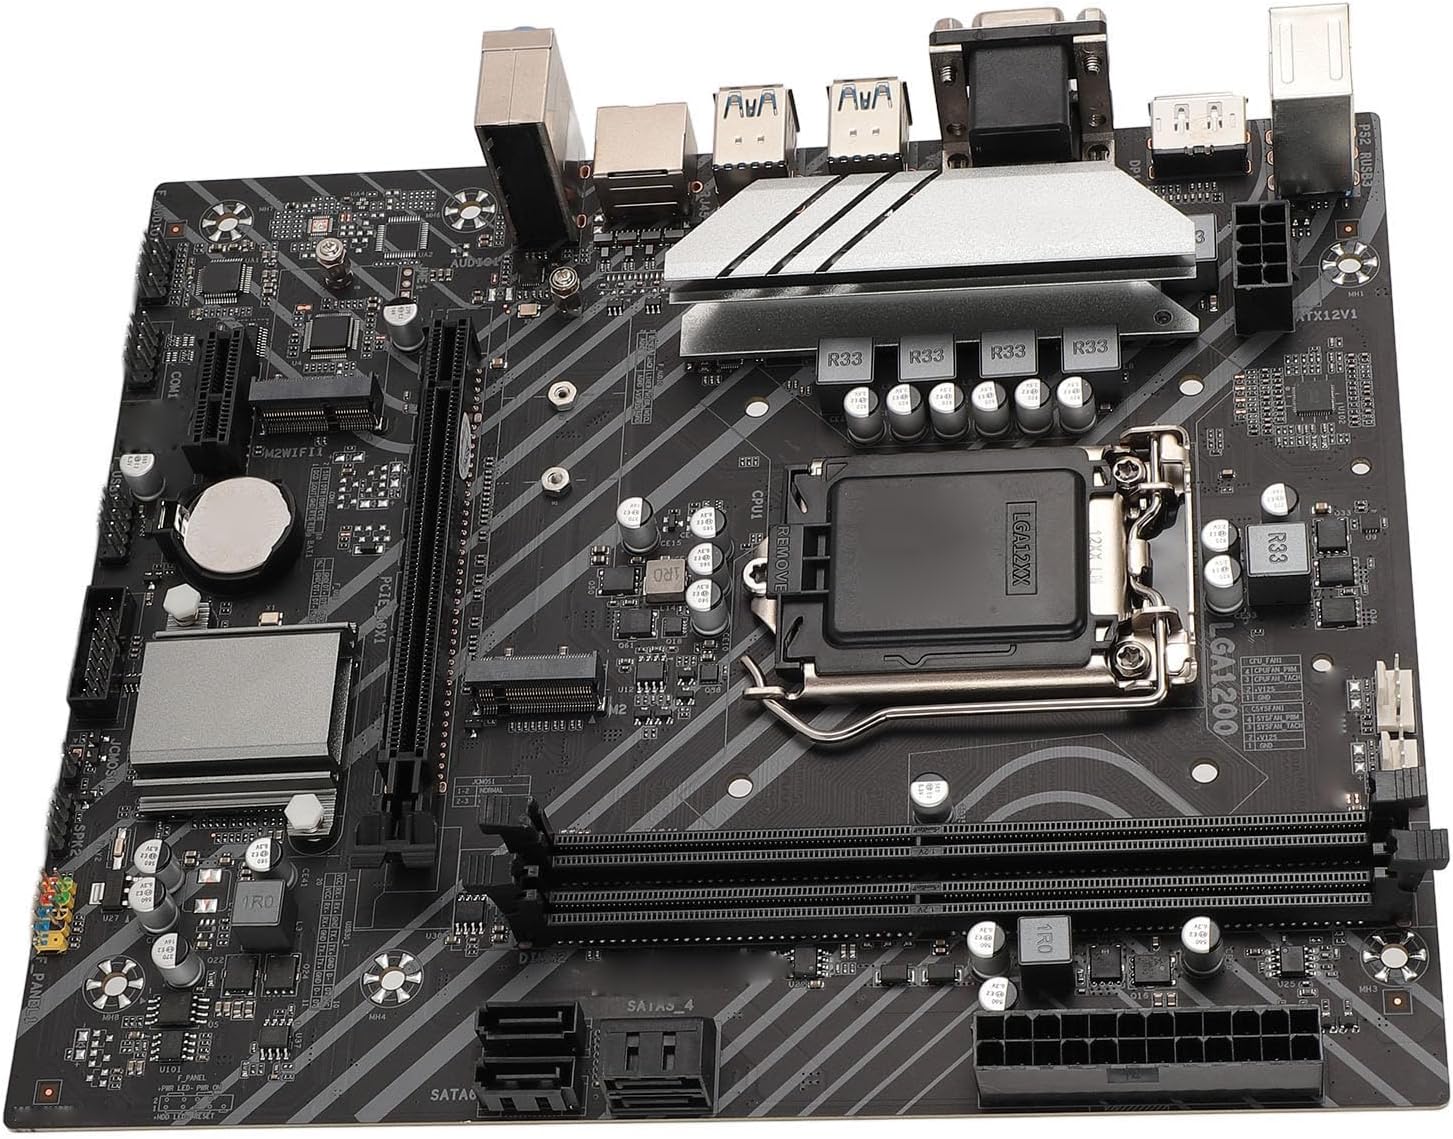
Зураг 3.2: Нарийвчилсан view of the CPU socket area, showing power delivery components.
3.2. Санах ой (RAM) суурилуулах
- DDR4 санах ойн үүрний хоёр үзүүрт байгаа хавчааруудыг нээнэ үү.
- DDR4 санах ойн модуль дээрх ховилыг санах ойн үүрэнд байгаа түлхүүртэй зэрэгцүүл.
- Санах ойн модулийг хавчаарууд нь бэхлэх хүртэл үүрэнд сайтар оруулна. Хоёр клип бүрэн хаалттай байгаа эсэхийг шалгаарай.
3.3. Хадгалах төхөөрөмж суурилуулах
3.3.1. M.2 SSD суурилуулах
- Эх хавтан дээрх M.2 үүрийг олоорой.
- M.2 бэхэлгээний боолтыг салга.
- M.2 SSD-г үүрэнд 30 градусын өнцгөөр оруулна.
- Gently push down the M.2 SSD and secure it with the standoff screw.

Image 3.3: The M.2 interface, designed for high-speed NVMe SSDs.

Image 3.4: Close-up of the M.2 slot and surrounding expansion slots and headers.
3.3.2. SATA Device Installation
- Connect one end of the SATA data cable to a SATA 3.0 port on the motherboard.
- SATA өгөгдлийн кабелийн нөгөө үзүүрийг SATA хатуу диск эсвэл SSD руу холбоно уу.
- Цахилгаан хангамжийн нэгжээсээ (PSU) SATA тэжээлийн кабелийг хадгалах төхөөрөмжтэй холбоно уу.

Image 3.5: The Serial ATA 3.0 ports for connecting traditional hard drives and SSDs.
3.4. Өргөтгөх карт суурилуулах (PCIe)
- График картынхаа PCIe x16 үүрийг эсвэл бусад өргөтгөлийн картуудын хувьд PCIe x1 үүрийг олоорой.
- Харгалзах өргөтгөлийн үүрний тагийг компьютерийнхээ хайрцагнаас ав.
- Картыг үүртэй зэрэгцүүлж, зөв суулгах хүртэл чанга дарна уу.
- Картыг компьютерийн хайрцагт боолтоор бэхлээрэй.
3.5. Эрчим хүчний холболт
- Connect the 24-pin ATX power connector from your PSU to the 24-pin ATXPWR socket on the motherboard.
- Connect the 8-pin ATX 12V power connector from your PSU to the 8-pin ATX12V socket on the motherboard.
3.6. Оролт/Гаралтын самбарын холболтууд
Connect your peripherals to the appropriate ports on the motherboard's rear I/O panel.
- Дэлгэц: Connect your monitor to the DP, HDMI, or VGA ports.
- USB төхөөрөмжүүд: Connect keyboards, mice, and other USB devices to the USB 3.2 Gen1 or USB 2.0 ports.
- Сүлжээ: Connect an Ethernet cable to the LAN port for internet access.
- Аудио: Чанга яригч эсвэл чихэвчийг аудио залгуурт холбоно уу.

Image 3.6: The rear I/O panel featuring DP, HDMI, VGA, USB, LAN, and audio ports.
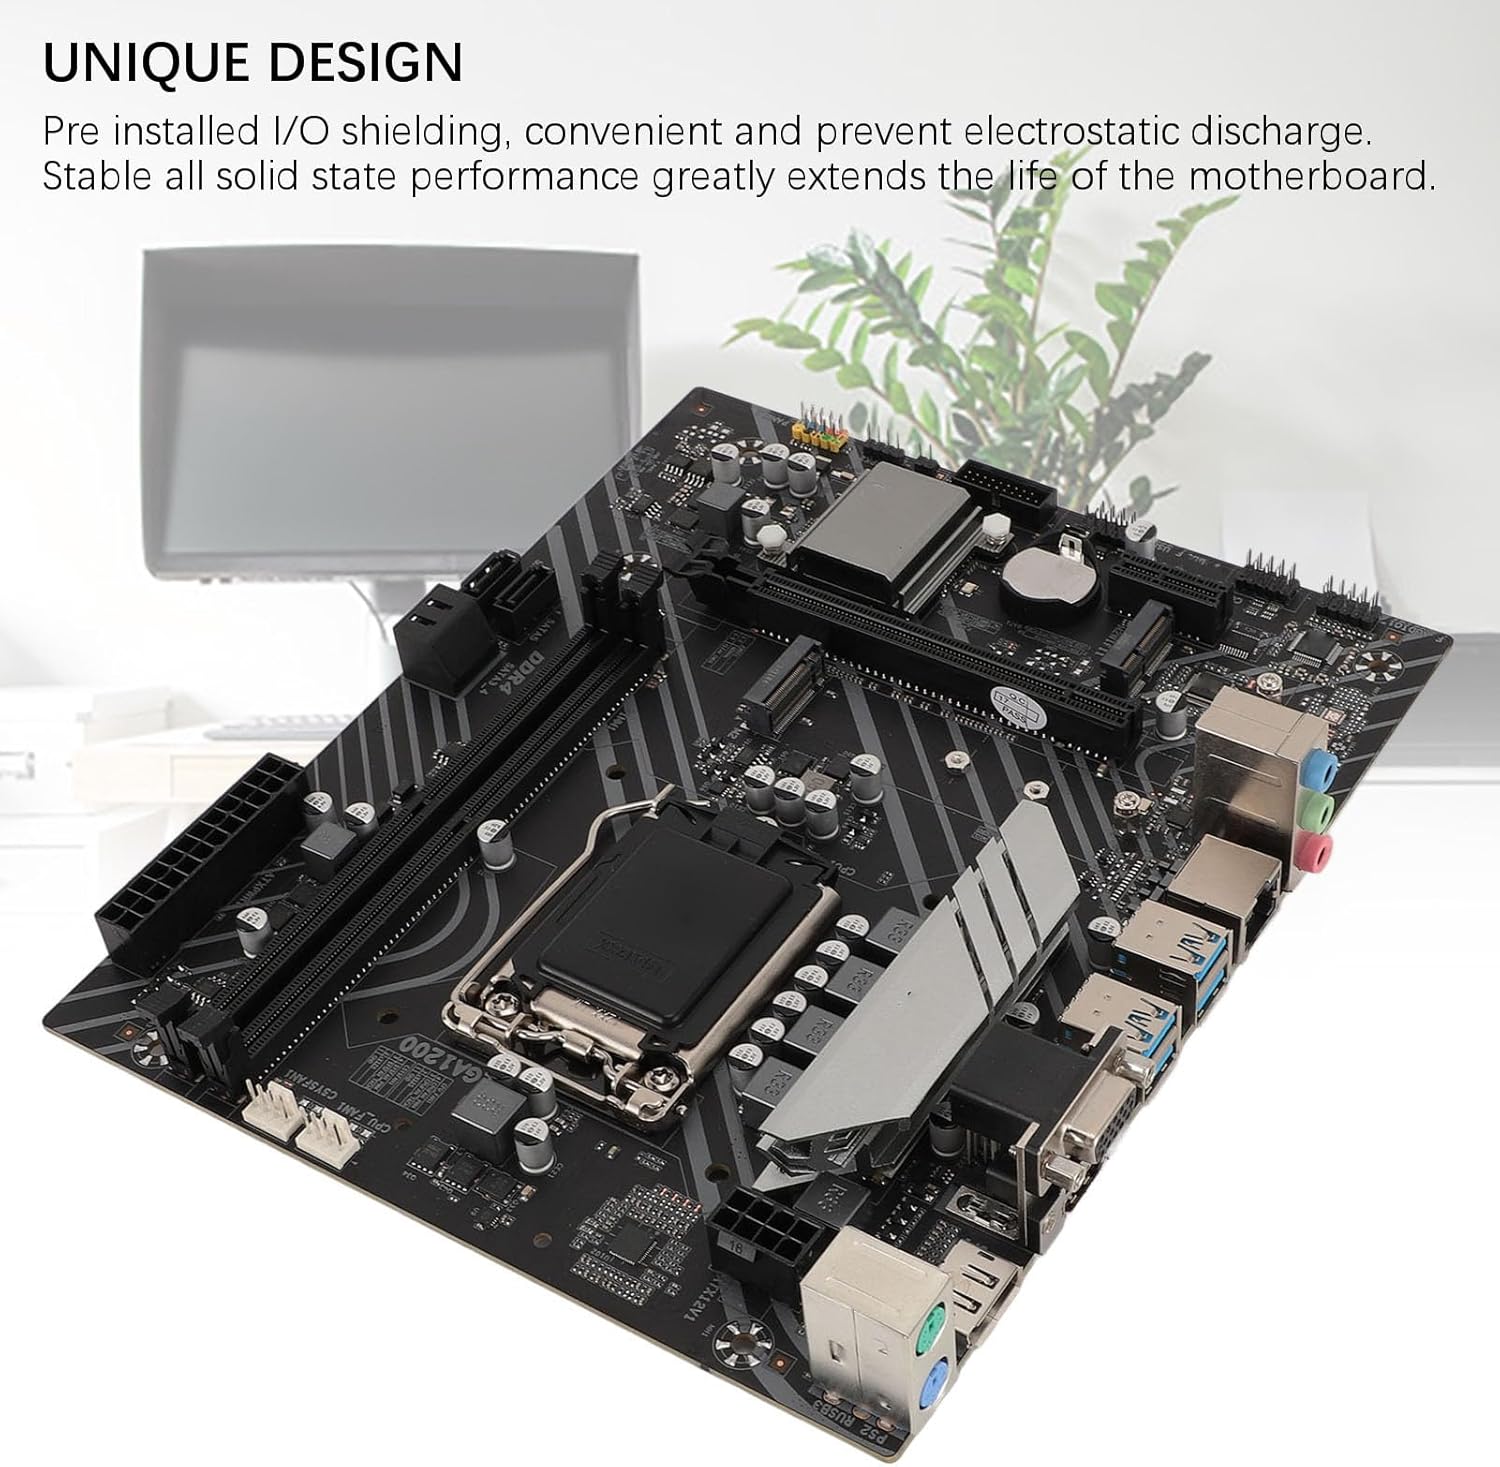
Image 3.7: The motherboard's unique design with pre-installed I/O shielding for convenience and protection.

Зураг 3.8: Нарийвчилсан view of the I/O ports and the CPU socket area.
4. Ашиглалтын заавар
4.1. Анхдагч ачаалах
After completing all hardware installations, connect your monitor, keyboard, and mouse. Power on your system. The motherboard will perform a Power-On Self-Test (POST). If all components are detected correctly, the system will proceed to boot from your installed operating system or prompt for OS installation.
4.2. BIOS/UEFI тохиргоо
BIOS/UEFI тохиргооны хэрэгсэлд хандахын тулд заасан товчлуурыг дарна уу (ихэвчлэн ДЭЛ or F2) repeatedly during the initial boot-up sequence. Within the BIOS/UEFI, you can configure system settings such as boot order, date/time, fan speeds, and other advanced options.
5. Техникийн үзүүлэлтүүд
| Онцлог | Тодорхойлолт |
|---|---|
| Загвар | Z490 GAMING PLUS |
| Motherboard Architecture | ATX |
| Эх хавтангийн хэмжээ | Approx. 225x190mm / 8.9x7.5in |
| CPU залгуурын төрөл | LGA 1200 (Supports 10th/11th Gen Intel Core, Pentium Gold, Celeron Processors) |
| Чипсет | Intel Z490 |
| Сүлжээний карт | 1000Mbps LAN |
| Integrated Sound Card | Realtek HiFi Sound |
| Graphics Card Slot | PCIE X16 Gen 3.0 |
| Дэмжигдсэн санах ойн төрөл | 2 x DDR4 DIMM үүр |
| Хамгийн их санах ойн багтаамж | 64GB (32GB x 2) |
| Цуваа ATA интерфэйс | Serial ATA3.0 x 4 |
| USB интерфейс | USB3.2 Gen1 x 4, Front USB2.0 pin x 1, Front USB3.0 pin x 1 |
| Өргөтгөх интерфэйсүүд | DP x 1, HDMI x 1, VGA x 1, M.2 Interface x 1 (Supports NGFF, NVME protocol), M.2 Wireless Fidelity Interface x 1, PCIE X1 x 1 |
| Цахилгаан холболт | 1 x 24PIN ATXPWR, 1 x 8PIN ATX12V |
| Зайны төрөл | CR2032 button cell battery (240 mAh, integrated) |
| Үйлдвэрлэгч | VBESTLIFE |
| Загварын дугаар | VBESTLIFE60hydko52q |
| Гарал үүслийн улс | Хятад |
6. Засвар үйлчилгээ
- Цэвэрлэгээ: Шахсан агаар ашиглан эх хавтан болон эд ангиудын тоосыг тогтмол цэвэрлэ. Цэвэрлэхийн өмнө системийг унтрааж, залгуураас салгасан эсэхийг шалгаарай.
- Харьцуулах: Always handle the motherboard by its edges. Avoid touching components directly to prevent electrostatic discharge.
- Байгаль орчин: Operate the motherboard in a well-ventilated area to prevent overheating. Avoid extreme temperatures and humidity.
- BIOS-ийн шинэчлэлтүүд: Үйлдвэрлэгчийг үе үе шалгаж байгаарай website for BIOS/UEFI updates. Follow update instructions carefully to avoid system instability.
7. Алдаа засах
7.1. Цахилгаангүй / Ачаалахгүй
- Ensure all power cables (24-pin ATX, 8-pin ATX12V) are securely connected to the motherboard and PSU.
- Verify that the power supply unit (PSU) is switched on and functioning correctly.
- Check front panel connections (power button, reset button) to ensure they are correctly plugged into the motherboard headers.
- Асуудлыг арилгахын тулд хамгийн бага бүрэлдэхүүн хэсгүүдээр (CPU, нэг RAM зөөгч, нэгдсэн график байхгүй бол график карт) ачаалж үзээрэй.
7.2. Дэлгэцийн гаралт байхгүй
- Ensure your monitor is connected to the correct display output port (DP, HDMI, or VGA) on the motherboard or dedicated graphics card.
- Verify that the graphics card (if installed) is properly seated in its PCIe slot and has adequate power connected.
- Боломжтой бол өөр дэлгэцийн кабель эсвэл монитороор туршиж үзээрэй.
7.3. Системийн тогтворгүй байдал / гацалт
- Check that all memory modules are correctly seated in their slots.
- Ensure CPU cooler is properly installed and making good contact with the CPU. Monitor CPU temperatures.
- Verify that your power supply unit (PSU) provides sufficient wattage for all installed components.
- Санах ойн оношилгооны хэрэгслүүдийг ажиллуулж, алдаатай RAM-г шалгана уу.
8. Баталгаат хугацаа ба дэмжлэг
This VBESTLIFE Z490 GAMING PLUS Motherboard comes with a Үйлдвэрлэгчийн 2 жилийн баталгаат хугацаа. This warranty covers defects in materials and workmanship under normal use. For warranty claims or technical support, please contact your retailer or the VBESTLIFE customer service directly. Please retain your proof of purchase for warranty validation.
For further assistance, please refer to the official VBESTLIFE webсайт эсвэл тэдний тусламжийн сувгаар холбогдоно уу.