SPH-P500242-031
Clarion 1 Light Black Clear Glass Transitional Pendant
Model: SPH-P500242-031
Аюулгүй байдлын чухал мэдээлэл
Please read and understand all instructions before beginning installation. Failure to do so may result in electric shock, fire, or other injuries that could be fatal or cause property damage. All wiring connections must be in accordance with local codes and ordinances. If you are unsure about any part of these instructions, consult a qualified electrician.
- Turn off electricity at the main fuse box or circuit breaker before installation.
- Энэ төхөөрөмжийг нойтон газар байрлуулж болохгүй.
- Бүх цахилгааны холболтууд найдвартай, зөв тусгаарлагдсан эсэхийг шалгаарай.
- Зөвхөн заасан чийдэнгийн төрөл ба ватыг ашиглана ууtage.
- Энэхүү бэхэлгээ нь зөвхөн дотор ашиглах зориулалттай.
Багцын агуулга
Шинэ бэхэлгээгээ болгоомжтой задалж, бүх эд ангиудыг чөлөөтэй талбайд байрлуул. Сав баглаа боодлын материалыг хаяхаасаа өмнө доор жагсаасан бүх эд ангиуд байгаа эсэхийг шалгаарай.
- Суурилуулах хавтан
- Халхавч
- Downrod(s)
- Fixture Body with Socket
- Цэвэр шилэн сүүдэр
- Суурилуулах тоног төхөөрөмж (эрэг, утас самар)
Шаардлагатай хэрэгслүүд (оруулсангүй)
- Филлипсийн толгой халив
- Хавтгай толгойтой халив
- Утас тайлагч
- бахө
- Цахилгаан соронзон хальс
- Шат
Тохиргоо ба суурилуулалт
This section provides step-by-step instructions for installing your pendant light. It is recommended to have a second person assist with installation.
Алхам 1: Суулгахад бэлтгэ
- Цахилгааныг унтраах: Хэлхээ таслагч эсвэл гал хамгаалагчийн хайрцгийг олж, бэхэлгээ суурилуулах уулзвар хайрцагны цахилгааныг унтраа.
- Remove existing fixture: If replacing an old fixture, carefully remove it and disconnect all wiring.
- Unpack components: Remove all parts from the packaging and inspect for any damage.
Алхам 2: Холбох хавтанг хавсаргана
- Өгөгдсөн бэхэлгээний боолтыг ашиглан бэхэлгээний хавтанг уулзвар хайрцагт бэхлэнэ үү. Хавтанг найдвартай бэхэлсэн эсэхийг шалгаарай.
Step 3: Assemble Downrod and Fixture Body
- Determine the desired hanging height. Connect the appropriate downrod(s) to the fixture body and then to the canopy. Thread the fixture wires through the downrod(s) and canopy.
Алхам 4: Цахилгааны холболт хийх
Refer to the image below for a visual guide to the pendant's design. Note that the actual product features a black finish, while the image illustrates the overall structure.
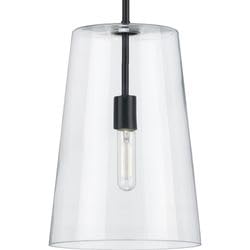
Image: Illustrative example of the Clarion 1 Light Pendant design. The actual product features a black finish.
- -г холбоно уу хар бэхэлгээнээс утас руу хар (халуун) утас самар ашиглан уулзвар хайрцагнаас утас.
- -г холбоно уу цагаан бэхэлгээнээс утас руу цагаан (төвийг сахисан) утас самар ашиглан уулзвар хайрцагнаас утас.
- -г холбоно уу газар wire from the fixture (usually bare copper or green) to the газар wire from the junction box and to the mounting plate's ground screw.
- Бүх утсыг уулзвар хайрцагт болгоомжтой хийнэ үү.
Step 5: Secure Canopy and Glass Shade
- Align the canopy with the mounting plate and secure it with the provided screws.
- Carefully attach the clear glass shade to the fixture body according to the design. Ensure it is stable and secure.
Алхам 6: Булцууг суулгана уу
- Screw in one A19 medium base bulb (not included) into the socket. Do not exceed the maximum wattage 60 ватт.
Алхам 7: Эрчим хүчийг сэргээх
- Return to the main fuse box or circuit breaker and turn the power back on. Test the light fixture.
Ашиглалтын заавар
This pendant light is designed for simple operation.
- Асаах/унтраах: Гэрлийг чийдэнгийн хэлхээнд холбогдсон стандарт ханын унтраалга ашиглан удирдана уу.
- Булцууны төрөл: Uses one A19 medium base bulb.
- Ватtage: Maximum 60 Watts.
- Багасгах: The fixture is dimmable when used in conjunction with a dimmable bulb and a compatible dimmer switch (both sold separately).
Засвар үйлчилгээ
Тогтмол засвар үйлчилгээ нь таны гэрлийн гадаад байдал, үйл ажиллагааг хадгалахад тусална.
- Цэвэрлэгээ: Цэвэрлэхийн өмнө үргэлж цахилгааныг унтраа. Төхөөрөмжийг зөөлөн, хуурай даавуугаар арчина. Зүлгүүрийн цэвэрлэгч, уусгагч эсвэл өнгөлөгч бүү хэрэглэ, учир нь тэдгээр нь өнгөлгөөг гэмтээж болзошгүй.
- Шилэн сүүдэр: The clear glass shade can be gently wiped with a damp cloth and then dried with a soft, lint-free cloth.
- Булцуу солих: Ensure the power is off and the bulb has cooled before attempting to replace it. Screw in a new A19 medium base bulb, not exceeding 60 Watts.
Алдааг олж засварлах
If you experience issues with your pendant light, refer to the following common problems and solutions.
| Асуудал | Боломжит шалтгаан | Шийдэл |
|---|---|---|
| Гэрэл асахгүй байна | Бэхэлгээнд цахилгаан байхгүй Сул утас холболтууд Алдаатай чийдэн | Хэлхээ таслагч/гал хамгаалагчийг шалгана уу. Бүх холболтууд найдвартай байгаа эсэхийг шалгаарай (эхлээд цахилгаанаа унтраагаарай). Гэрлийн чийдэнг шинээр солино уу. |
| Гэрэл анивчдаг | Сул утас холболтууд Буруу чийдэнгийн төрөл Тохиромжгүй бүдгэрүүлэгч унтраалга | Утасны холболтыг шалгана уу (эхлээд цахилгаанаа унтраана уу). Ensure bulb is correct type and wattage. If using a dimmer, ensure it is compatible with LED/dimmable bulbs. |
| Шилэн сүүдэр сул байна | Shade not properly secured | Carefully re-secure the glass shade to the fixture body. |
Эдгээр шийдлүүдийг туршиж үзсэний дараа асуудал хэвээр байвал хэрэглэгчийн дэмжлэгтэй холбоо барина уу.
Үзүүлэлтүүд
| Онцлог | Дэлгэрэнгүй |
|---|---|
| Загварын дугаар | SPH-P500242-031 |
| Брэнд | Ерөнхий |
| Өнгө | Хар (тунгалаг шилтэй) |
| Lamp Төрөл | A19 (Medium Base) |
| Макс Ватtage | 60 ватт |
| Багасгах боломжтой | Yes (with dimmable bulb and compatible dimmer) |
| Эрчим хүчний одтой | Үгүй |
| Хэмжээ | 10.5 инч (диаметр) x 15.87 инч (өндөр) |
Баталгаат болон дэмжлэг
Энэ бүтээгдэхүүн нь хамт ирдэг Үйлдвэрлэгчийн 1 жилийн баталгаат хугацаа худалдан авсан өдрөөс эхлэн материал, хийцийн согогийг хамарна.
For warranty claims, technical assistance, or replacement parts, please contact the retailer or manufacturer directly. Keep your proof of purchase for warranty validation.
Ask a question about this manual
Ask about setup, troubleshooting, compatibility, parts, safety, or missing instructions. Manuals+ will review the question and use this page’s manual context to help answer it.