1. Танилцуулга
This manual provides essential information for the installation, operation, and maintenance of your Hikvision IDS-7208HQHI-M1/XT 8-Channel 5MP Turbo HD DVR. Please read this manual thoroughly before using the product to ensure correct and safe operation. Keep this manual for future reference.
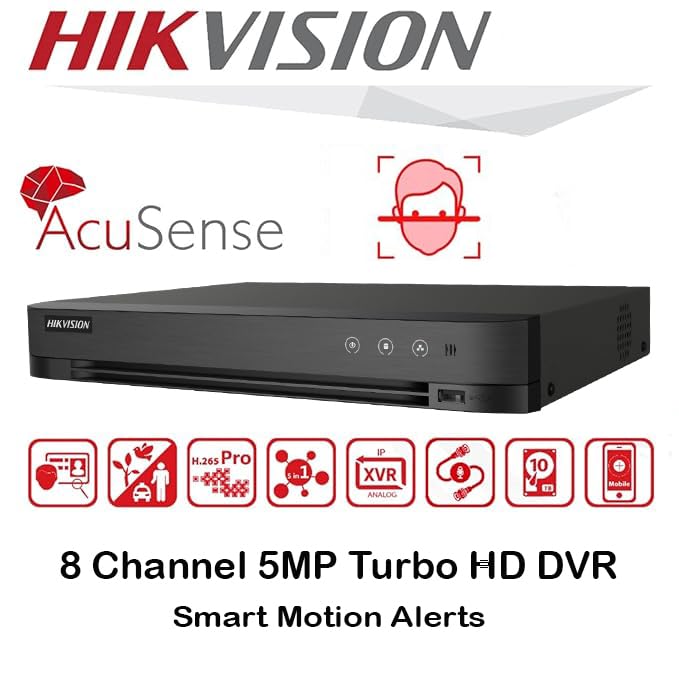
The Hikvision IDS-7208HQHI-M1/XT is an advanced 8-channel Digital Video Recorder designed for high-definition surveillance systems. It supports various video input formats, including Turbo HD, AHD, CVI, CVBS, and IP cameras, offering versatile compatibility. Key features include 5MP recording capability, H.265+ video compression for efficient storage, AcuSense technology for intelligent motion detection, and remote access via the Hik-Connect app.
2. Багцын агуулга
Verify that all items are present and in good condition upon unpacking. If any items are missing or damaged, contact your supplier immediately.
- DVR main unit
- Эрчим хүчний адаптер
- USB хулгана
3. Бүтээгдэхүүний онцлог
The Hikvision IDS-7208HQHI-M1/XT DVR offers a range of features designed for effective surveillance:
- 8-Channel DVR with 5MP HD Support: Supports multiple analog HD camera formats and up to 8 channels of real-time video monitoring and recording.
- Two-Way Audio Support: Enables audio communication through compatible cameras.
- Built-In AcuSense Technology: Smart analysis minimizes false alarms by focusing on human and vehicle-based motion detection.
- Remote Access via Hik-Connect App: View live video, playback recordings, and receive alerts anytime on your smartphone.
- Efficient Storage with H.265+ Compression: Saves bandwidth and hard disk space while maintaining clear video quality.
Зураг: Дууслааview of key features including AcuSense, H.265+ compression, and 5MP resolution support.
Image: The Hikvision Turbo HD DVR highlighting its support for two-way audio cameras, enabling interactive communication.
4. Физик интерфэйс
Familiarize yourself with the ports and indicators on the DVR unit. The following diagram illustrates the rear panel of the Hikvision IDS-7208HQHI-M1/XT DVR:

Image: Rear panel connections of the DVR, showing video inputs, audio ports, network, and power.
- Видео бичлэг (BNC): Connect analog HD cameras (Turbo HD, AHD, CVI, CVBS).
- Video Out (BNC): Connect to a monitor for local display.
- Audio In (RCA): Connect external audio input devices.
- HDMI гаралт: Connect to an HDMI-compatible monitor or TV for high-definition video output.
- VGA гаралт: Connect to a VGA-compatible monitor.
- Аудио гаралт (RCA): Connect to external audio output devices.
- USB портууд: Connect a USB mouse, USB flash drive for backup, or external storage.
- LAN порт (RJ45): Connect to your network for remote access and IP camera integration.
- RS-485: For PTZ camera control (if supported).
- 12V DC тэжээлийн оролт: Дагалдах тэжээлийн адаптерийг холбоно уу.
- Газрын терминал: For grounding the device.
5. Тохиргоо
Follow these steps for initial setup of your DVR system:
5.1 Hard Drive Installation (if not pre-installed)
- DVR-ийн дээд тагийг тайлж ав.
- SATA өгөгдлийн кабель болон тэжээлийн кабелийг хатуу диск рүү холбоно уу.
- Өгөгдсөн боолтыг ашиглан хатуу дискийг DVR-ийн их биед бэхлэнэ үү.
- Дээд талын тагийг сольж, боолтоор бэхлэнэ.
5.2 Захын төхөөрөмжүүдийг холбох
- Connect your cameras to the Видео оруулах (BNC) ports.
- мониторыг холбоно уу HDMI or VGA гаралтын порт.
- Connect the USB mouse to a USB порт.
- Connect the DVR to your network router using an Ethernet cable plugged into the LAN порт.
- Эрчим хүчний адаптерийг 12V DC тэжээлийн оролт and then plug it into a power outlet.
5.3 Анхны тохиргоо
- Анх ачаалахад DVR нь танд тохиргооны шидтэнг зааж өгөх болно.
- Set a strong password for the administrator account.
- Сүлжээний тохиргоог тохируулах (DHCP нь ихэнх гэрийн сүлжээнд хангалттай).
- Initialize the hard drive if prompted. This will format the drive for recording.
- Adjust date, time, and other system preferences as needed.
6. Ажиллаж байгаа
Once the DVR is set up, you can begin monitoring and recording.
6.1 Амьд View
Нэвтэрсний дараа DVR нь шууд дамжуулалтыг харуулах болно view дэлгэц дээрх холбогдсон камераас. Та дан камер хооронд шилжиж болно view болон олон камерын сүлжээ view дэлгэц дээрх удирдлага эсвэл хулгана ашиглан.
6.2 Бичлэг хийх
The DVR is typically configured to record continuously or based on motion detection. You can adjust recording schedules and settings through the DVR's menu system (Configuration > Record > Schedule).
6.3 Тоглуулах
Дахин хэлэхэдview foo бүртгэгдсэнtage, navigate to the Тоглуулах menu. Select the date, time, and camera channel to view recordings. Use the playback controls (play, pause, fast forward, rewind) to navigate through the footage.
6.4 Remote Access (Hik-Connect App)
The Hik-Connect app allows you to access your DVR remotely from a smartphone or tablet.
- Hik-Connect аппликейшнийг төхөөрөмжийнхөө апп дэлгүүрээс татаж аваарай.
- Hik-Connect бүртгэл үүсгээд нэвтэрнэ үү.
- Add your DVR by scanning the QR code on the DVR's label or by manually entering its serial number.
- Follow the in-app instructions to complete the device addition.
- Нэгэнт нэмсэн бол та чадна view live feeds, play back recordings, and receive push notifications for events.

Image: Illustration of the Hik-Connect mobile application interface, demonstrating remote access to live video and recordings.
7. Засвар үйлчилгээ
Тогтмол засвар үйлчилгээ нь таны DVR системийн оновчтой ажиллагаа, урт наслалтыг баталгаажуулдаг.
- Clean the DVR: Periodically clean the exterior of the DVR with a soft, dry cloth. Ensure ventilation openings are free from dust to prevent overheating.
- Програм хангамжийн шинэчлэлтүүд: Check the official Hikvision website for firmware updates. Updating firmware can improve performance, add features, and fix bugs. Follow update instructions carefully.
- Хатуу дискний эрүүл мэнд: Monitor the health of your hard drive through the DVR's system menu (HDD менежмент). Replace the hard drive if it shows signs of failure.
- Чухал Foo-г нөөцлөөрэйtage: Чухал видео foo-г тогтмол нөөцлөөрэйtagгадаад USB диск эсвэл сүлжээний санах ой руу.
- Нууц үгийн аюулгүй байдал: Change your DVR and Hik-Connect passwords periodically to maintain security.
8. Алдаа засах
Энэ хэсэгт танд тулгарч болох нийтлэг асуудлуудыг авч үзэх болно.
8.1 No Video Output on Monitor
- Check if the monitor is powered on and correctly connected to the DVR's HDMI or VGA port.
- Дэлгэц дээрээ зөв оролтын эх үүсвэр сонгогдсон эсэхийг шалгаарай.
- Өөр монитор эсвэл өөр кабель ашиглан холбогдож үзнэ үү.
8.2 Камерууд харагдахгүй байна
- Verify that cameras are powered on and properly connected to the DVR's BNC inputs.
- Check camera power supplies.
- Ensure the camera type (TVI, AHD, CVI, CVBS) is compatible with the DVR and configured correctly in the DVR settings.
8.3 Remote Access Not Working
- DVR нь LAN портоор дамжуулан интернетэд холбогдсон эсэхийг шалгаарай.
- Check network settings on the DVR (Configuration > Network).
- Verify that the Hik-Connect service is enabled on the DVR.
- Таны ухаалаг гар утас идэвхтэй интернет холболттой эсэхийг шалгаарай.
- Re-add the device to the Hik-Connect app if necessary.
8.4 Бичлэг хийхгүй
- Check if a hard drive is installed and properly initialized (Configuration > HDD).
- Verify recording schedules are set correctly (Configuration > Record > Schedule).
- Хатуу диск дээр хангалттай зай байгаа эсэхийг шалгаарай.
9. Техникийн үзүүлэлтүүд
Detailed technical specifications for the Hikvision IDS-7208HQHI-M1/XT DVR:
| Онцлог | Тодорхойлолт |
|---|---|
| Загварын дугаар | IDS-7208HQHI-M1/XT |
| Видео оролт | 8-Channel (Turbo HD/AHD/CVI/CVBS/IP) |
| Видео шахалт | H.265+/H.265/H.264+/H.264 |
| Бичлэгийн нягтрал | 5 MP хүртэл |
| Видео гаралт | HDMI, VGA, BNC |
| Аудио оролт/гаралт | 2-Way Audio Support |
| Сүлжээний интерфейс | 1 RJ45 10M/100M Ethernet Interface |
| USB интерфейс | 2 x USB 2.0 |
| HDD дэмжлэг | 1 SATA интерфэйс (нэг хатуу диск тутамд 10 ТБ хүртэл багтаамжтай) |
| Эрчим хүчний хангамж | 12V DC |
| Хэмжээ (L x W x H) | 19.7 x 19.2 x 4.1 см |
| Жин | 1.5 кг |
| Үйлдвэрлэгч | HIKVISION, Prama Hikvision India Pvt. Ltd. |
10. Баталгаат хугацаа ба дэмжлэг
Баталгаат хугацааны мэдээлэл болон техникийн дэмжлэг авахыг хүсвэл бүтээгдэхүүнтэй хамт ирсэн баталгаат картыг үзэх эсвэл Hikvision-ий албан ёсны вэбсайтад зочилно уу. webсайт. Худалдан авалтын баримтаа баталгаат нэхэмжлэлд зориулж худалдан авалтын баталгаа болгон хадгална уу.
For further assistance, contact Hikvision customer support or your authorized dealer.