1. Танилцуулга
This manual provides essential information for the setup, operation, and maintenance of your MikroTik RouterBoard RB951Ui-2nD hAP device. The hAP is designed as a compact home access point suitable for small offices, offering wireless connectivity and multiple wired ports.

Зураг 1.1: Key Features of the MikroTik hAP. This image highlights the main technical specifications and capabilities of the device, including its wireless standard, CPU, RAM, PoE output, and USB port.
Key features include a 2.4 GHz dual-chain wireless interface, a 650 MHz CPU, 64 MB of RAM, Passive PoE output on port 5, and a USB port for 3G/4G modems. The device is preconfigured for ease of use.

Зураг 1.2: Дууслааview of the MikroTik RouterBoard RB951Ui-2nD hAP. This image displays the device from a top-down angle, highlighting the five Ethernet ports, power input, USB port, and LED indicators.
2. Багцын агуулга
Таны багц дараах зүйлсийг агуулж байгаа эсэхийг шалгана уу.
- MikroTik RouterBoard RB951Ui-2nD hAP device
- Цахилгаан хувиргагч (24V 0.8A)
- Wire (Ethernet cable)
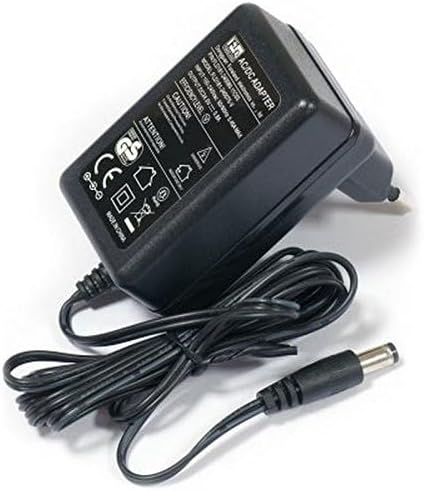
Зураг 2.1: Included Power Adapter. This image shows the 24V 0.8A power adapter with its cable and barrel connector.
3. Тохируулах заавар
Follow these steps to set up your MikroTik hAP device:
3.1. Төхөөрөмж дууссанview болон портууд

Зураг 3.1: MikroTik hAP Port Layout. This image illustrates the front panel of the hAP device, clearly labeling the power input, reset button (RES), power indicator (PWR), user LED (USR), Internet port (Ether1), LAN ports (Ether2-4), and the PoE output port (Ether5).
- Эрчим хүчний оролт: DC 10-28V.
- RES (Reset Button): Used for resetting the device to factory defaults.
- PWR (Power LED): Эрчим хүчний төлөвийг заана.
- USR (User LED): Programmable LED.
- Internet (Ether1): Connect your internet service provider's cable here. This port also supports Passive PoE input.
- LAN (Ether2-4): Connect your wired devices (computers, switches, etc.) to these ports.
- PoE out (Ether5): This port provides Passive PoE output, capable of powering other PoE-capable devices with the same voltage as applied to the unit. Maximum load is 500mA.
- USB: Connect a 3G/4G modem or other USB devices.
3.2. Анхны холболт
- Интернетэд холбогдох: Plug your internet cable (from your modem or ISP) into the port labeled "Internet" (Ether1) on the hAP device.
- Эрчим хүчийг холбох:
- If using the included power adapter: Connect the power adapter to the "Power" jack on the device, then plug the adapter into a wall outlet.
- If using Passive PoE: Connect a Passive PoE injector to the "Internet" (Ether1) port. The device can be powered via this port.
- Асаах: The device will power on automatically. Wait for the PWR LED to stabilize.
- Сүлжээнд холбогдох:
- Утастай: Connect a computer to any of the "LAN" ports (Ether2-4) using an Ethernet cable.
- Утасгүй: хайх available Wi-Fi networks on your computer or mobile device. The hAP is preconfigured with a default MikroTik wireless network. Connect to this network.
- Хандалтын тохиргоо: Холбогдсоны дараа a web browser and navigate to the default IP address (usually http://192.168.88.1). You will be prompted to log in. The default username is админ with no password. It is highly recommended to set a strong password immediately after initial login.
4. Ашиглалтын заавар
The MikroTik hAP runs RouterOS, a powerful operating system that offers extensive configuration options.
4.1. Basic Network Functionality
- Интернет хандалт: After connecting the internet cable and powering on, your devices connected to the hAP (wired or wireless) should automatically obtain an IP address and have internet access.
- Wireless Access Point: The hAP functions as a wireless access point, allowing Wi-Fi enabled devices to connect to your network. The default wireless network name (SSID) and password can be found on the device label or in the initial configuration.
- Утастай холболт: Use the LAN ports (Ether2-4) to connect devices that require a stable wired connection, such as desktop computers, smart TVs, or network printers.
4.2. Advanced Configuration (RouterOS)
For advanced network configurations, such as setting up firewalls, VPNs, VLANs, or customizing wireless settings, you will need to use the RouterOS interface. This can be accessed via:
- WebЗураг: The web-based graphical user interface (GUI) accessible through your browser at the device's IP address.
- WinBox: A dedicated Windows application for managing MikroTik devices.
- CLI (Тушаалын мөрийн интерфэйс): Accessible via SSH for experienced users.
Detailed documentation and guides for RouterOS are available on the official MikroTik webсайт.
5. Засвар үйлчилгээ
Regular maintenance ensures optimal performance and security of your hAP device.
- Програм хангамжийн шинэчлэлтүүд: MikroTik-ийг үе үе шалгаж байгаарай website for RouterOS updates. Keeping your firmware updated provides new features, performance improvements, and security patches.
- Биеийн цэвэрлэгээ: Keep the device free from dust and debris. Use a soft, dry cloth for cleaning. Do not use liquid cleaners.
- Байгаль орчны нөхцөл: Ensure the device is placed in a well-ventilated area, away from direct sunlight, heat sources, and moisture.
- Нөөцлөлтийн тохиргоо: Regularly back up your device's configuration using the RouterOS interface. This allows for quick restoration in case of unexpected issues or device replacement.
6. Алдаа засах
If you encounter issues with your MikroTik hAP, refer to the following common troubleshooting steps:
- Эрчим хүчгүй:
- Цахилгаан адаптер нь төхөөрөмж болон ажиллаж байгаа цахилгаан залгуурт найдвартай холбогдсон эсэхийг шалгаарай.
- If using PoE, verify the PoE injector is functioning and connected correctly.
- Check the PWR LED on the device; if it's off, there might be a power issue.
- Интернет холболт байхгүй:
- Verify that the internet cable is securely plugged into the "Internet" (Ether1) port.
- Check your modem or ISP connection to ensure it is active.
- Log into RouterOS and check the status of the Ether1 interface.
- Wi-Fi-д холбогдох боломжгүй:
- Ensure the wireless interface is enabled in RouterOS.
- Та зөв Wi-Fi сүлжээний нэр (SSID) болон нууц үг ашиглаж байгаа эсэхээ шалгана уу.
- Check if the device is within range of the hAP.
- Forgot Password / Device Unresponsive:
- You can reset the device to factory defaults by holding the RES button during power-up until the USR LED starts flashing, then release it. Анхааруулга: This will erase all your configurations.
- Удаан гүйцэтгэл:
- Сүлжээний ачаалал эсвэл хөндлөнгийн оролцоог шалгана уу.
- Төхөөрөмжийн програм хангамж шинэчлэгдсэн эсэхийг шалгаарай.
- Monitor CPU and memory usage in RouterOS.
For more detailed troubleshooting, consult the MikroTik documentation or support resources.
7. Техникийн үзүүлэлтүүд
Key technical specifications for the MikroTik RouterBoard RB951Ui-2nD hAP:
| Онцлог | Дэлгэрэнгүй |
|---|---|
| Бүтээгдэхүүний код | RB951Ui-2nD |
| CPU-ийн нэрлэсэн давтамж | 650 МГц |
| CPU Core Count | 1 |
| RAM-ийн хэмжээ | 64 MB |
| 10/100 Ethernet портууд | 5 |
| Утасгүй | Built-in 2.4 GHz 802.11b/g/n, dual-chain |
| Антенн олз | 1.5 дБ |
| PoE In | Yes (Passive PoE) |
| PoE гарлаа | Yes (Ether5, Passive PoE, max 500mA) |
| Дэмжигдсэн оролтын ботьtage | 6 V - 30 V (Jack or Passive PoE) |
| USB порт | USB 2.0 Type A full size port, 1A |
| Үйлдлийн систем | RouterOS |
| Хэмжээ | 113 x 89 x 28 мм |
| Хамгийн их эрчим хүчний хэрэглээ | 5 Вт |

Зураг 7.1: Detailed Specifications. This image presents a table summarizing the technical specifications of the RB951Ui-2nD hAP.
8. Баталгаат хугацаа ба дэмжлэг
For warranty information, please refer to the documentation provided with your purchase or visit the official MikroTik webсайт.
For technical support, detailed documentation, and community forums, please visit the official MikroTik webсайт: https://mikrotik.com/.


