1. Танилцуулга
This manual provides detailed instructions for the installation, operation, and maintenance of your Vibe Powerbox Micro Mono Amplifier, model POWERBOX400.1M-V7. Please read this manual thoroughly before attempting installation or operation to ensure proper use and to prevent damage to the unit or your vehicle's audio system.
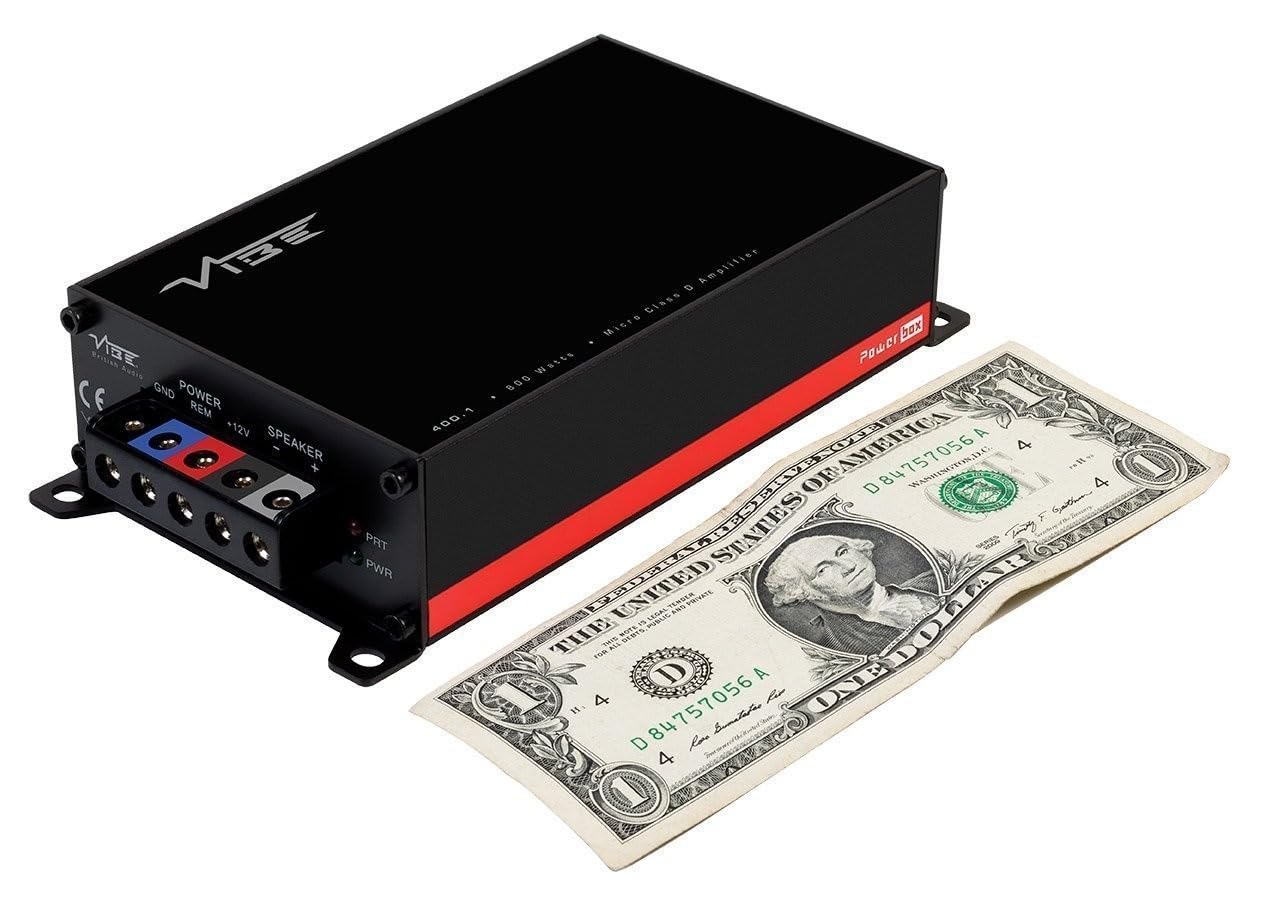
The Vibe Powerbox Micro Mono Amplifier is a compact, high-performance Class D amplifier designed for car audio systems. It delivers up to 400W RMS, making it suitable for powering subwoofers. Its small footprint allows for flexible installation options.
2. Аюулгүй байдлын мэдээлэл
- Цахилгааны ажил эхлэхийн өмнө тээврийн хэрэгслийн аккумуляторын сөрөг терминалыг үргэлж салгаж байгаарай.
- Ensure all wiring is correctly routed and secured to prevent damage from moving parts or sharp edges.
- Use appropriate gauge wiring for power and speaker connections as specified in this manual to prevent overheating and potential fire hazards.
- бүү суулгаарай ampнарны шууд тусгал, хэт халалт, чийг, тоос шороонд өртдөг газарт өргөгч.
- Хэрэв та суулгах процессын аль нэг хэсэгт эргэлзэж байвал мэргэжлийн машины аудио суурилуулагчтай зөвлөлдөөрэй.
- -ийг ажиллуулж байна amplifier at excessively high volumes for prolonged periods can cause hearing damage.
3. Багцын агуулга
Суулгацыг үргэлжлүүлэхийн өмнө багцад бүх зүйл байгаа эсэхийг шалгана уу:
- Vibe Powerbox Micro Mono Amplifier (POWERBOX400.1M-V7)
- Remote Gain Control Unit
- RCA аудио кабель
- Mounting Hardware (screws, connectors)
- Хэрэглэгчийн гарын авлага

4. Бүтээгдэхүүний онцлог
- Class D Micro Amplifier design for high efficiency and compact size.
- Ultra-compact footprint for easy and discreet installation.
- Output: 1 x 400W RMS at 1 ohm, with a maximum output of 800W.
- Dimensions: 37 x 157 x 82mm (approximately 1.46 x 6.18 x 3.23 inches).
- Compatible with Critical Link Rapid kits for simplified integration.
- Features Deltabox™ Connectivity auto turn-on.
- VIBE Sound Studio™ Active crossovers.
- 1 Ohm Stable operation.
5. Бүрэлдэхүүн хэсгүүдийг тодорхойлох
5.1 Power and Speaker Terminals

The power input section includes terminals for Ground (GND), Remote Turn-On (REM), and +12V power. The speaker output section provides terminals for connecting your subwoofer.
5.2 Оролт ба удирдлагын самбар
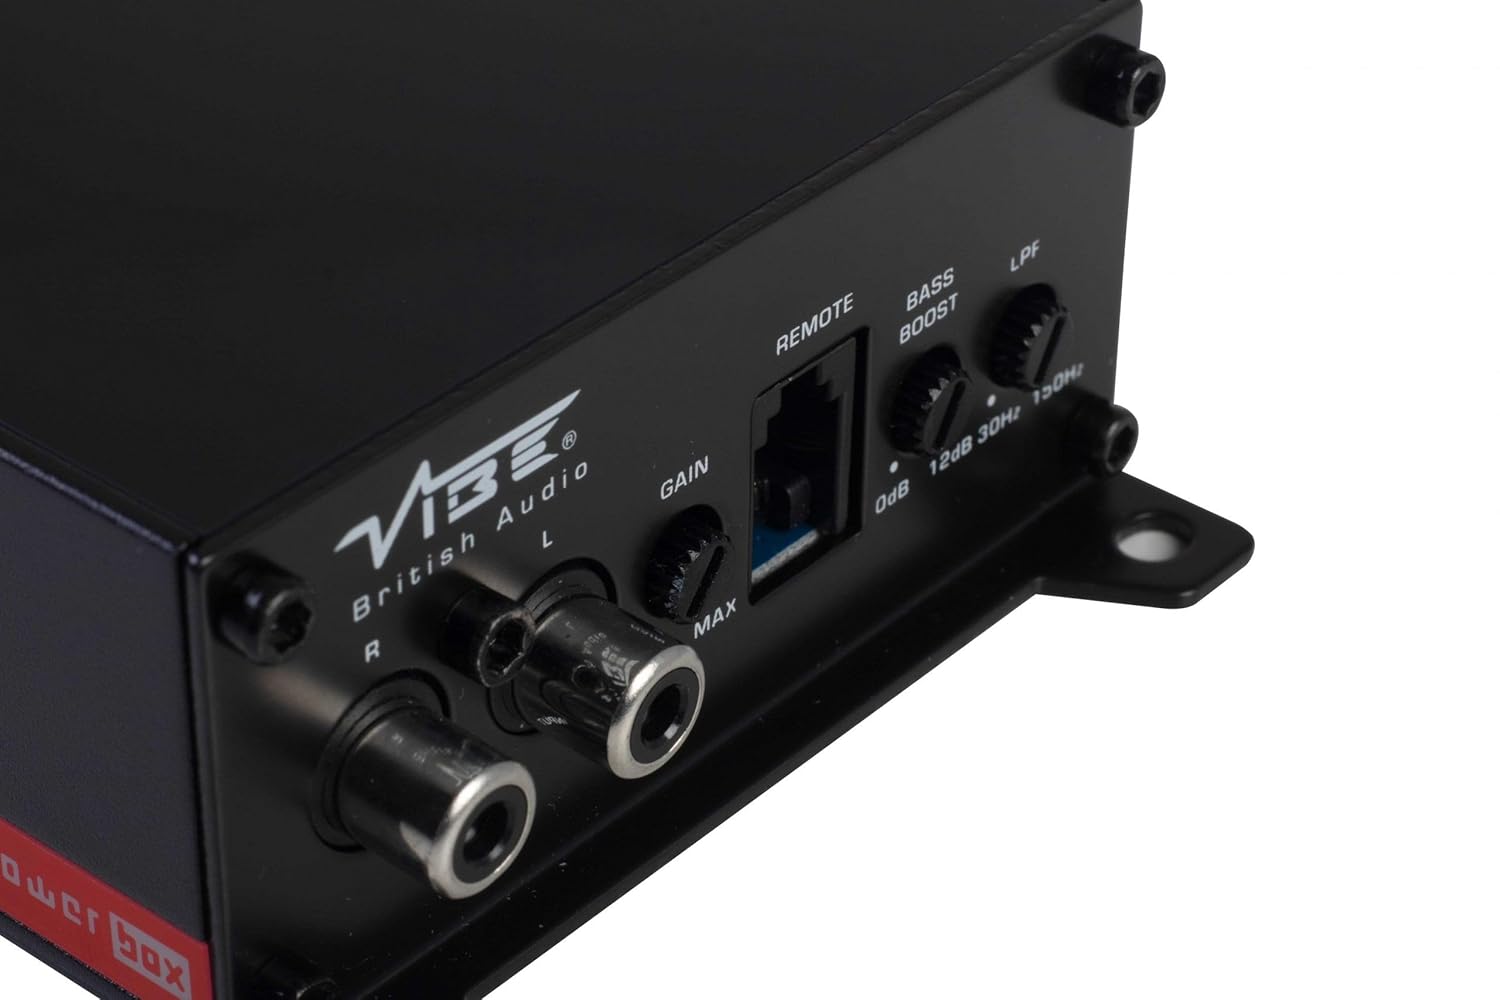
This panel features the RCA input jacks for audio signal, a Gain control knob to match the amplifier's input sensitivity to your head unit's output, a dedicated port for the remote gain control, a Bass Boost switch for enhancing low frequencies, and an LPF (Low Pass Filter) control to adjust the upper frequency limit for the subwoofer.
5.3 Remote Gain Control

The remote gain control unit connects to the amplifier via the 'REMOTE' port and allows for convenient adjustment of the subwoofer's output level from the vehicle's cabin.
6. Тохиргоо ба суурилуулалт
Proper installation is crucial for optimal performance and safety. If you are not confident in your ability to install the amplifier, seek professional assistance.
6.1 Холбох байршил
Choose a mounting location that is dry, well-ventilated, and away from direct heat sources. The compact size of the Powerbox Micro allows for installation under seats, behind trim panels, or in other discreet locations. Ensure there is sufficient airflow around the ampхөргөх зориулалттай өргөгч.
6.2 утас холболт
Цахилгааны утас:
- -г холбоно уу +12V terminal to the vehicle's positive battery terminal using a suitable gauge power cable (e.g., 8 AWG or 10 AWG). Install an in-line fuse holder within 18 inches (45 cm) of the battery.
- -г холбоно уу GND terminal to a clean, unpainted metal surface on the vehicle's chassis. Ensure a good electrical connection. The ground cable should be of the same gauge as the power cable and as short as possible.
- -г холбоно уу REM (Remote Turn-On) terminal to the remote output of your head unit. This wire signals the amplifier to turn on and off with your stereo. If your head unit lacks a remote output, you can use an accessory wire that turns on with the ignition, or utilize the amplifier's auto-sense feature if applicable.
Чанга яригчийн утас:
- Сабвуферээ холбоно уу Чанга яригчийн гаралт terminals (+ and -). Ensure correct polarity. This amplifier is 1 Ohm stable, allowing flexibility in subwoofer impedance configurations. Refer to your subwoofer's specifications for optimal impedance matching.
Signal Input (RCA):
- Connect the RCA output from your head unit or signal processor to the INPUT (L/R) RCA jacks on the ampнастан.
Алсын олз хяналт:
- Plug the remote gain control unit into the dedicated АЛСЫН дээрх порт amplifier. Route the cable to a convenient location for adjustment.
ISO T Harness / ISOAWK Kit:
- For simplified installation with existing stereo looms, an optional ISOAWK kit (available separately) can be used to make the amplifier compatible with an ISO T harness. This allows for plug-and-play integration for audio signal, power, and ground, potentially eliminating the need for separate battery connections.
7. Үйл ажиллагаа
7.1 Анхдагч асаалт
After all connections are made and verified, reconnect the vehicle's battery. Turn on your head unit. The amplifier's power indicator (PWR) should illuminate green. If the protection indicator (PRT) illuminates red, refer to the troubleshooting section.
7.2 Олз тохируулга
Өсгөлтийн хяналт дараахтай тохирч байна amplifier-ийн оролтын мэдрэмжийн гаралтын хэмжээtage of your head unit. To set the gain:
- эргүүлэх amplifier's Gain control to its minimum (MIN) setting.
- Толгой хэсгийнхээ дууны түвшинг дээд хэмжээнээс нь 75-80% орчимд тохируулна уу.
- Динамик хөгжмийн бүтээл тоглоорой.
- Аажмаар нэмэгдүүлэх amplifier's Gain control until you hear distortion, then back it off slightly until the sound is clear.
The remote gain control unit allows for real-time adjustment of the subwoofer level without affecting the main system volume.
7.3 Бага нэвтрүүлэх шүүлтүүр (LPF)
The LPF control sets the upper frequency limit for the amplifier's output. This is essential for subwoofers, ensuring they only reproduce low frequencies. Adjust the LPF knob (typically 30Hz to 150Hz) to blend the subwoofer's output seamlessly with your main speakers. A common starting point is around 80-100Hz.
7.4 басс нэмэгдүүлэх
The Bass Boost switch provides an adjustable low-frequency enhancement. Use this feature sparingly, as excessive bass boost can lead to distortion and potential damage to your subwoofer. Adjust the boost level (0dB to 12dB) to your preference.
8. Засвар үйлчилгээ
- Цэвэрлэгээ: Үе үе арчих amplifier-ийн гадна талыг зөөлөн, хуурай даавуугаар . Химийн хүчтэй бодис, зүлгүүрийн цэвэрлэгч хэрэглэж болохгүй.
- Холболтууд: Regularly check all power, ground, and speaker connections to ensure they are secure and free from corrosion. Loose connections can cause performance issues or damage.
- Агааржуулалт: гэдгийг баталгаажуулах amplifier's cooling fins are not obstructed to maintain proper heat dissipation.
9. Алдаа засах
| Асуудал | Боломжит шалтгаан | Шийдэл |
|---|---|---|
| Цахилгаан байхгүй (PWR LED унтарсан) | Гал хамгаалагч шатсан, цахилгаан/газрын холболт суларсан, алсын дохио байхгүй. | Шугамын гал хамгаалагчийг шалгаж, +12V, GND болон REM холболтуудыг шалгана уу. |
| Protection Mode (PRT LED on) | Overheating, short circuit in speaker wiring, impedance too low. | Ensure proper ventilation, check speaker wiring for shorts, verify speaker impedance. |
| Дууны гаралт байхгүй | No input signal, gain too low, speaker wires disconnected. | Check RCA input connections, adjust gain, verify speaker wiring. |
| Гажуудсан дуу | Gain set too high, LPF incorrectly set, poor ground connection. | Reduce gain, adjust LPF, check ground connection. |
10. Техникийн үзүүлэлтүүд
- Загварын дугаар: POWERBOX400.1M-V7
- AmpАмьдралын төрөл: D ангиллын моно Ampнастан
- RMS цахилгаан гаралт: 1 x 400W RMS @ 1 Ohm
- Хамгийн их цахилгаан гаралт: 800 Вт
- Бүтээгдэхүүний хэмжээс (L x W x H): Ойролцоогоор 157 x 82 x 37 мм (6.18 x 3.23 x 1.46 инч)
- Жин: Ойролцоогоор 1.54 фунт
- Ботьtage: 12 вольт (Нэрлэсэн)
- Нийлүүлэлтийн дээд хэмжээtage: 12 вольт
- Суурилуулах төрөл: Гадаргуугийн бэхэлгээ
- Үйлдвэрлэгч: Vibe Audio
- Эхний боломжтой огноо: 21 оны долдугаар сарын 2018
11. Баталгаат хугацаа ба дэмжлэг
Vibe Audio products are designed and manufactured to the highest standards. For warranty information and technical support, please refer to the warranty card included with your product or visit the official Vibe Audio webсайт. Баталгаат нэхэмжлэл гаргахын тулд худалдан авалтаа нотлох баримтаа хадгалаарай.


