1. Танилцуулга
Welcome to the user manual for your Modecom Oberon Pro Glass USB 3.0 White PC Case. This manual provides essential information for the proper installation, operation, and maintenance of your computer chassis. Please read this manual thoroughly before beginning assembly to ensure correct setup and to prevent damage to your components or the case itself.
Аюулгүй байдлын урьдчилан сэргийлэх арга хэмжээ:
- Аливаа эд ангиудыг суулгах эсвэл салгахаасаа өмнө цахилгаан тэжээлийг ханын залгуураас үргэлж салга.
- Цахилгаан статик цэнэг алдалтаас (ESD) зайлсхийхийн тулд эд ангиудыг болгоомжтой харьцана уу. Статик бус бугуйн оосор ашиглах талаар бодож үзээрэй.
- Жижиг эд анги, баглаа боодлын материалыг хүүхдээс хол байлга.
- Хэт халалтаас урьдчилан сэргийлэхийн тулд хайрцгийн эргэн тойронд агааржуулалтыг зөв хийх хэрэгтэй.
2. Бүтээгдэхүүн дууссанview
The Modecom Oberon Pro Glass is a stylish mid-tower PC case designed to house your computer components. It features a tempered glass side panel for showcasing your build and a clean white finish. The front panel includes convenient USB 3.0 ports for high-speed data transfer.
Зураг 2.1: Урд-баруун view of the Modecom Oberon Pro Glass PC Case. This image displays the white exterior, the front panel with ventilation, and the top-mounted I/O ports including USB 3.0.
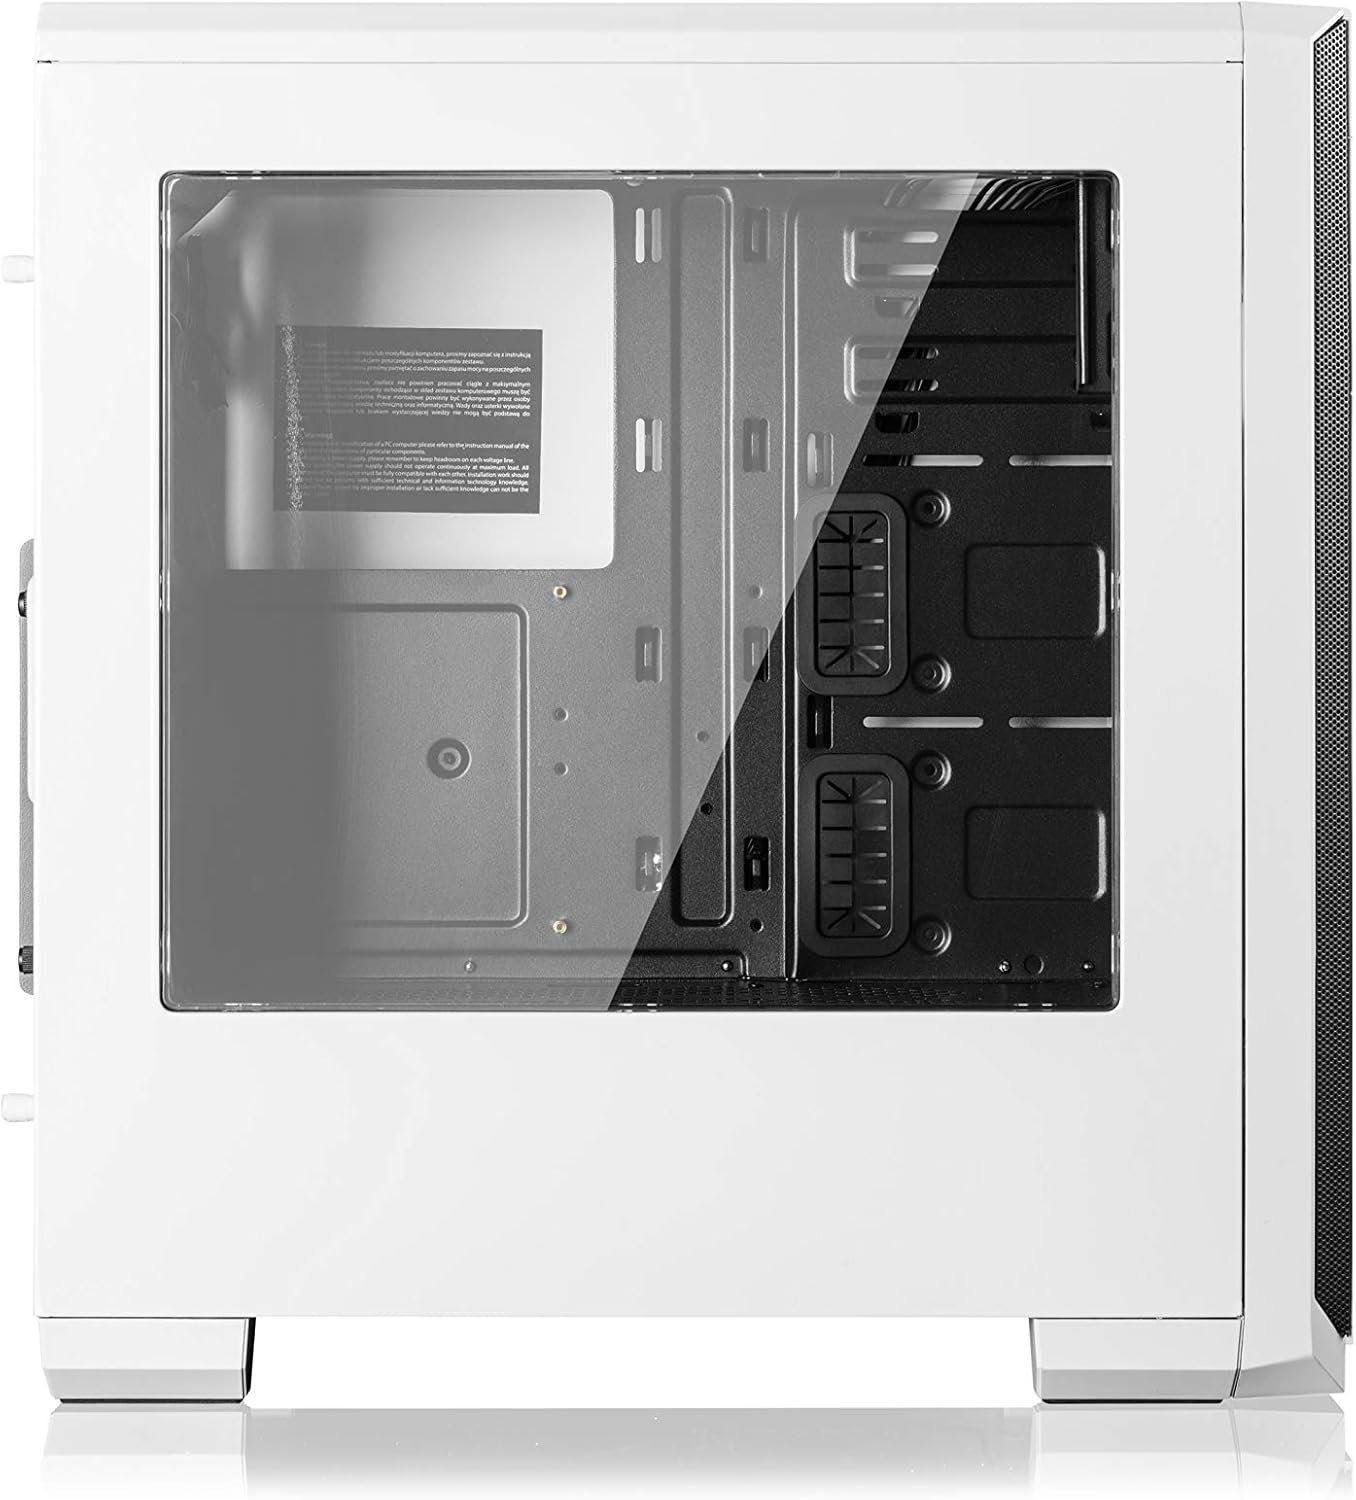
Зураг 2.2: Хажуу тал view of the Modecom Oberon Pro Glass PC Case, highlighting the tempered glass side panel. This panel allows for a clear view of the internal components when installed.
3. Тохиргоо ба суурилуулалт
Follow these steps to install your computer components into the Modecom Oberon Pro Glass PC Case.
3.1. Савлах, анхны үзлэг
- Компьютерийн хайрцгийг сав баглаа боодолоос нь болгоомжтой авч хая.
- Тээвэрлэлтийн явцад гэрийг эвдрэлийн шинж тэмдэг байгаа эсэхийг шалгана уу. Хэрэв эвдрэл илэрвэл худалдаачинтайгаа яаралтай холбоо барина уу.
- Remove the tempered glass side panel by unscrewing the thumb screws, typically located at the rear corners of the panel. Set the panel aside on a soft, flat surface to prevent scratches.
3.2. Эх хавтанг суурилуулах

Зураг 3.1: Интерьер view of the Modecom Oberon Pro Glass PC Case, showing the motherboard tray, drive bays, and cable management cutouts.
- Install the I/O shield that came with your motherboard into the designated opening at the rear of the case.
- Ensure the motherboard standoffs are correctly aligned for your motherboard's form factor (ATX, Micro ATX, or ITX). Install additional standoffs if necessary.
- Эх хавтангаа тулгуур дээр болгоомжтой байрлуулж, шурагны нүхнүүдийг тэгшлээрэй.
- Secure the motherboard with the provided screws. Do not overtighten.
3.3. Цахилгаан хангамжийн нэгж (PSU) суурилуулах
- Position your PSU in the dedicated compartment, typically at the bottom rear of the case.
- Align the screw holes on the PSU with those on the case's rear panel.
- Secure the PSU with the provided screws.
3.4. Хадгалах диск суурилуулах (HDD/SSD)
- Locate the 3.5" HDD bays and 2.5" SSD mounting points within the case.
- For 3.5" HDDs, slide the drive into a bay and secure it with screws or tool-less clips if available.
- For 2.5" SSDs, mount them to the designated trays or screw points, typically behind the motherboard tray or in specific drive cages.
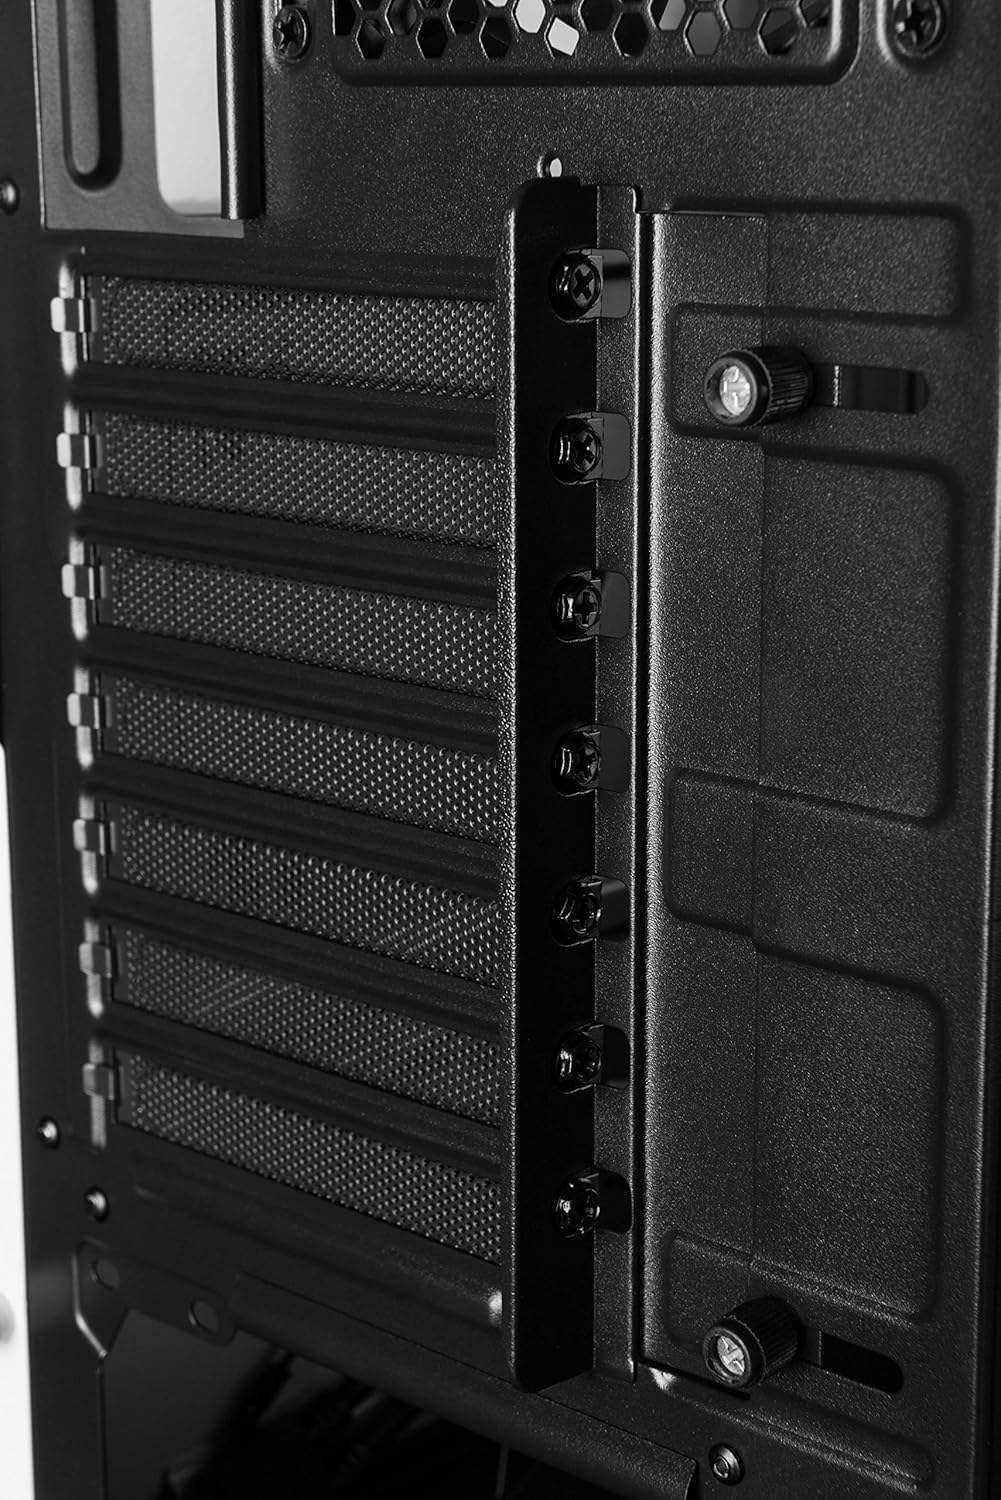
3.5. Expansion Card Installation (GPU, PCIe cards)

Зураг 3.2: Арын дотоод засал view of the Modecom Oberon Pro Glass PC Case, illustrating the expansion slot covers and thumb screws for securing PCIe cards.
- Remove the necessary expansion slot covers from the rear of the case, corresponding to your card's slot on the motherboard.
- Insert your expansion card (e.g., graphics card) firmly into the PCIe slot on the motherboard.
- Secure the card to the case with the provided screws or retention mechanism.
3.6. Урд талын самбарын холбогч суурилуулах
- Connect the front panel cables (USB 3.0, HD Audio, Power Switch, Reset Switch, Power LED, HDD LED) to their respective headers on your motherboard. Refer to your motherboard manual for exact pin layouts.
3.7. Кабелийн менежмент
- Кабелийг цэгцлэхийн тулд эх хавтангийн тавиурын ард байрлах кабелийн чиглүүлэлтийн таслуур болон холбох цэгүүдийг ашиглаарай. Энэ нь агаарын урсгал болон гоо зүйн байдлыг сайжруулна.
- Once all components are installed and cables managed, reattach the tempered glass side panel and secure it with the thumb screws.
4. Үйл ажиллагаа
After successful installation, your PC is ready for operation.
- Асааж байна: Press the power button located on the top I/O panel of the case.
- Using Front Panel Ports: The front panel includes USB 3.0 ports and audio jacks. Connect your USB devices (e.g., flash drives, external hard drives) to the USB ports for data transfer. Plug your headphones or microphone into the respective audio jacks.
5. Засвар үйлчилгээ
Тогтмол засвар үйлчилгээ нь таны компьютерын эд ангиудын оновчтой ажиллагаа, урт хугацааны ашиглалтыг хангахад тусална.
- Тоосны шүүлтүүр: Periodically remove and clean the dust filters (if present) to maintain good airflow and prevent dust buildup inside the case. Use compressed air or a soft brush.
- Гадна цэвэрлэгээ: Хэргийн гадна талын гадаргууг зөөлөн, damp cloth. Avoid abrasive cleaners or solvents that could damage the finish or tempered glass.
- Температуртай шилэн хавтан: Clean the tempered glass with a glass cleaner and a microfiber cloth to avoid streaks and scratches.
6. Алдаа засах
Хэрэв танд асуудал тулгарвал дараах үндсэн алдааг олж засварлах алхмуудыг анхаарч үзээрэй.
- Систем асахгүй байна:
- Цахилгаан тэжээлийн хангамжийг асааж, ханын залгуурт зөв холбосон эсэхийг шалгана уу.
- Урд талын самбарын цахилгаан шилжүүлэгчийн кабель эх хавтангийн толгой хэсэгт зөв холбогдсон эсэхийг шалгана уу.
- Эх хавтан болон эд ангиудын бүх цахилгаан холболтыг шалгана уу.
- USB портууд ажиллахгүй байна:
- Confirm that the front panel USB 3.0 cable is securely connected to the corresponding header on the motherboard.
- Test with different USB devices.
- Хэт их дуу чимээ:
- Identify the source of the noise (e.g., case fans, CPU cooler fan, GPU fan).
- Ensure all fans are free from obstructions and properly secured.
- Clean any dust buildup on fans.
For more complex issues, consult your component manuals or seek professional assistance.
7. Техникийн үзүүлэлтүүд
| Онцлог | Тодорхойлолт |
|---|---|
| Брэнд | Modecom |
| Загварын нэр | Oberon Pro Glass |
| Загварын дугаар | AT-OBERON-PG-20-000000-0002 |
| Кейсийн төрөл | Дунд цамхаг |
| Өнгө | Цагаан |
| Материал | Поликарбонат (PC) |
| Тохиромжтой эх хавтангууд | ATX, Micro ATX, ITX |
| Урд I / O портууд | USB 3.0, Audio In/Out |
| Эрчим хүчний хангамж | W/O PSU (Power Supply Unit not included) |
| Зүйлийн жин | 2 кг |
| Олон улсын нийтлэлийн код | 05901885248370 |
8. Баталгаат хугацаа ба дэмжлэг
Баталгаат мэдээлэл:
Modecom provides a guarantee of spare parts availability for 2 years from the date of purchase. This ensures that essential components for repair or replacement will be accessible within this period.
Хэрэглэгчийн дэмжлэг:
For technical assistance, warranty claims, or further inquiries, please refer to the official Modecom website or contact your local retailer where the product was purchased. Ensure you have your product model number and proof of purchase available when seeking support.


