1. Танилцуулга
This manual provides comprehensive instructions for the installation, operation, and maintenance of your PANOEAGLE DS-7608NI-I2/8P 8-Channel 4K Network Video Recorder (NVR). Please read this manual thoroughly before using the product to ensure proper setup and functionality. Retain this manual for future reference.
The PANOEAGLE DS-7608NI-I2/8P is an embedded Plug and Play 4K NVR designed for robust 24/7 surveillance recording. It supports up to 8 cameras simultaneously, offering high-resolution recording up to 12MP and utilizing H.264+/H.264/H.265 video compression for efficient storage. Its Power over Ethernet (PoE) capability simplifies camera installation by providing both power and data through a single cable.
2. Бүтээгдэхүүн дууссанview
Familiarize yourself with the components and interfaces of your NVR.
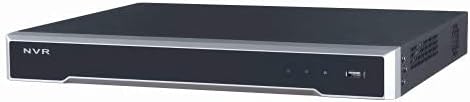
Зураг 2.1: Урд самбар View
This image displays the front panel of the NVR, featuring the 'NVR' branding, status indicators, and a USB port for peripheral connections.

Зураг 2.2: Арын самбар View
This image shows the rear panel of the NVR, highlighting the power input, cooling fan, 8 PoE ports, network port, USB ports, audio input/output, VGA, and HDMI video outputs, and alarm/control terminals.

Зураг 2.3: Өнцөгтэй арын хэсэг View
An angled perspective of the NVR's rear panel, providing a clearer view of the various connectivity options and ventilation.
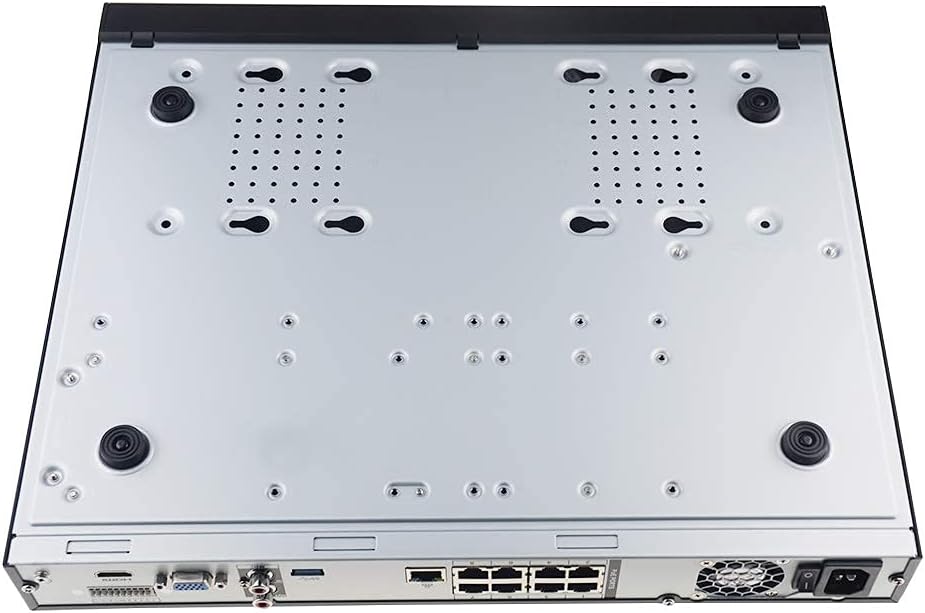
Figure 2.4: Bottom Panel View
This image displays the bottom of the NVR, showing mounting points and ventilation holes, along with rubber feet for stable placement.
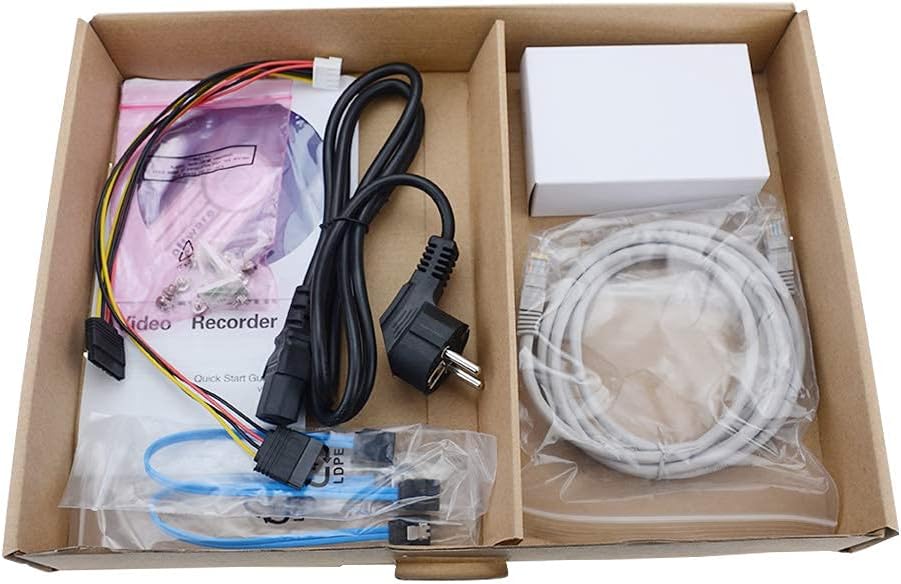
Зураг 2.5: Багцын агуулга
A view of the accessories included with the NVR, typically comprising a power cable, network cable, USB mouse, SATA cables for hard drive installation, and a quick start guide.
3. Үндсэн шинж чанарууд
- 8 сувгийн бичлэг: Supports simultaneous recording from up to 8 IP cameras.
- 4K нягтралын дэмжлэг: Capable of recording and displaying video resolutions up to 12MP.
- PoE Easy Setup: Integrated Power over Ethernet (PoE) ports for direct connection and power supply to IP cameras via a single Ethernet cable.
- Видео шахалтын дэвшилтэт хувилбар: Utilizes H.264+/H.264/H.265 codecs for efficient storage and bandwidth usage.
- 24/7 бичлэг: Designed for continuous, reliable surveillance monitoring.
- HDMI гаралт: High-definition video output for connecting to monitors or TVs.
- SATA дэмжлэг: Features 2 SATA interfaces for internal hard drive installation (HDDs not included).
4. Тохируулах гарын авлага
4.1. Хатуу диск суурилуулах (заавал биш)
Хэрэв таны NVR урьдчилан суулгасан хатуу дисктэй хамт ирээгүй бол дараах алхмуудыг дагана уу:
- NVR-ийг унтраагаад бүх кабелийг салга.
- Unscrew and remove the top cover of the NVR chassis.
- NVR-ээс SATA өгөгдлийн кабель болон цахилгааны кабелийг хатуу диск рүү холбоно уу.
- Өгөгдсөн боолтыг ашиглан хатуу дискийг NVR-ийн их биед бэхлэнэ үү.
- Дээд талын тагийг сольж, боолтоор бэхлэнэ.
4.2. Анхны холболтууд
- Мониторыг холбох: Мониторыг NVR-ийн HDMI эсвэл VGA гаралтын порт руу холбоно уу.
- Хулгана холбох: USB хулганыг NVR-ийн USB портуудын аль нэгэнд нь залгаарай.
- Сүлжээнд холбогдох: NVR-ийн LAN портыг Ethernet кабель ашиглан чиглүүлэгч эсвэл сүлжээний унтраалгатай холбоно уу.
- IP камеруудыг холбох: Connect your PoE IP cameras to the NVR's PoE ports using Ethernet cables. The NVR will provide power and data to the cameras.
- Асаах: Цахилгаан адаптерийг NVR-д холбоод дараа нь цахилгааны залгуурт залгаарай. NVR автоматаар асна.
4.3. Анхны тохиргоо
Анх ачаалсны дараа NVR нь таныг анхны тохиргооны шидтэнгээр дамжуулан удирдах болно. Үүнд ихэвчлэн дараахь зүйлс орно:
- Администраторын нууц үг тохируулах.
- Configuring network settings (DHCP is usually default).
- Initializing the hard drive (if newly installed).
- Холбогдсон IP камеруудыг хайж, нэмж байна.
- Огноо, цагийг тохируулах.
Тохиргоог дуусгахын тулд дэлгэцэн дээрх зааврыг дагана уу.
5. Ашиглалтын заавар
5.1. Амьд View
After logging in, the NVR will typically display the live view холбогдсон бүх камеруудын. Та дан камер хооронд шилжиж болно view, олон камерын сүлжээ view, мөн дэлгэцийн байршлыг өөрчлөх.
5.2. Бичлэг хийх
- Үргэлжлүүлэн бичлэг хийх: Records 24/7. Configure schedules in the NVR's menu.
- Хөдөлгөөн илрүүлэх бичлэг: Records only when motion is detected. Sensitivity and detection zones can be adjusted.
- Хуваарьт бичлэг: Бичлэг хийх тодорхой цагийг тохируулна уу.
Access recording settings via the NVR's main menu, usually under "Record" or "Storage" settings.
5.3. Дахин тоглуулах
Дахин хэлэхэдview foo бүртгэгдсэнtage:
- Үндсэн цэснээс "Тоглуулах"-г сонгоно уу.
- Choose the camera(s) and date/time range you wish to review.
- Use the timeline to navigate through recorded events. Options for fast-forward, rewind, and pause are available.
5.4. Алсын зайнаас хандах
The NVR supports remote viewгар утасны аппликейшнаар дамжуулан эсвэл web browser. Refer to the NVR's network settings for details on enabling P2P (peer-to-peer) or port forwarding for remote access. Download the official PANOEAGLE mobile application from your device's app store.
6. Засвар үйлчилгээ
- Тогтмол цэвэрлэгээ: Keep the NVR free from dust. Use a soft, dry cloth for exterior cleaning. Ensure ventilation openings are clear.
- Програм хангамжийн шинэчлэлтүүд: Periodically check the PANOEAGLE official website for firmware updates. Updates can improve performance, add features, and enhance security. Follow update instructions carefully.
- Хатуу дискний эрүүл мэнд: Monitor the health of your hard drive(s) through the NVR's system information. Replace failing drives promptly to avoid data loss.
- Нууц үгийн аюулгүй байдал: Regularly change your administrator password and use strong, unique passwords.
7. Алдаа засах
| Асуудал | Боломжит шалтгаан | Шийдэл |
|---|---|---|
| Монитор дээр видео гаралт байхгүй. | Кабелийн холболт сул, дэлгэц дээрх оролтын эх үүсвэр буруу, NVR асаалттай биш байна. | HDMI/VGA кабелийн холболтыг шалгана уу. Дэлгэц зөв оролтод тохируулагдсан эсэхийг шалгана уу. NVR-ийн хүчийг шалгана уу. |
| Шууд нэвтрүүлэгт камерууд харагдахгүй байна view. | Camera not powered, network issue, camera not added to NVR, incorrect IP address. | Check camera power and Ethernet cables. Ensure cameras are connected to PoE ports. Use NVR's camera management to search and add cameras. Verify camera IP addresses. |
| No recording or missing footage. | Hard drive not installed/initialized, recording schedule not configured, hard drive full, hard drive failure. | Install and initialize HDD. Configure recording schedules. Check HDD status and capacity. Replace faulty HDD. |
| NVR-д алсаас хандах боломжгүй. | Network configuration issues, P2P disabled, incorrect app settings, firewall blocking. | Ensure NVR has internet access. Enable P2P service. Verify app settings and NVR's network configuration. Check router firewall settings. |
8. Техникийн үзүүлэлтүүд
| Онцлог | Дэлгэрэнгүй |
|---|---|
| Загвар | DS-7608NI-I2/8P |
| Брэнд | PANOEAGLE (Compatible with Hi-k USA systems) |
| Сувгийн тоо | 8 |
| Макс тогтоол | 12 MP хүртэл |
| Видео шахалт | H.264+/H.264/H.265 |
| Видео гаралт | hdmi, vga |
| Аудио оролт | RCA |
| SATA интерфэйсүүд | 2 (for HDD) |
| Холболтын технологи | HDMI, Ethernet (PoE) |
| Эхний боломжтой огноо | 28 оны долдугаар сарын 2021 |
9. Баталгаат хугацаа ба дэмжлэг
For warranty information, please refer to the warranty card included with your product or visit the official PANOEAGLE website. Technical support may be available through the manufacturer's webсайт эсвэл тэдний харилцагчийн үйлчилгээний хэлтэстэй холбогдож болно.
Always ensure you are using official channels for support and firmware downloads to maintain product integrity and security.


