1. Танилцуулга
This manual provides detailed instructions for the installation, operation, and maintenance of your Snapmaker 2.0 Rotary Module A350T. The Rotary Module enhances your Snapmaker 2.0 machine by enabling 4-axis CNC carving and laser engraving on cylindrical and irregular objects. Please read this manual thoroughly before using the product to ensure safe and efficient operation.
2. Бүтээгдэхүүн дууссанview
The Snapmaker 2.0 Rotary Module A350T is designed to integrate seamlessly with your Snapmaker 2.0 system, expanding its capabilities to include rotary machining. It features a robust construction and precise mechanics for high-quality results.

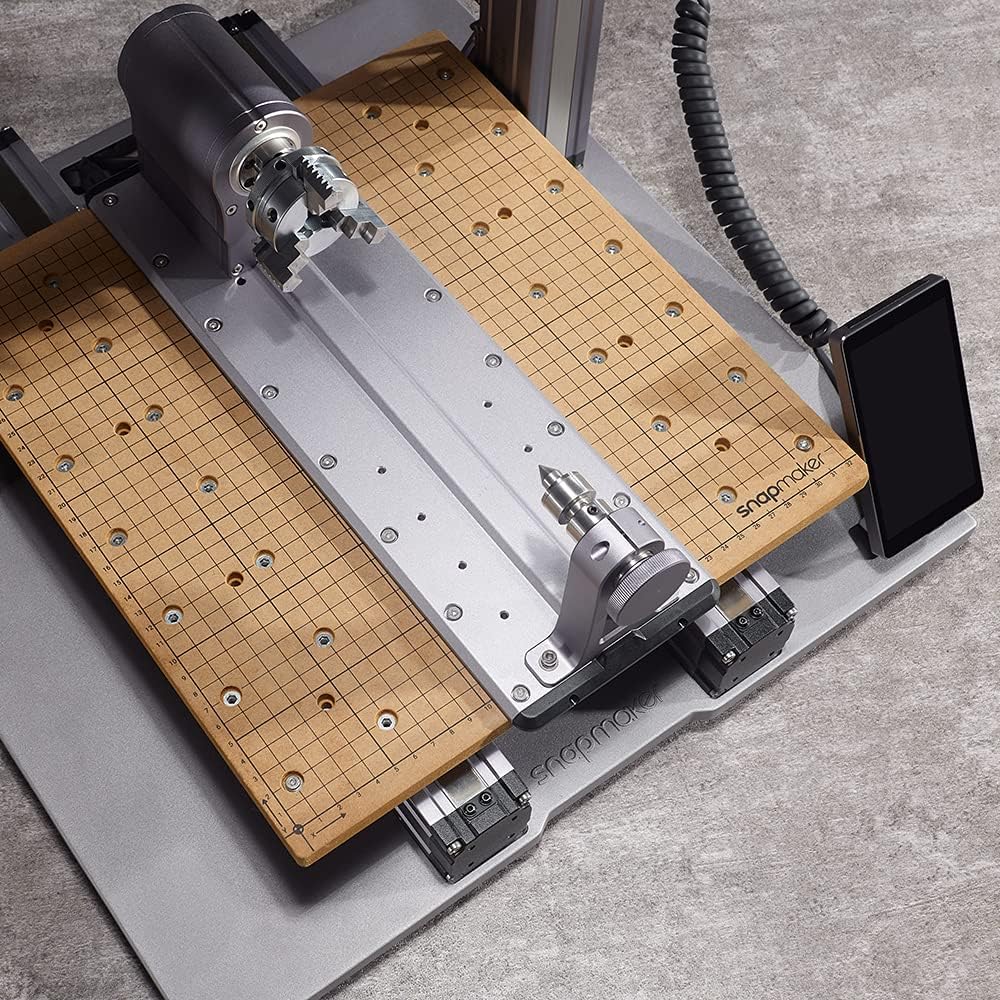
Image 2.1: The Snapmaker 2.0 Rotary Module A350T, showing the headstock with a 3-jaw chuck and the tailstock.
Гол онцлогууд:
- 4th Dimension Machining: Enables rotary CNC carving and laser engraving on uneven and irregular surfaces.
- Strain Wave Gearing: Incorporates a 100:1 speed reducer for precise rotation and minimal angle control (0.1°).
- Өндөр нарийвчлал: Capable of producing detailed three-dimensional artworks and small-sized sculptures.
- Програм хангамжийн дэмжлэг: Fully supported by Snapmaker Luban for 4-axis projects, including STL file import and advanced 4-axis linkage.
3. Тохиргоо ба суурилуулалт
Proper installation of the Rotary Module is crucial for optimal performance. Follow these steps carefully.
3.1 Сав баглаа боодол, эд ангиудыг тодорхойлох
Бүх эд ангиудыг болгоомжтой задалж, савлагааны жагсаалттай харьцуулж шалгана уу. Бүх эд анги байгаа бөгөөд гэмтээгүй эсэхийг шалгана уу.
Зураг 3.1: Дууслааview of the Rotary Module components, including the headstock, tailstock, and base plate.
3.2 Mounting the Rotary Module
- Ensure your Snapmaker 2.0 machine is powered off and disconnected from the power source.
- Remove the existing wasteboard or work platform from your Snapmaker 2.0.
- Align the Rotary Module's base plate with the mounting holes on the Snapmaker 2.0's platform. The base plate has holes on both sides, allowing for flexible positioning of the headstock and tailstock.
- Secure the Rotary Module to the machine using the provided screws and tools. Ensure it is firmly attached and does not wobble.
- Connect the Rotary Module cable to the designated port on your Snapmaker 2.0 controller.
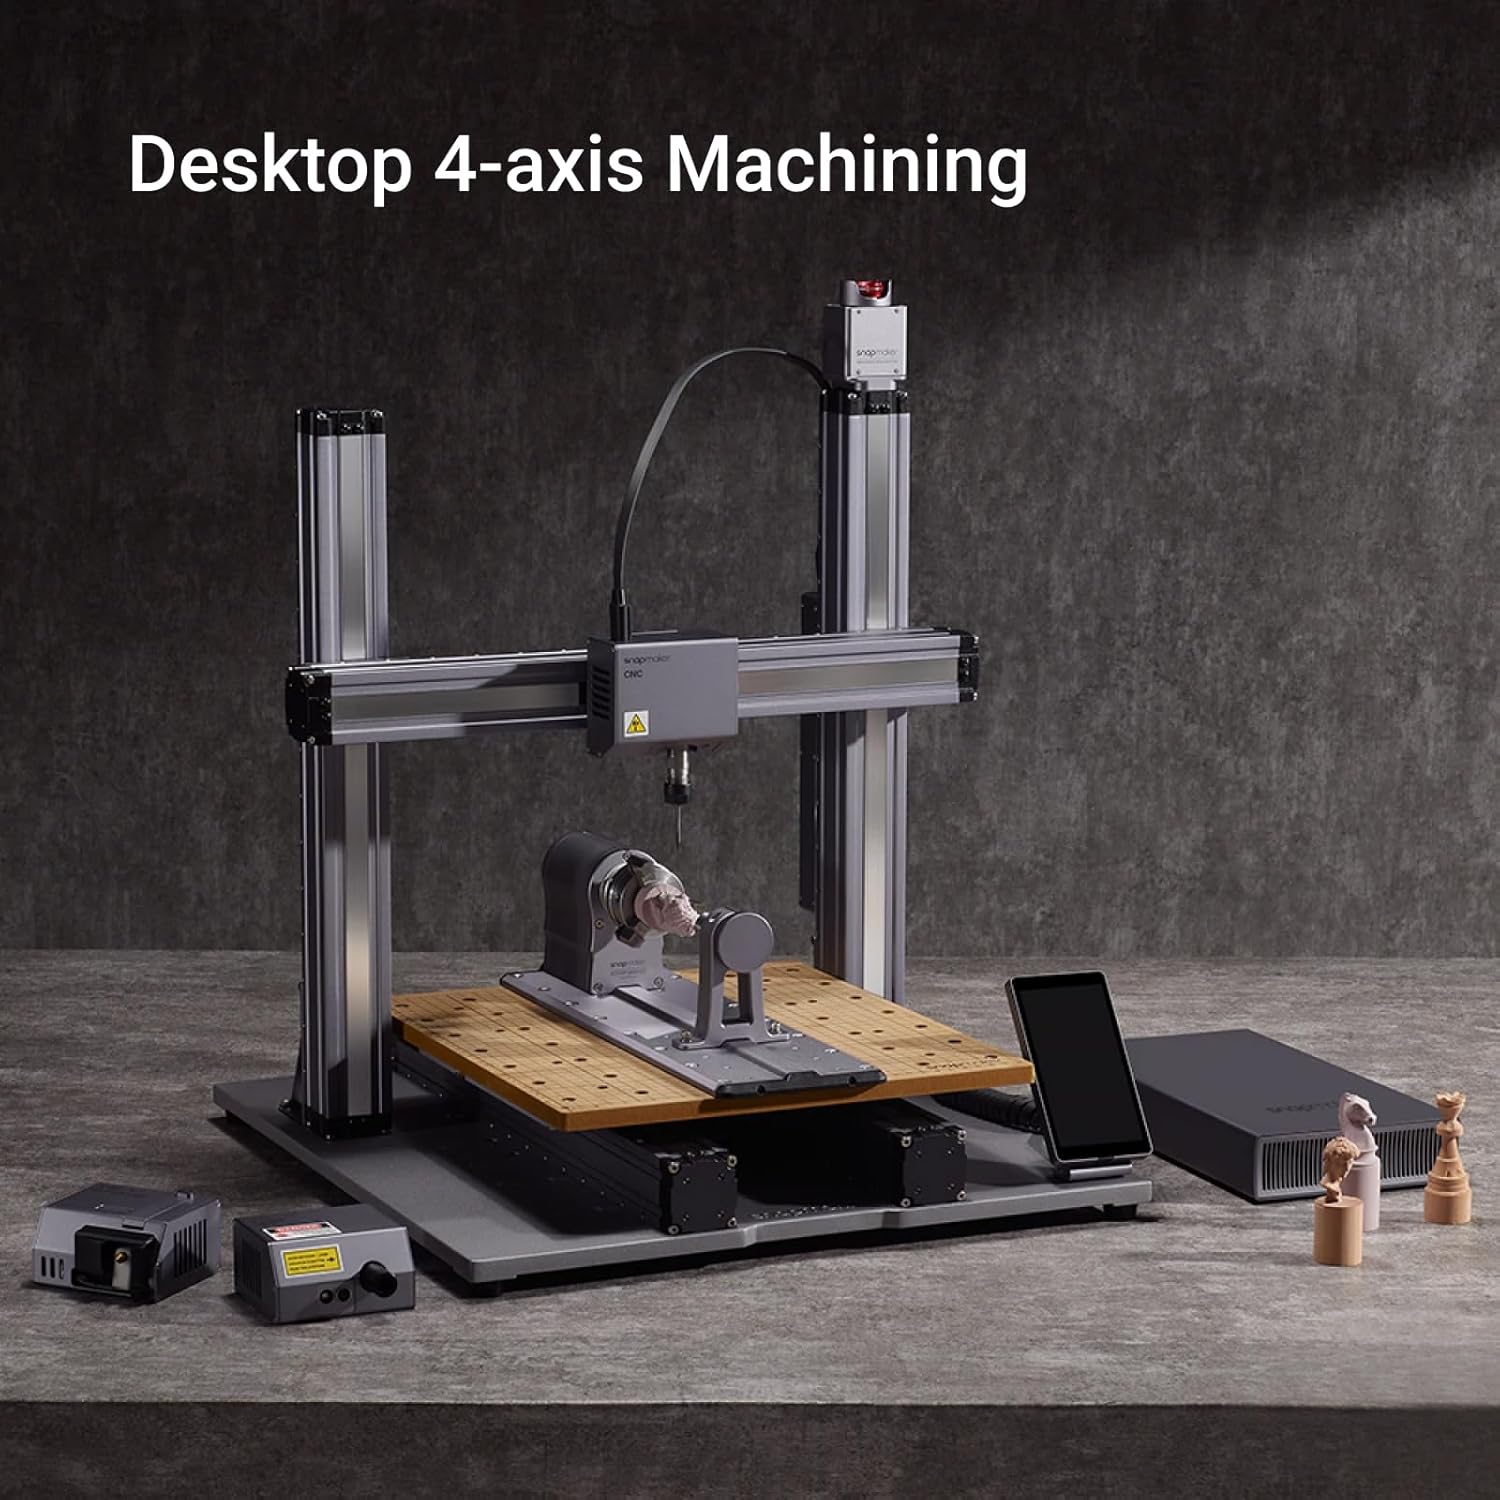
Image 3.2: A Snapmaker 2.0 machine with the Rotary Module correctly installed for 4-axis machining.

Зураг 3.3: Дээрээс доош view illustrating the Rotary Module's placement on the Snapmaker 2.0 work platform.
4. Ашиглалтын заавар
This section details the operational aspects of the Rotary Module for CNC carving and laser engraving.
4.1 Software Setup (Snapmaker Luban)
The Snapmaker Luban software is essential for preparing and executing 4-axis projects. Ensure you have the latest version installed.
- Launch Snapmaker Luban and select the 4-axis CNC or Rotary Laser engraving workspace.
- Import your 3D model (e.g., STL files) into the software.
- Configure the project settings, including material type, toolpaths, and rotation parameters. Luban supports advanced 4-axis linkage, allowing simultaneous movement of X, Y, Z, and B axes.
- Generate the G-code and transfer it to your Snapmaker 2.0 machine.

Image 4.1: Screenshot of Snapmaker Luban software demonstrating 4-axis project setup and preview.
4.2 Loading Workpieces
Securely mount your workpiece onto the Rotary Module's 3-jaw chuck and tailstock.
- Open the jaws of the 3-jaw chuck and insert one end of your cylindrical workpiece.
- Tighten the chuck jaws to firmly grip the workpiece.
- Adjust the tailstock to support the other end of the workpiece, ensuring it is centered and stable. The tailstock center holds objects securely in place.
- Verify that the workpiece is level and securely held before starting any operation.

Image 4.2: Diagram illustrating the secure mounting of a workpiece using the 3-jaw chuck and tailstock.
4.3 Rotary CNC Carving
The Rotary Module excels at creating intricate three-dimensional objects.
- Supported materials for CNC carving include wood, tooling and modeling board, plastic, bamboo, and wax.
- The module offers 360° continuous rotation with a maximum angular speed of 45° per second.
- Precise control options are available on the touchscreen, ranging from 0.2, 1, and 5-degree rotations.

Зураг 4.3: Хуучинample of rotary CNC carving creating a detailed sculpture from a block of material.
4.4 Rotary Laser Engraving
Utilize the Rotary Module for precise laser engraving on cylindrical objects.
- Supported materials for laser engraving include wood, leather, plastic, fabric, paper, and non-transparent acrylic.
- Ensure proper safety precautions are taken when operating the laser module, including wearing protective eyewear.
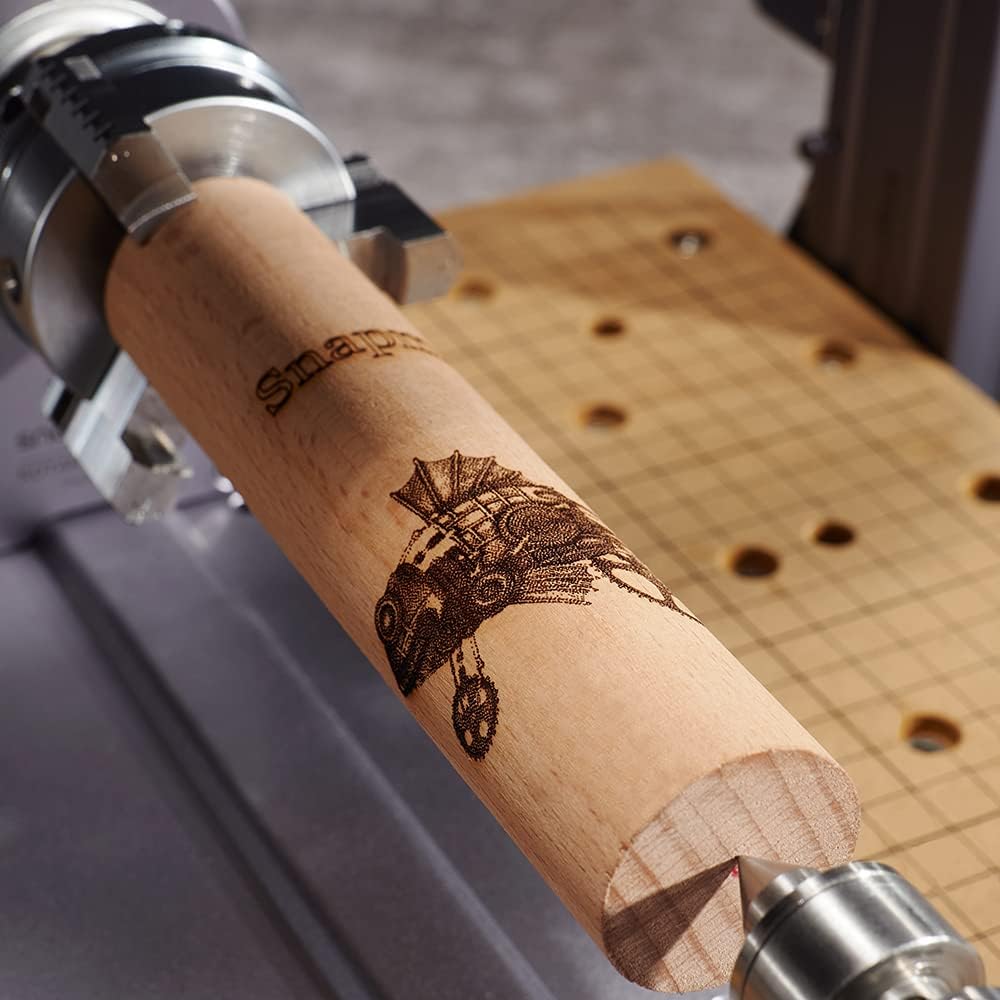
Image 4.4: A wooden cylinder undergoing rotary laser engraving, showcasing intricate design capabilities.
5. Засвар үйлчилгээ
Regular maintenance ensures the longevity and optimal performance of your Rotary Module.
5.1 Цэвэрлэгээ
- After each use, especially after CNC carving, clean any dust, chips, or debris from the module using a soft brush or compressed air.
- Wipe down the exterior surfaces with a dry, lint-free cloth. Avoid using harsh chemicals or abrasive materials.
5.2 Тосолгоо
- Periodically check the moving parts, such as the chuck jaws and tailstock mechanism, for smooth operation.
- Apply a small amount of light machine oil or grease to these components if necessary, following the recommendations in the main Snapmaker 2.0 manual.
5.3 Хяналт шалгалт
- Regularly inspect all screws and connections to ensure they are tight. Retighten any loose fasteners.
- Check cables for any signs of wear or damage. Replace damaged cables immediately.
6. Алдаа засах
This section addresses common issues you might encounter with the Rotary Module.
6.1 Rotary Module Not Responding
- Холболтуудыг шалгах: Ensure the Rotary Module cable is securely connected to both the module and the Snapmaker 2.0 controller.
- Програм хангамжийг таних: Verify that Snapmaker Luban recognizes the Rotary Module. Restart the software and the machine if necessary.
- Програм хангамжийн шинэчлэлт: Ensure your Snapmaker 2.0 and Rotary Module have the latest firmware installed.
6.2 Inaccurate Machining/Engraving
- Ажлын хэсгийн тогтвортой байдал: Ensure the workpiece is firmly secured in both the 3-jaw chuck and the tailstock. Any movement can lead to inaccuracies.
- Шалгалт тохируулга: Perform a calibration check for the Rotary Module if available in the Snapmaker Luban software or machine settings.
- Tool/Laser Focus: For CNC, ensure the carving bit is sharp and correctly installed. For laser, verify the laser focus is properly set for the material.
- G-code Errors: Review your G-code and project settings in Snapmaker Luban for any potential errors or incorrect parameters.
6.3 Хэт их дуу чимээ, чичиргээ
- Сул бүрэлдэхүүн хэсгүүд: Check all mounting screws and ensure the Rotary Module is securely attached to the Snapmaker 2.0 platform.
- Workpiece Imbalance: An unbalanced workpiece can cause vibrations. Ensure the workpiece is as centered as possible.
- Тосолгоо: Apply lubrication to moving parts as described in the Maintenance section if they appear dry or stiff.
7. Техникийн үзүүлэлтүүд
Detailed technical specifications for the Snapmaker 2.0 Rotary Module A350T.
| Онцлог | Тодорхойлолт |
|---|---|
| Үйлдвэрлэгч | Snapmaker |
| Хэсгийн дугаар | 71012 |
| Зүйлийн жин | 9.88 фунт |
| Багцын хэмжээ | 18.75 x 9 x 9 инч |
| Хэмжээ | Artisan/A350T Rotary Module |
| Gearing Type | Strain Wave Gearing |
| Speed Reducer Ratio | 100:1 |
| Minimum Angle Control | 0.1° |
| Хамгийн их өнцгийн хурд | секундэд 45° |
8. Баталгаат хугацаа ба дэмжлэг
For warranty information and technical support, please refer to the official Snapmaker webсайт эсвэл харилцагчийн үйлчилгээтэй шууд холбогдоно уу.
- Албан ёсны Webсайт: зочилно уу www.snapmaker.com for the latest support resources, FAQs, and contact information.
- Харилцагчийн үйлчилгээ: For specific issues or warranty claims, please reach out to Snapmaker's customer support team through their webсайт.


