1. Бүтээгдэхүүн дууссанview
The Waveshare RP2040-Zero is a compact, high-performance microcontroller unit (MCU) board designed around the Raspberry Pi RP2040 chip. This board is ideal for a wide range of embedded applications, offering a powerful dual-core Arm Cortex M0+ processor with flexible clock speeds up to 133 MHz. It integrates 264KB of SRAM and 2MB of on-board Flash memory, providing ample resources for complex projects. Its castellated module design allows for direct soldering onto carrier boards, making it suitable for SMD applications. The inclusion of a modern USB-C connector enhances ease of use and connectivity.

Зураг 1: Урд view of the Waveshare RP2040-Zero Microcontroller Board.
2. Үндсэн шинж чанарууд
- RP2040 Microcontroller Chip: Designed by Raspberry Pi, featuring a dual-core Arm Cortex M0+ processor.
- Flexible Clock Speed: Operates up to 133 MHz.
- Санах ой: Equipped with 264KB of SRAM and 2MB of on-board Flash memory.
- USB-C холбогч: Modern and reversible connector for power and data.
- Castellated Module: Enables direct soldering to custom carrier boards for integrated designs.
- USB 1.1 дэмжлэг: Includes both device and host capabilities.
- Эрчим хүчний горимууд: Supports low-power sleep and dormant modes for energy efficiency.
- Програмчлал: Features drag-and-drop programming via mass storage over USB.
- GPIO зүү: 29 multi-function GPIO pins (20 via edge pinout, others via solder points).
- Дагалдах төхөөрөмжүүд: 2 × SPI, 2 × I2C, 2 × UART, 4 × 12-bit ADC, 16 × controllable PWM channels.
- Дотоод бүрэлдэхүүн хэсгүүд: Accurate clock and timer on-chip, temperature sensor, accelerated floating-point libraries.
- PIO төлөвийн машинууд: 8 × Programmable I/O (PIO) state machines for custom peripheral support.
3. Тохиргоо
3.1 Физик холболт
To begin using your Waveshare RP2040-Zero, connect it to your computer using a standard USB-C cable. The board will typically appear as a mass storage device, allowing for easy firmware upload. Ensure the cable is securely connected to both the board's USB-C port and your computer's USB port.

Figure 2: The RP2040-Zero board, showing the USB-C port for connection.
3.2 Pinout Diagram
Understanding the pinout is crucial for connecting external components and utilizing the board's full capabilities. The RP2040-Zero provides various GPIO pins, power pins (5V, 3V3, GND), and dedicated peripheral pins (SPI, I2C, UART, ADC, PWM). Refer to the diagram below for a detailed layout.
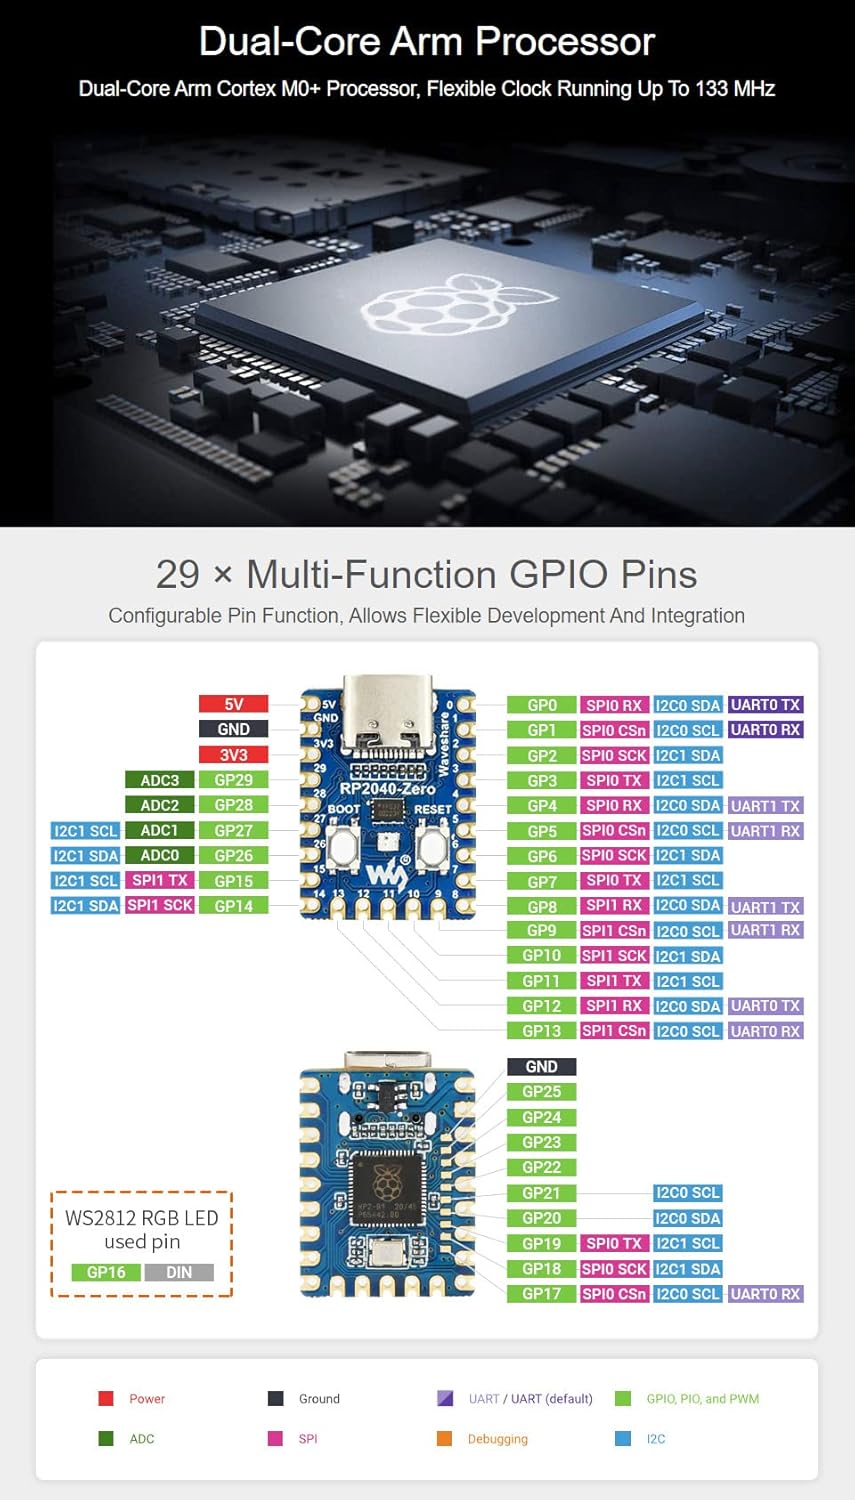
Figure 3: Detailed pinout diagram for the Waveshare RP2040-Zero, indicating multi-function GPIOs and power connections.
3.3 Programming Environment
The RP2040-Zero supports multiple programming environments, offering flexibility for developers:
- Pico C/C++ SDK: The official C SDK from Raspberry Pi, suitable for command-line development or integration with IDEs like Visual Studio Code and Eclipse.
- MicroPython: A full implementation of the Python 3 programming language optimized for embedded hardware like the Raspberry Pi Pico.
- Arduino IDE: Compatibility with the Arduino IDE allows for familiar development using Arduino sketches.
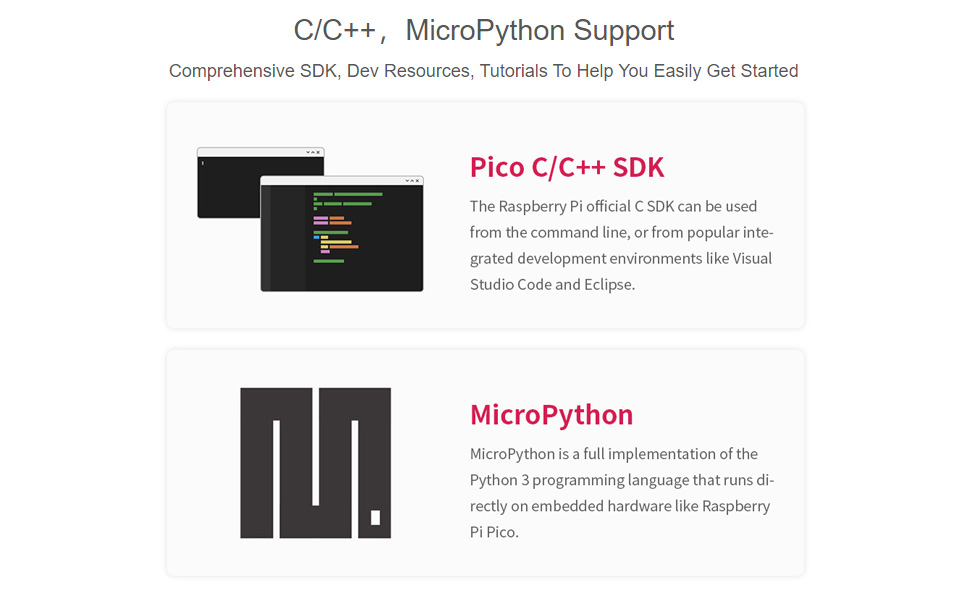
Figure 4: Illustration of C/C++ SDK and MicroPython support for the RP2040-Zero.
For a visual introduction to the RP2040-Tiny (a similar board from Waveshare), including its features and programming capabilities, please watch the video below:
Видео 1: Дууслааview of the RP2040 Tiny Kit, demonstrating its features and programming support.
4. Үйл ажиллагаа
4.1 Boot and Reset Buttons
The RP2040-Zero features two tactile buttons: BOOT and RESET. These buttons are essential for controlling the board's state and uploading new firmware.
- BOOT товчлуур: Press and hold this button while connecting the USB-C cable to enter USB mass storage mode, which allows you to drag-and-drop firmware files onto the board.
- RESET товч: Press this button to restart the microcontroller. This is useful after uploading new code or if the board becomes unresponsive.
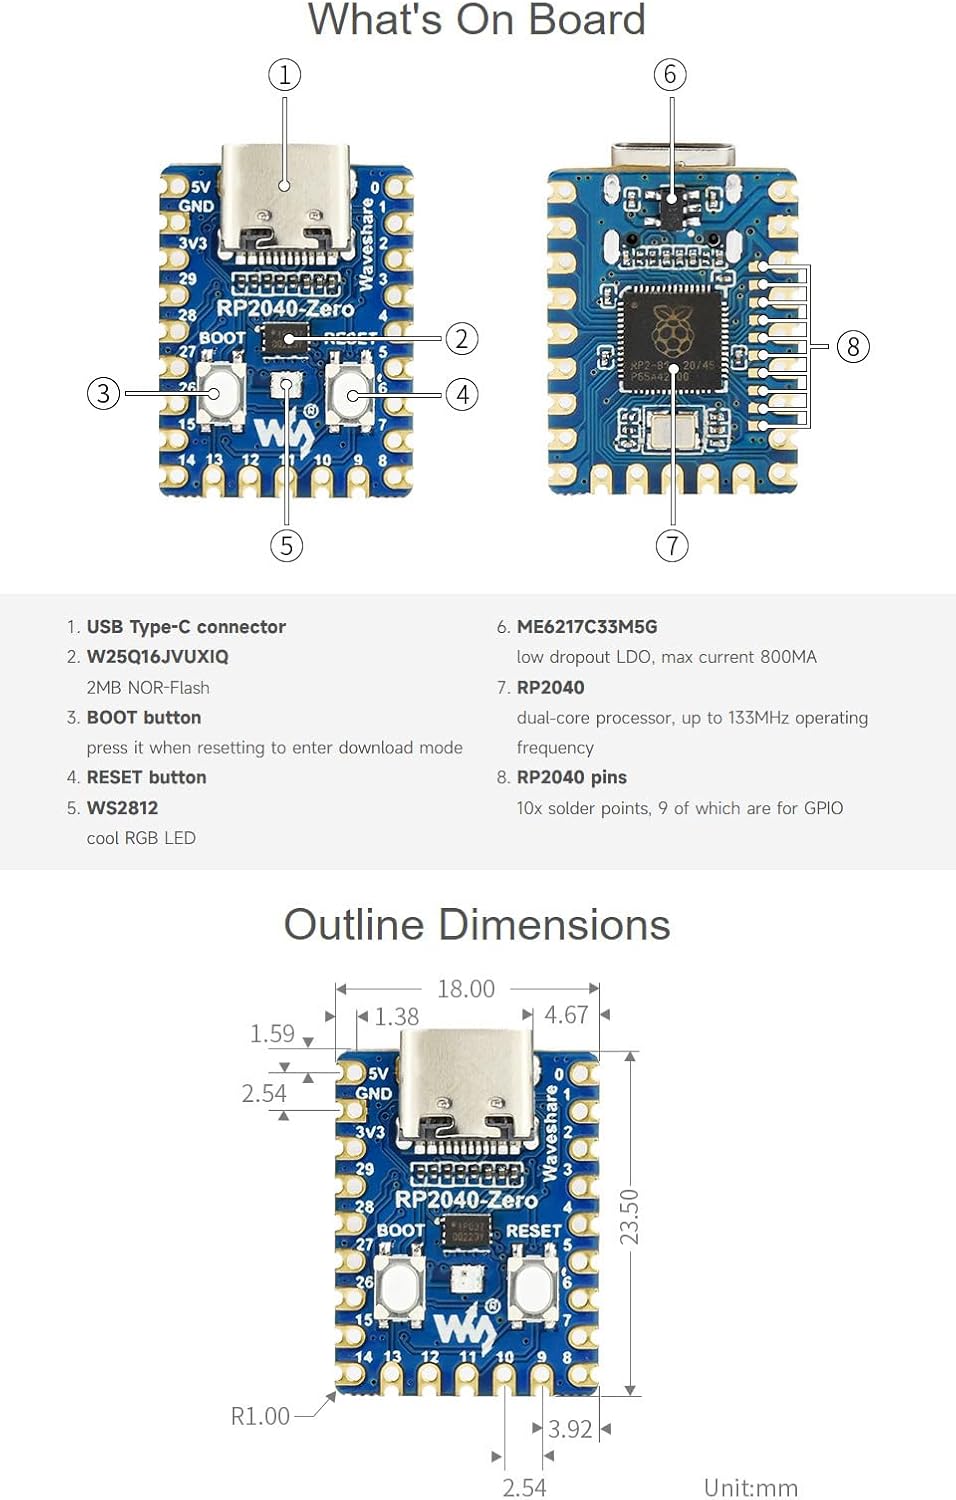
Figure 5: Labeled components of the RP2040-Zero board, highlighting the BOOT and RESET buttons.
4.2 Drag-and-Drop Programming
One of the most user-friendly features of the RP2040-Zero is its drag-and-drop programming capability. When the board is in bootloader mode (by holding the BOOT button during connection), it appears as a removable drive on your computer. You can then simply drag and drop a compiled firmware file (.uf2 format) onto this drive. The board will automatically flash the new firmware and reboot.
5. Засвар үйлчилгээ
To ensure the longevity and optimal performance of your Waveshare RP2040-Zero, follow these general maintenance guidelines:
- Болгоомжтой харьцах: Самбарыг унагаах эсвэл хэт их бие махбодийн стрессд оруулахаас зайлсхий.
- Статик хамгаалалт: Always handle the board in an anti-static environment or use appropriate grounding measures to prevent electrostatic discharge (ESD) damage.
- Хуурай байлгах: Богино холболт болон зэврэлт үүсгэж болзошгүй чийг болон шингэнээс хавтанг хамгаална.
- Цэвэр байдал: Самбарыг тоос шороо, хог хаягдлаас цэвэр байлга. Шаардлагатай бол зөөлөн, хуурай сойз эсвэл шахсан агаар ашиглан цэвэрлэнэ үү.
- Зөв хадгалалт: When not in use, store the board in its original packaging or an anti-static bag in a cool, dry place.
6. Алдаа засах
If you encounter issues with your RP2040-Zero, consider the following troubleshooting steps:
- Компьютерт танигдаагүй самбар:
- Ensure the USB-C cable is fully inserted and functional. Try a different cable or USB port.
- Verify the board is in bootloader mode (hold BOOT button while connecting USB).
- Check if necessary drivers are installed for your operating system (though often not required for RP2040).
- Програм хангамжийн байршуулалтын алдаа:
- Confirm the firmware file is in the correct .uf2 format.
- Ensure the board is in bootloader mode before dragging the file.
- Check for sufficient free space on the board's flash memory (if applicable for your specific firmware).
- Code Not Running as Expected:
- Double-check your code for syntax errors or logical flaws.
- Verify that all external components are correctly wired according to the pinout diagram.
- Use serial debugging to output messages and identify where the code might be failing.
- Эрчим хүчний асуудал:
- Ensure your USB power source provides adequate current.
- Inspect the board for any visible damage or short circuits.
7. Техникийн үзүүлэлтүүд
| Онцлог | Тодорхойлолт |
|---|---|
| Процессор | Dual-core Arm Cortex M0+ |
| CPU-ийн хурд | 133 МГц хүртэл |
| SRAM | 264 КБ |
| Флэш санах ой | 2 MB |
| USB холбогч | USB-C |
| USB стандарт | USB 1.1 (Device and Host support) |
| GPIO зүү | 29 (20 via edge pinout) |
| ADC сувгууд | 4 × 12-bit |
| PWM сувгууд | 16 × controllable |
| PIO төлөвийн машинууд | 8 |
| Үйлдлийн системийн дэмжлэг | FreeRTOS (and others via SDKs) |
| Хэмжээ | 23мм x 18мм (ойролцоогоор 0.90 x 0.70 инч) |
| Зүйлийн жин | 0.704 унц |
8. Дэмжлэг ба нөөц
For further assistance, detailed documentation, and community support, please refer to the official Waveshare resources:
- Waveshare Wiki/Documentation: Visit the Waveshare official website for comprehensive guides, tutorials, and technical specifications specific to the RP2040-Zero.
- Raspberry Pi Pico Documentation: As the RP2040-Zero is based on the RP2040 chip, much of the official Raspberry Pi Pico documentation and SDK information is directly applicable.
- Олон нийтийн форумууд: Engage with the broader Raspberry Pi and embedded systems communities for project ideas, troubleshooting tips, and shared knowledge.


