1. Танилцуулга
The Weber Genesis Smart SX-335 LP SS Liquid Propane Grill is designed to provide a comprehensive outdoor cooking experience. This manual provides essential information for the safe and efficient operation, maintenance, and troubleshooting of your new grill.

Зураг 1: The Weber Genesis Smart SX-335 LP SS Liquid Propane Grill. This image shows the full grill unit with its stainless steel finish and black cabinet.
2. Аюулгүй байдлын чухал мэдээлэл
АНХААРУУЛГА: Эдгээр зааврыг дагаж мөрдөхгүй байх нь гал түймэр, дэлбэрэлт, шатах аюулд хүргэж болзошгүй бөгөөд энэ нь эд хөрөнгийн хохирол, хүний гэмтэл, үхэлд хүргэж болзошгүй юм.
- Шарах шүүгээг үргэлж гадаа, агааржуулалт сайтай газар ажиллуул.
- Энэ болон бусад хэрэгслийн ойролцоо бензин болон бусад шатамхай уур, шингэнийг бүү хадгал.
- Төхөөрөмжийн талбайг цэвэр, шатамхай материал, бензин болон бусад шатамхай уур, шингэнээс хол байлга.
- Шаталтын болон агааржуулалтын агаарын урсгалд саад болохгүй.
- Keep any electrical supply cord and fuel supply hose away from heated surfaces.
- Хэрэглэх бүрийн өмнө хийн алдагдал байгаа эсэхийг үргэлж шалгаарай.
- Хоол хийхдээ шарах шүүгээ хэзээ ч хараа хяналтгүй орхиж болохгүй.
- Хүүхдүүд болон тэжээвэр амьтдыг гриллээс үргэлж хол байлга.
- Халуун бүрэлдэхүүн хэсгүүдтэй ажиллахдаа хамгаалалтын бээлий өмс.
3. Хайрцагт юу байна
Таны Weber Genesis Smart SX-335 LP SS grill package includes the following components:
- Weber Genesis Smart SX-335 LP SS Gas Grill Unit
- Cooking Grates (porcelain-enameled cast iron)
- Flavorizer Bars
- Grease Management System (including drip tray and catch pan)
- Side Burner (integrated)
- Weber Connect Smart Grilling Hub (integrated)
- Propane Tank (sold separately, but required for operation)
- Зааварчилгааны гарын авлага

Зураг 2: The Weber Genesis Smart SX-335 LP SS grill with its lid closed, showcasing the stainless steel finish and control panel.
4. Тохиргоо
4.1 Угсралт
Assembly of your Weber Genesis Smart SX-335 LP SS grill is required. For detailed, step-by-step interactive 3D instructions, download the free BILT app on your mobile device. This app provides visual guidance for each step of the assembly process.
Video 1: BILT App - Step by Step Interactive Assembly Instructions. This video demonstrates the interactive 3D assembly guide available through the BILT app for the Weber Genesis мах шарах.
Ensure all parts are accounted for before beginning assembly. It is recommended to have a second person assist with assembly due to the size and weight of some components.
4.2 Connecting the Liquid Propane Tank
- Шатаагчийг хянах бүх товчлуурууд OFF байрлалд байгаа эсэхийг шалгаарай.
- Open the cabinet doors located beneath the grill.
- Place the liquid propane tank securely in the designated tank holder.
- Connect the regulator hose from the grill to the propane tank valve. Hand-tighten the connection firmly.
- Slowly open the propane tank valve fully.
- Check for any gas leaks using a soapy water solution on all connections. Bubbles indicate a leak. If a leak is detected, close the tank valve, tighten connections, and re-test. If the leak persists, do not use the grill and contact customer service.

Figure 3: A hand connecting the liquid propane tank to the grill's regulator hose inside the cabinet.
The grill cabinet features a hook that indicates the propane level by weight, helping you monitor remaining fuel.
4.3 Анхан шатны эхлүүлэлт
Before first use, operate the grill on high heat for 15 minutes with the lid closed to burn off any manufacturing residues. This process is called "seasoning" the grill.
5. Ашиглалтын заавар
5.1 Үндсэн шатаагчийг асаах
- Шарсан тагийг нээнэ үү.
- Пропан савны хавхлага бүрэн нээлттэй байгаа эсэхийг шалгаарай.
- Turn the leftmost main burner control knob to the START/HIGH position.
- Цахим гал асаах товчийг нэн даруй дарж, шатаагч асах хүртэл барина уу.
- Once the first burner is lit, turn on adjacent burners to the desired heat setting.
- If ignition does not occur within 5 seconds, turn the burner control(s) OFF, wait 5 minutes, and repeat the lighting procedure.

Зураг 4: Ойруулсан зураг Weber Genesis grill's control knobs, showing the ignition button and burner controls.
5.2 Temperature Control and Smart Features
The Weber Genesis Smart SX-335 LP SS features integrated Weber Connect smart technology for precise temperature monitoring. The digital display on the side table shows real-time food temperatures from connected probes.
- Weber Connect App: -г татаж авах Weber Connect app to your smartphone for remote monitoring, temperature alerts, and flip & serve notifications.
- Сорьцын хүчин чадал: The grill supports up to 2 temperature probes for monitoring different food items simultaneously.
- Powering the Display: The grill display can be powered by plugging it into an electrical outlet or by using a USB-certified, 10,000mAh rechargeable power bank (sold separately) clipped under the side table.

Зураг 5: The Weber Connect smart display on the grill's side table, showing temperature readings, alongside a smartphone displaying the Weber Connect app with temperature alerts.
5.3 Using the Sear Zone
The extra-large sear zone is designed for high-heat searing to achieve perfect grill marks and lock in juices. To activate the sear zone, turn the dedicated sear zone burner knob to the HIGH position. Allow it to preheat for 5-10 minutes before placing food directly over it.
5.4 Using the Side Burner
The integrated side burner allows you to sauté vegetables, boil corn, or heat up sauces while grilling. To light the side burner, open its cover, turn the control knob to the START/HIGH position, and press the electronic ignition button until it ignites.

Зураг 6: The Weber Genesis grill with the side burner cover open, revealing the burner grate.
5.5 Weber Crafted Outdoor Kitchen Collection
Expand your culinary possibilities with the Weber Crafted Outdoor Kitchen Collection. By replacing a cooking grate with custom-fit grillware (sold separately), you can sear, roast, bake, steam, and stir-fry. The grill locker provides convenient storage for these accessories.

Зураг 7: The Weber Crafted grillware frame installed in the grill, ready to accommodate various inserts.

Figure 8: A person stir-frying vegetables and rice in a wok insert on the Weber Genesis мах шарах.
5.6 Cooking Techniques
- Шууд халаалт: Use direct heat for searing, grilling smaller items, or cooking foods that require quick cooking.
- Шууд бус дулаан: For larger cuts of meat, poultry, or delicate items, use indirect heat. Turn off the burners directly beneath the food and use adjacent burners to maintain the desired temperature. The expandable top cooking grate provides additional space for indirect cooking.

Figure 9: Two whole chickens cooking on the main grates, with temperature probes inserted, demonstrating indirect cooking.

Figure 10: Grilled shrimp, mixed vegetables in a basket, and toasted bread on the upper warming rack, illustrating diverse cooking options.
6. Засвар үйлчилгээ
6.1 Хоол хийх сараалжыг цэвэрлэх
After each use, while the grates are still warm, use a grill brush to scrape off any food residue. For a deeper clean, remove the grates and wash them with warm, soapy water.
6.2 Өөх тосны менежментийн систем
The improved grease management system simplifies cleaning. Simply pull the grease tray out from the front of the grill and scrape away accumulated grease and debris. Replace the disposable catch pan as needed.
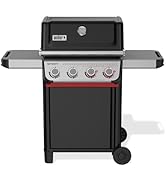
Figure 11: A hand demonstrating the removal and cleaning of the grease management system's pull-out tray.
6.3 Шарсан махны таг
Protect your grill from the elements by using a weather-resistant grill cover when not in use. This helps prolong the life and appearance of your grill.
7. Алдаа засах
| Асуудал | Боломжит шалтгаан | Шийдэл |
|---|---|---|
| Шатаагч асахгүй байна | Хийн урсгал байхгүй, шатаагч бөглөрсөн, гал асаагч буруу байна. | Check propane tank connection and fuel level. Clean burner ports. Check igniter electrode. |
| Тэгш бус халаалт | Clogged burner ports, low fuel, wind. | Clean burner ports. Ensure adequate fuel. Position grill away from strong winds. |
| Бага дөл эсвэл дөл байхгүй | Low fuel, regulator bypass, gas leak. | Check fuel level. Reset regulator by turning off all gas, disconnecting, waiting 1 minute, and reconnecting. Check for leaks. |
| Weber Connect display not working | No power, battery low (if using power bank). | Ensure plugged into outlet or power bank is charged and connected. |
For further assistance, refer to the full troubleshooting guide in your printed manual or contact Weber Хэрэглэгчийн үйлчилгээ.
8. Техникийн үзүүлэлтүүд
| Онцлог | Дэлгэрэнгүй |
|---|---|
| Брэнд | Weber |
| Загварын нэр | Genesis Smart SX-335 LP SS |
| Загварын дугаар | 35600001 |
| Бүтээгдэхүүний хэмжээс | 35.5"D x 31"W x 30.75"H |
| Зүйлийн жин | 209 фунт |
| Өнгө | Зэвэрдэггүй ган |
| Шатахууны төрөл | Шингэн пропан (LP) |
| Үндсэн шатаагчийн тоо | 3 |
| Халаалтын хүч | 13000 Британийн дулааны нэгж (BTU) |
| Хоол хийх гадаргуугийн талбай | 787 квадрат инч |
| Онцлог шинж чанар | Grease Management System, Weber Connect Smart Technology, Sear Zone, Side Burner, Expandable Top Cooking Grate, Grill Locker |
| Материал | Зэвэрдэггүй ган |
| Угсрах шаардлагатай | Тиймээ |
9. Баталгаат хугацаа ба дэмжлэг
The Weber Genesis Smart SX-335 LP SS Liquid Propane Grill comes with a 12 жилийн хязгаарлагдмал баталгаат хугацаа. For detailed warranty information, please refer to the warranty card included with your product or visit the official Weber webсайт.
For customer support, technical assistance, or to order replacement parts, please visit the Weber Store on Amazon эсвэл холбоо барина уу Weber directly through their official channels.
Холбогдох баримт бичиг - SX-335
 |
Weber Genesis S-335 LP Gas Grill Assembly Guide угсралтын иж бүрэн зааварчилгаа Weber Genesis S-335 LP шингэн пропан хийн мах шарах. Энэхүү гарын авлага нь дэлгэрэнгүй алхмууд, эд ангиудын жагсаалт, багаж хэрэгслийн шаардлага, аюулгүй байдлын чухал мэдээллийг агуулсан бөгөөд бүх агуулгыг ойлгомжтой, хүртээмжтэй байлгах үүднээс англи хэл дээр толилуулж байна. |
 |
Weber Genesis E-325, E-335, EP-335 хурдан эхлүүлэх гарын авлага: Шарсан мах хийх заавар Энэхүү хурдан эхлүүлэх гарын авлага нь чухал зааварчилгааг өгдөг Weber Genesis E-325, E-335, EP-335 шарсан мах. Шууд болон шууд бус хоол хийх аргуудыг сурч, шарагчийн тохиргоог ойлгож, дагалдах хэрэгслийг ашиглан шарах, шарсан үр дүнг оновчтой болгоно. Домог дүрс болон хоол хийх ширээ багтана. |
 |
Weber Genesis II EX-335 SX-335 Assembly Guide цогц угсралтын гарын авлага Weber Genesis II EX-335 and SX-335 LP gas grills, providing step-by-step instructions, safety tips, and essential setup information for a successful build. |
 |
Weber Genesis II EX-335 SX-335 Assembly Guide цогц угсралтын гарын авлага Weber Genesis II EX-335 and SX-335 propane gas grills. Includes step-by-step instructions and parts lists. |
 |
Weber Genesis II EX-335 / SX-335 эзэмшигчийн гарын авлага - Шарах гарын авлага иж бүрэн хэрэглэгчийн гарын авлага WebGenesis II EX-335 болон SX-335 хийн шарагч. GS4 шарах системийн талаар мэдэж аваарай, WEBER CONNECT technology, safety, installation, operation, maintenance, and troubleshooting for optimal outdoor cooking. |
 |
Weber Genesis E-315/E-415 LP Assembly Guide Comprehensive step-by-step assembly instructions for the Weber Genesis E-315 and E-415 LP gas grills, including parts identification, assembly procedures, and important pre-assembly and post-assembly information. |