1. Танилцуулга
Худалдан авалт хийсэнд баярлалааasing the IRRADIO VDP-4600HDW LCD/LED Projector. This manual provides essential information for the safe and efficient operation of your device. Please read it thoroughly before use and retain it for future reference.
2. Аюулгүй ажиллагааны заавар
- Агааржуулалтын нүхийг бүү бөглөөрэй. Хэт халалтаас сэргийлж, проекторын эргэн тойронд хангалттай агаарын урсгалыг хангана уу.
- l байх үед проекторын линз рүү шууд харж болохгүйamp тод гэрэл нь нүдийг гэмтээж болзошгүй тул асаалттай байна.
- Проекторыг ус болон бусад шингэнээс хол байлга. Дулаан орчинд ажиллуулж болохгүй.amp эсвэл нойтон нөхцөл.
- Зөвхөн проектортой хавсаргасан тэжээлийн адаптерийг ашиглана уу.
- Проекторыг өөрөө засах гэж бүү оролдоорой. Бүх үйлчилгээг мэргэшсэн боловсон хүчинд шилжүүлээрэй.
- Проекторыг унахаас сэргийлж тогтвортой, тэгш гадаргуу дээр байрлуул.
3. Багцын агуулга
Таны багцад бүх зүйл байгаа эсэхийг шалгана уу:
- IRRADIO VDP-4600HDW Projector
- Алсын удирдлага
- Цахилгаан кабель
- HDMI кабель
- АВ кабель
- Хэрэглэгчийн гарын авлага
4. Бүтээгдэхүүн дууссанview
4.1. Проекторын бүрэлдэхүүн хэсгүүд

Зураг 4.1: Ерөнхийдөө view of the IRRADIO VDP-4600HDW Projector. This image displays the projector from an angled perspective, highlighting its compact design and the lens on the front left side, with ventilation grilles and control buttons visible on the top and sides.

Зураг 4.2: Урд view of the projector. This image focuses on the large projection lens on the left, with the IRRADIO logo and ventilation grilles on the right side of the front panel.

Зураг 4.3: Арын view of the projector. This image shows the VGA port, focus adjustment knob, and keystone correction knob on the rear panel, along with additional ventilation.
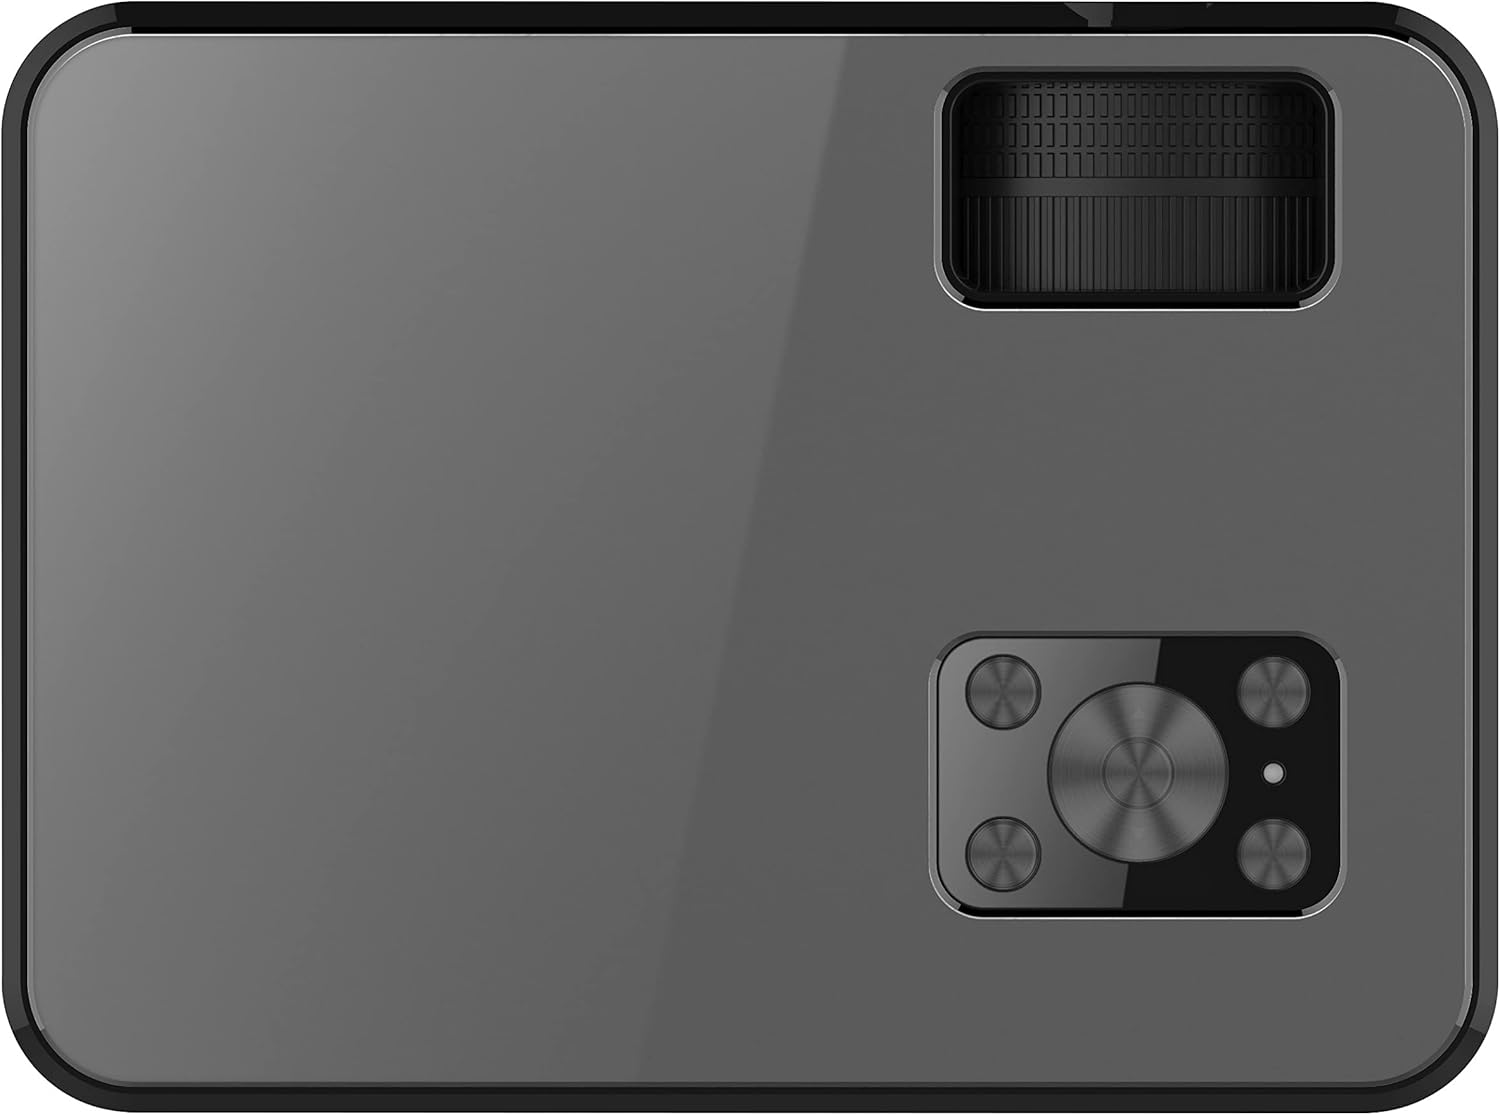
Зураг 4.4: Топ view of the projector. This image displays the control panel with navigation buttons (up, down, left, right, OK), source, menu, and exit buttons, along with the power button and volume controls.

Зураг 4.5: Хажуу тал view of the projector showing input/output ports. This image highlights two HDMI ports, AV input, two USB ports, and a 3.5mm headphone jack (audio out).

Зураг 4.6: Эсрэг тал view of the projector. This image shows the power input port and additional ventilation grilles.

Зураг 4.7: Доод талд view of the projector. This image displays the mounting points for ceiling installation and rubber feet for stable placement on a flat surface.
4.2. Алсын удирдлага
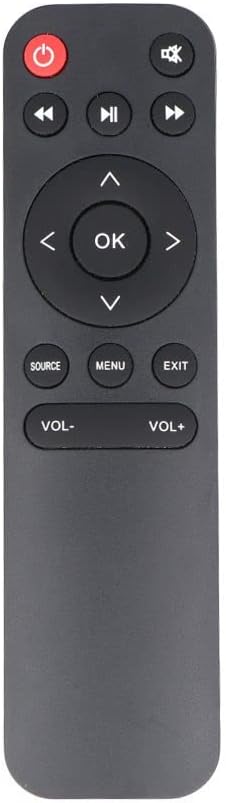
Зураг 4.8: The remote control for the IRRADIO VDP-4600HDW Projector. It features buttons for power, mute, navigation (up, down, left, right, OK), source selection, menu, exit, and volume control.
4.3. Ports and Controls Overview
- Цахилгаан товч: Проекторыг асаах/унтраах.
- Линз: Зургийг проекцлодог.
- Фокус бөгж: Зургийн тодорхой байдлыг тохируулна.
- Түлхүүр чулууны залруулга: Зургийн гажуудлыг тохируулна.
- HDMI портууд (x2): Connect to HDMI-enabled devices (laptops, gaming consoles, Blu-ray players).
- USB портууд (x2): Медиа тоглуулахын тулд USB хөтчүүдийг холбоно уу.
- VGA порт: VGA гаралттай компьютеруудтай холбогдоно уу.
- AV порт: Connect to older devices using composite video.
- 3.5 мм аудио гаралт: Гадаад чанга яригч эсвэл чихэвчийг холбоно уу.
- IR хүлээн авагч: Алсын удирдлагын дохионы хувьд.
5. Тохиргоо
5.1. Байрлуулах
Place the projector on a stable, flat surface or mount it to the ceiling. Ensure the projector is positioned directly in front of the projection screen or wall. The optimal projection distance ranges from 1.52 meters to 3.48 meters, yielding a screen size between 50 and 120 inches.
- Урд талын проекц: Place the projector in front of the screen.
- Арын проекц: Проекторыг тунгалаг дэлгэцийн ард байрлуул.
- Таазны бэхэлгээ: The projector can be inverted and mounted to the ceiling. Adjust settings in the OSD menu for inverted projection.
5.2. Эрчим хүчний холболт
- Цахилгааны кабелийг проекторын цахилгаан оролтын порт руу холбоно уу.
- Plug the other end of the power cable into a standard electrical outlet (220V AC, 50Hz).
- Проектор эсвэл алсын удирдлага дээрх цахилгаан товчийг дарж асаана уу.
5.3. Фокус ба гол тулгуурын тохируулга
- Проектороо асаагаад зураг харуулна уу.
- -г эргүүл Фокус цагираг (located near the lens) until the image appears sharp and clear.
- -ийг тохируулна уу Тулгуур чулууг засах knob (located on the rear panel) to correct any trapezoidal distortion, making the image rectangular.
6. Ажиллаж байгаа
6.1. Асаах/унтраах
Төхөөрөмжийг асаах эсвэл унтраахын тулд проектор эсвэл алсын удирдлага дээрх асаах товчийг дарна уу.
6.2. Оролтын эх үүсвэрийн сонголт
Асаасны дараа товчийг дарна уу ЭХ СУРВАЛЖ button on the remote control or the projector's control panel to cycle through available input sources (HDMI1, HDMI2, USB1, USB2, VGA, AV).
6.3. Гадаад төхөөрөмжүүдийг холбох
- HDMI: Connect an HDMI cable from your device (e.g., laptop, game console) to one of the projector's HDMI ports. Select the corresponding HDMI input.
- VGA: Connect a VGA cable from your computer to the projector's VGA port. Select the VGA input.
- OF: Use the provided AV cable to connect to devices with composite video output. Select the AV input.
- USB: Insert a USB flash drive into a USB port. The projector's media player interface will appear automatically or can be accessed via the source menu.
6.4. Медиа тоглуулах (USB)
The integrated media player supports various formats:
- Зургийн формат: JPEG, BMP, PNG, MPO
- Видео форматууд: MPEG1, MPEG2, H.263, H.264, AVS, MJPEG, RV30, RV40, HEVC
- Аудио форматууд: MPEG1, MPEG2, LPCM, MP3
Дамжуулах files using the remote control's arrow keys and press OK сонгох.
6.5. Wireless Audio Connection
The projector features an integrated wireless audio function for connecting to external audio devices. Refer to the on-screen display (OSD) menu for specific pairing instructions. Typically, you will need to enable the wireless audio feature in the projector's settings and then pair it with your desired external speaker or headphone.
7. Засвар үйлчилгээ
7.1. Линз цэвэрлэх
Use a soft, lint-free cloth and a specialized lens cleaning solution to gently wipe the lens. Avoid abrasive materials or excessive pressure.
7.2. Тоосны шүүлтүүр цэвэрлэх
Regularly check and clean the dust filters to ensure optimal airflow and prevent overheating. Use a soft brush or a vacuum cleaner with a brush attachment to remove dust from the ventilation grilles.
7.3. Хадгалах
When not in use for extended periods, store the projector in a cool, dry place, protected from dust and direct sunlight. Use the original packaging or a protective case.
8. Алдаа засах
- Эрчим хүчгүй: Цахилгааны кабель найдвартай холбогдсон, цахилгааны залгуур ажиллаж байгаа эсэхийг шалгаарай.
- Зураг байхгүй: Check the input source selection. Ensure the connected device is powered on and sending a signal. Verify cable connections.
- Бүдэг зураг: Adjust the focus ring. Ensure the projection distance is within the optimal range.
- Image Distorted: Чулууны засварыг тохируулна уу.
- Дуугүй: Check the volume settings on both the projector and the connected device. If using external speakers, ensure they are properly connected or paired via wireless audio.
- Алсын удирдлага ажиллахгүй байна: Replace the batteries. Ensure there are no obstructions between the remote and the projector's IR receiver.
9. Техникийн үзүүлэлтүүд
| Онцлог | Тодорхойлолт |
|---|---|
| Проекцийн систем | LCD panel with LED light source |
| Төрөлхийн тогтоол | 1920x1080 (Full HD 1080p) |
| Динамик тодосгогч харьцаа | 2000:1 |
| Гэрлийн эх үүсвэрийн тод байдал | 3000 люмен |
| LED Lamp Амьдрал | 50,000 цаг |
| Линз | Гараар анхаарлаа төвлөрүүлэх |
| Утасгүй аудио функц | Нэгдсэн |
| Холболт | 2x HDMI, 2x USB, VGA, AV Composite, 3.5mm Headphone Jack (output) |
| Харьцаа | 16:9 Native / 4:3 Compatible |
| Төслийн оновчтой хэмжээ | 50" - 120" |
| Проекцийн оновчтой зай | 1.52 м-ээс 3.48 м хүртэл |
| Проекцийн горимууд | Front, Rear, Ceiling (Front/Rear) |
| Аудио | 1x 3W Hi-Fi Speaker |
| Хөргөлтийн систем | Хос хөргөлтийн систем |
| OSD хэл | 23 хэл |
| Эрчим хүчний хангамж | 220V AC 50Hz (single phase) |
| Жин | 1.4 кг |
| Хэмжээ (Ө x Ө x D) | 222 x 91 x 173 мм |
10. Баталгаат хугацаа ба дэмжлэг
Information regarding specific warranty terms and support contacts is not available in the provided product data. Please refer to the product packaging or the retailer's webбаталгаат мэдээлэл болон хэрэглэгчийн тусламжийн мэдээллийг авах сайт.


