Танилцуулга
This manual provides detailed instructions for the installation, operation, and maintenance of your HIKVISION DS-7616NXI-K1 16 Channel 8MP 4K Network Video Recorder (NVR). Please read this manual thoroughly before using the product to ensure proper and safe operation. Keep this manual for future reference.
Багцын агуулга
Савыг задлахдаа доор жагсаасан бүх зүйл байгаа бөгөөд сайн нөхцөлд байгаа эсэхийг шалгаарай.
- HIKVISION DS-7616NXI-K1 NVR Main Unit
- Эрчим хүчний адаптер
- USB хулгана
- Ethernet кабель
- SATA кабель (HDD холболтод зориулагдсан)
- HDMI Cable (USEWEll HDMI Included)
- Түргэн эхлүүлэх гарын авлага

Figure 1: Package Contents. The image displays the NVR unit, power adapter, USB mouse, Ethernet cable, SATA cables, and a quick start guide, all neatly arranged as they would appear upon unboxing.
Бүтээгдэхүүн дууссанview
Гол онцлогууд
- Supports up to 16 IP camera inputs.
- Advanced H.265+/H.265/H.264+/H.264 video formats for efficient storage and bandwidth usage.
- Equipped with Motion Detection 2.0 for enhanced security.
- Up to 160 Mbps incoming bandwidth to support multiple high-resolution cameras.
- AcuSense technology for intelligent analysis and reduced false alarms.
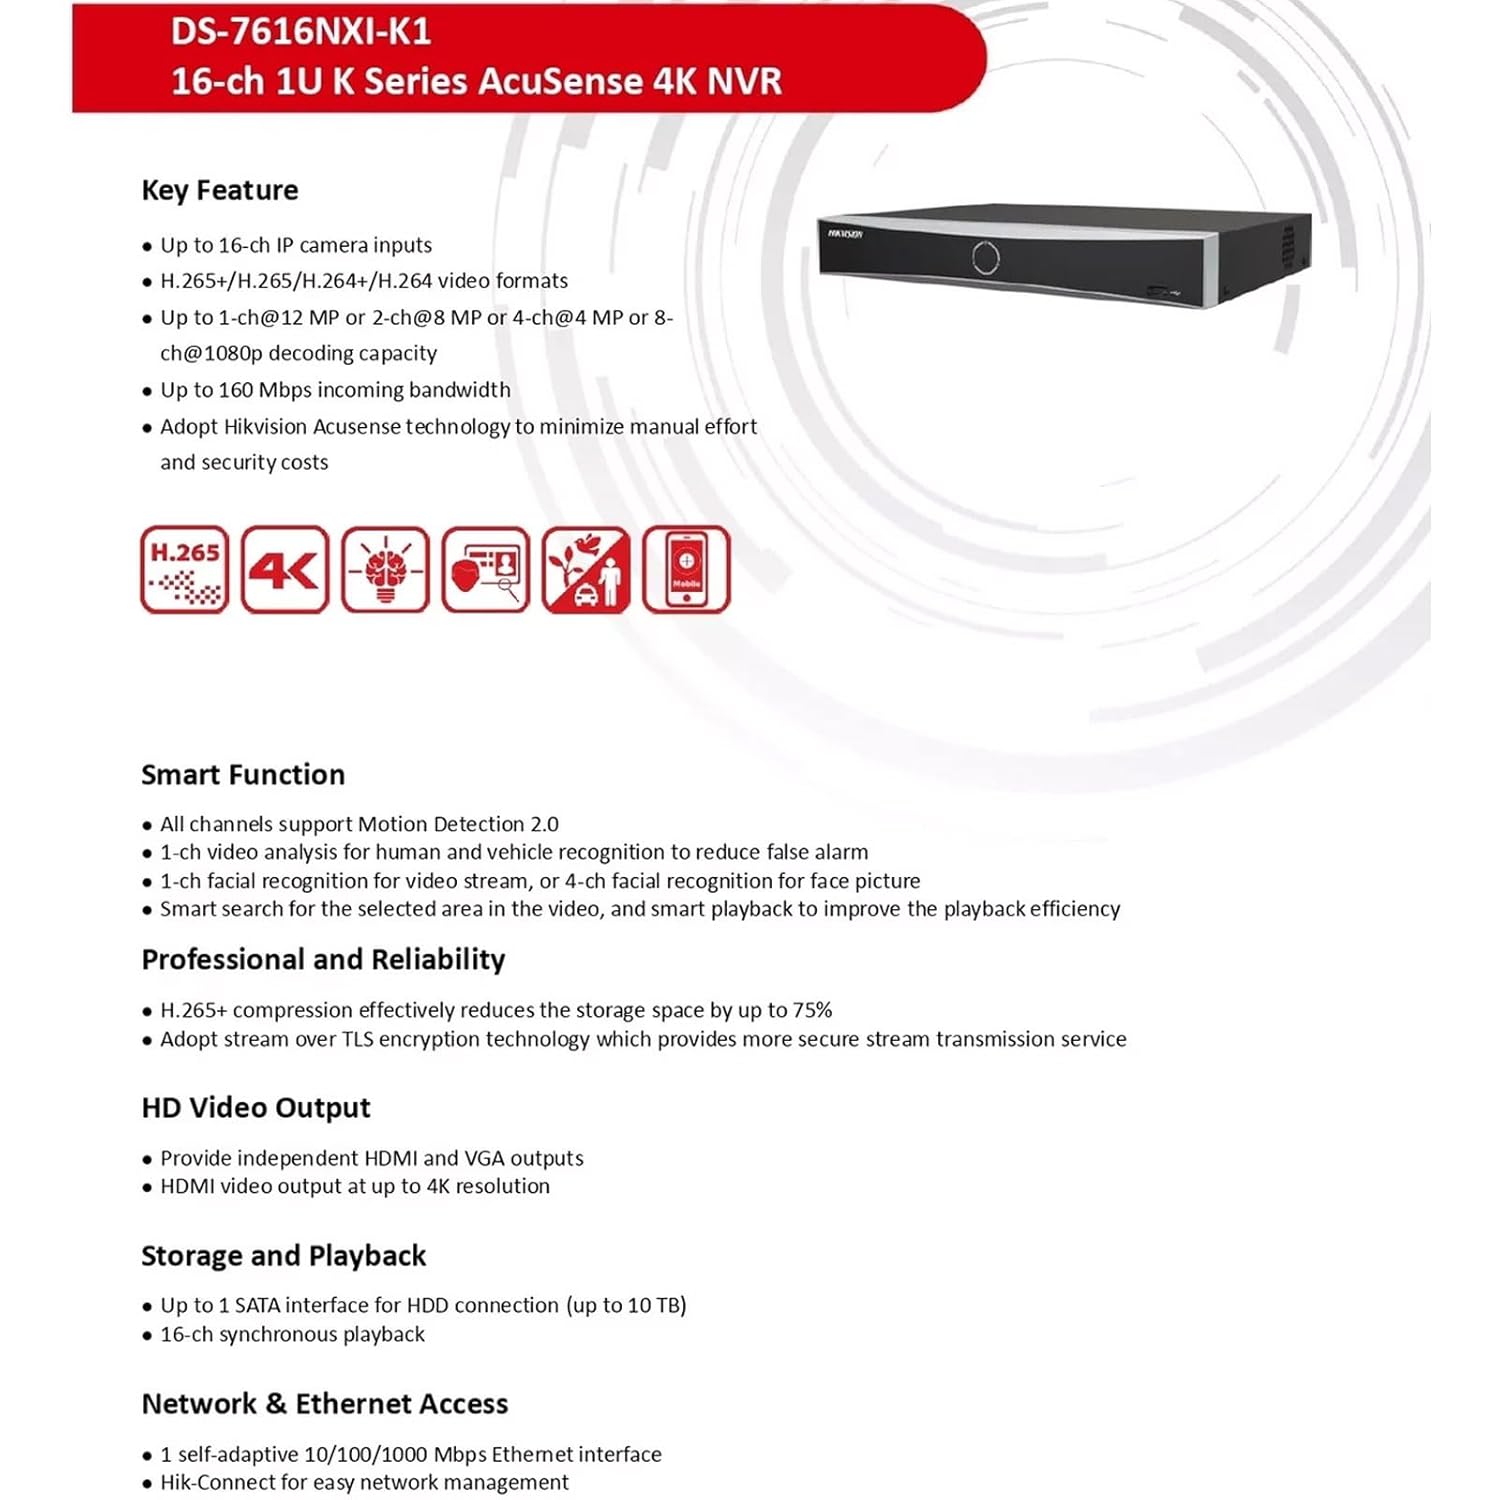
Figure 2: Key Features. This image highlights the main capabilities of the NVR, such as H.265+ compression, 4K resolution support, AcuSense technology, and various smart functions.
Физик интерфейс
The NVR features a well-organized rear panel with various ports for connectivity. Refer to the diagram below for a detailed layout.

Figure 3: Physical Interface. This diagram illustrates the rear panel of the NVR, labeling ports such as LAN, Audio In/Out, HDMI, VGA, USB, and Power Supply.
| Үгүй | Тодорхойлолт | Үгүй | Тодорхойлолт |
|---|---|---|---|
| 1 | LAN сүлжээний интерфейс | 6 | USB интерфейс |
| 2 | Аудио нэвтрэх | 7 | Цахилгаан хангамж |
| 3 | Аудио гарав | 8 | Цахилгаан унтраалга |
| 4 | HDMI интерфейс | 9 | GND |
| 5 | VGA интерфэйс |

Figure 4: NVR Front and Rear ViewЭнэ зураг тодорхой харуулж байна view of the NVR's front panel with its minimalist design and the rear panel showcasing all connectivity options.
Тохиргоо
Follow these steps to set up your HIKVISION NVR:
- Хатуу диск суурилуулах (заавал биш): If a hard drive is not pre-installed, open the NVR casing, connect the SATA power and data cables to the hard drive, and secure it within the NVR. Close the casing.
- Дэлгэцийг холбох: Connect a monitor to the NVR's HDMI or VGA output port using the provided HDMI cable or a VGA cable.
- Хулгана холбох: USB хулганыг NVR-ийн USB портуудын аль нэгэнд нь залгаарай.
- Сүлжээний холболт: Connect the NVR to your local network using an Ethernet cable. Ensure your network has internet access for remote viewшинж чанарууд.
- Асаах: Connect the power adapter to the NVR and then to a power outlet. Turn on the NVR using the power switch on the rear panel.
- Анхны тохиргоо: Follow the on-screen prompts to complete the initial setup, including setting up a password, network settings, and hard drive initialization.
- IP камеруудыг холбох: Connect your IP cameras to the same network as the NVR. The NVR will automatically search for and add compatible cameras. For non-PoE cameras, ensure they are powered separately and connected to the network.
Ашиглалтын заавар
Once the NVR is set up, you can begin monitoring and managing your surveillance system.
Амьд View болон Бичлэг
- Шууд нэвтрэх view interface from the connected monitor or via the Hik-Connect app/web интерфейс.
- Configure recording schedules and motion detection settings for each camera through the NVR's menu.
AcuSense Features
The NVR's AcuSense technology enhances security by providing intelligent detection capabilities:
- Хөдөлгөөн илрүүлэх 2.0: Reduces false alarms caused by environmental factors (e.g., rain, leaves) by accurately classifying human and vehicle targets.
- Нүүр царай таних: Supports face picture comparison and facial detection for specific applications.
- Периметрийн хамгаалалт: Utilizes deep learning algorithms to reduce false alarms in intrusion detection and line crossing scenarios.
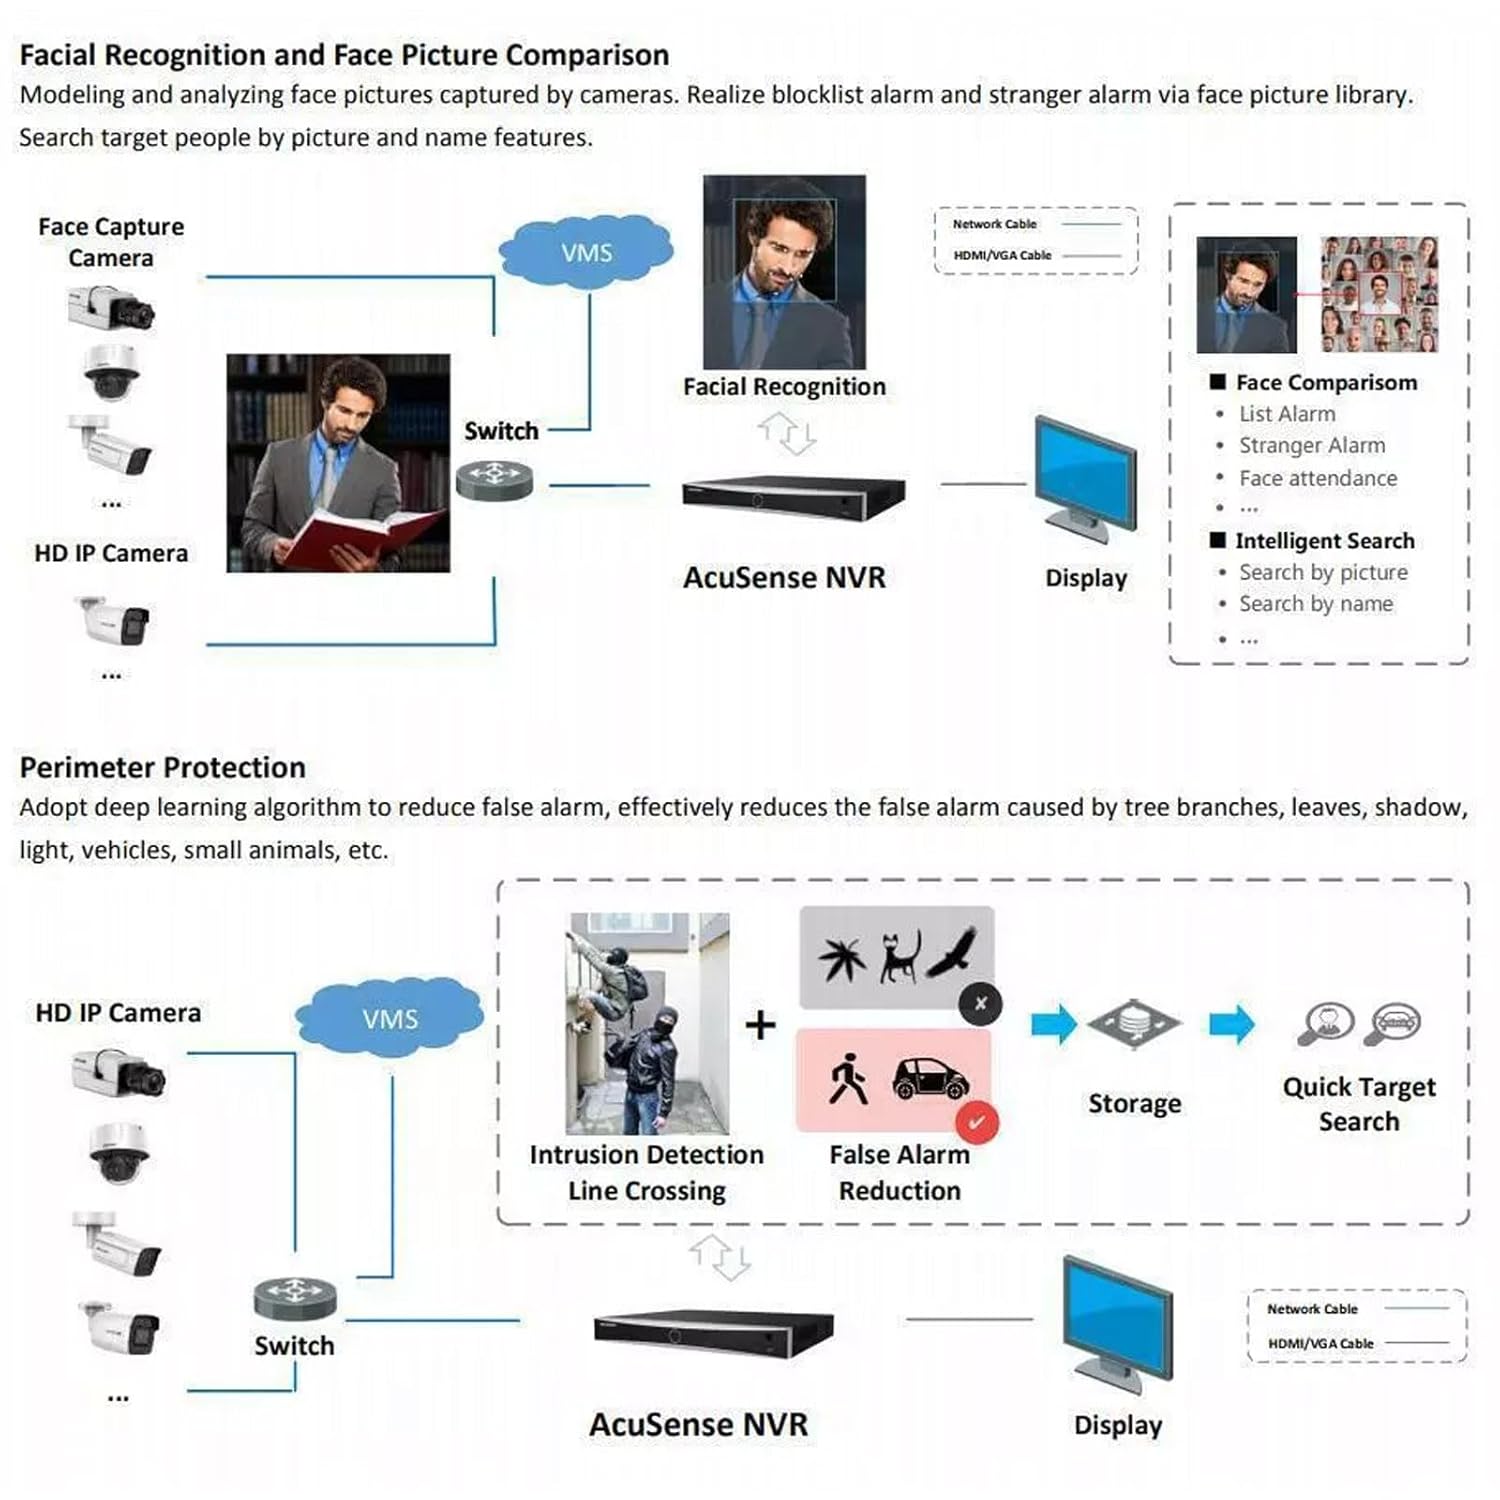
Figure 5: AcuSense Detection Capabilities. This image visually explains how AcuSense technology works for facial recognition and perimeter protection, showing the integration with cameras and the NVR.
Алсын хандалт
Utilize the Hik-Connect P2P function for easy remote management and live viewing from your mobile device or web хөтөч.
Засвар үйлчилгээ
Тогтмол засвар үйлчилгээ нь таны NVR системийн оновчтой гүйцэтгэл, урт наслалтыг баталгаажуулдаг.
- Цэвэрлэгээ: NVR-ийн гадна талыг зөөлөн, хуурай даавуугаар үе үе цэвэрлэж байгаарай. Агааржуулалтын нүхнүүд нь тоос шороо, бөглөрөлгүй байгаа эсэхийг шалгаарай.
- Програм хангамжийн шинэчлэлтүүд: Албан ёсны HIKVISION-г шалгана уу website for the latest firmware updates. Regularly updating the firmware can improve system stability and add new features.
- Хатуу дискний удирдлага: Monitor the health of your hard drive(s) through the NVR's system settings. Ensure sufficient storage space is available for recordings.
- Нөөцлөлтийн тохиргоо: NVR-ийнхээ тохиргооны тохиргоог USB диск эсвэл сүлжээний байршилд тогтмол нөөцөлж байгаарай.
Алдааг олж засварлах
Энэ хэсэгт танд тулгарч болох нийтлэг асуудлуудыг авч үзэх болно.
- Видео гаралт байхгүй: Check all cable connections (HDMI/VGA, power). Ensure the monitor is on and set to the correct input. Restart the NVR.
- Камерууд харагдахгүй байна: Verify that IP cameras are powered on and correctly connected to the network. Check network settings on both the NVR and cameras. Ensure cameras are added to the NVR.
- Сүлжээний холболтын асуудлууд: Confirm the Ethernet cable is securely connected. Check your router/switch status. Verify NVR network settings (IP address, gateway, DNS).
- Hard Drive Detection Issues: If the hard drive is not detected or shows errors, ensure it is properly connected inside the NVR. In some cases, an insufficient power supply to the NVR can cause HDD issues. Consider using a 12V 2A power adapter if the supplied 12V 1.5A adapter proves insufficient for your HDD.
- Хуурамч дохиолол: Adjust the sensitivity and detection zones for motion detection. Utilize AcuSense features (Motion Detection 2.0, Perimeter Protection) to filter out non-human/vehicle events.
Үзүүлэлтүүд
Detailed technical specifications for the HIKVISION DS-7616NXI-K1 NVR.
| Онцлог | Дэлгэрэнгүй |
|---|---|
| IP видео оролт | 16 суваг |
| Ирж буй зурвасын өргөн | 160 Mbps |
| Гарч буй зурвасын өргөн | 80 Mbps |
| HDMI гаралт | 1-ch, 4K (3840 × 2160)/30Hz, 2K (2560 × 1440)/60Hz, 1920 × 1080/60Hz, 1600 × 1200/60Hz, 1280 × 1024/60Hz, 1280 × 720/60Hz, 1024 × 768/60Hz |
| VGA гаралт | 1 суваг, 1920 × 1080/60 Гц, 1280 × 1024/60 Гц, 1280 × 720/60 Гц |
| Декодчилох формат | H.265+/H.265/H.264+/H.264 |
| Бичлэгийн нягтрал | 12 MP/8 MP/6 MP/5 MP/4 MP/3 MP/1080p/UXGA/720p/VGA/4CIF/DCIF/2CIF/CIF/QCIF |
| Синхрон тоглуулах | 16-ч |
| SATA интерфэйс | 1 SATA интерфэйс |
| Санах ойн хадгалах багтаамж | Up to 10 TB per HDD |
| USB интерфейс | Урд самбар: 1 × USB 2.0; Арын самбар: 1 × USB 2.0 |
| Сүлжээний интерфейс | 1 RJ-45 10/100/1000 Mbps self-adaptive Ethernet interface |
| Эрчим хүчний хангамж | 12 VDC, 1.5 А. |
| Эрчим хүчний хэрэглээ | ≤ 10 Вт (HDD-гүй) |
| Ажлын температур | -10 °C - 55 °C (14 °F - 131 °F) |
| Ажлын чийгшил | 10% - 90% |
| Хэмжээ (W × D × H) | 320 мм × 240 мм × 48 мм (12.6" × 9.4" × 1.9") |
| Жин | ≤ 1 kg (without HDD), 1.5 kg (Item Weight) |
| Гарал үүслийн улс | Энэтхэг |

Figure 6: NVR Dimensions. This technical drawing provides precise measurements of the NVR unit in millimeters.
Бүтээгдэхүүний албан ёсны видео
Video 1: HIKVISION 16 Channel 8MP 4K NVR Overview. This video provides a brief visual introduction to the HIKVISION DS-7616NXI-K1 NVR, showcasing its design, package contents, and key features.
Баталгаат болон дэмжлэг
Your HIKVISION DS-7616NXI-K1 NVR comes with a 2 жилийн баталгаат хугацаа, ensuring peace of mind regarding product quality and performance. For technical support, troubleshooting assistance, or warranty claims, please contact HIKVISION customer service or your authorized dealer.
Additionally, extended warranty plans are available for purchase:
- 1 Year Extended warranty by OneAssist
- 2 Year Extended warranty by OneAssist
For further information, visit the official HIKVISION website or consult your product documentation.