1. Танилцуулга
This manual provides detailed instructions for the safe and efficient operation of your Weytoll 4-in-1 MIG/MMA/MAG/TIG 160A Welding Machine. Please read this manual thoroughly before using the equipment to ensure proper setup, operation, and maintenance. Keep this manual for future reference.
2. Аюулгүй ажиллагааны заавар
АНХААРУУЛГА: Гагнуур нь аюултай байж болно. Осол гэмтэл, үхлээс урьдчилан сэргийлэхийн тулд аюулгүй байдлын урьдчилан сэргийлэх арга хэмжээг үргэлж дагаж мөрдөөрэй.
- Нүд хамгаалах: Always wear a welding helmet with appropriate shade lenses to protect your eyes from arc rays.
- Биеийн хамгаалалт: Wear flame-resistant clothing, gloves, and safety shoes to protect against sparks, heat, and electric shock.
- Агааржуулалт: Эрүүл мэндэд аюултай байж болзошгүй гагнуурын утаа болон хийг зайлуулахын тулд хангалттай агааржуулалтыг хангана уу.
- Гал түймрээс урьдчилан сэргийлэх: Ойролцоо гал унтраагч байлга. Гагнуурын хэсгээс бүх шатамхай материалыг зайлуул.
- Цахилгааны аюулгүй байдал: Ensure the welding machine is properly grounded. Do not operate in wet conditions. Inspect cables for damage before each use.
- Хийн цилиндрүүд: If using shielding gas, secure cylinders properly and handle them with care.
- Хүүхдүүд ба ажиглагчид: Хүүхэд болон зөвшөөрөлгүй хүмүүсийг гагнуурын талбайгаас хол байлга.
3. Багцын агуулга
Савлагааг задлахдаа доор жагсаасан бүх зүйлс байгаа бөгөөд гэмтээгүй эсэхийг шалгана уу. Хэрэв ямар нэгэн зүйл алга болсон эсвэл гэмтсэн бол нийлүүлэгчтэйгээ яаралтай холбоо барина уу.

Figure 3.1: Included accessories with the welding machine.
- 1 x Weytoll Welding Machine
- 1 x Electrode Holder
- 1 x 300A Welding Clamp (Ground Clamp)
- 1 x Roll of Welding Wire
- 1 x Welding Mask
- 1 x Steel Brush
- 1 x Хэрэглэгчийн гарын авлага (Энэхүү гарын авлага)
4. Бүтээгдэхүүний онцлог
The Weytoll 4-in-1 Welding Machine is designed for versatility and performance, offering multiple welding processes in a compact unit.

Зураг 4.1: Илүүview of the welding machine's key features.
- Multifunctional Welding: Supports MIG (Gas & Gasless), MMA (Stick), MAG, and TIG welding processes.
- Дижитал дэлгэц: Large digital screen for clear display of welding current/voltage and convenient operation.
- Тохируулах параметрүүд: Гагнуурын ботьtage and wire feed speed are adjustable to match material thickness.
- Олон хамгаалалт: Equipped with over-temperature, over-current, and over-voltage protection for enhanced safety and reliability.
- IGBT технологи: Utilizes IGBT high-frequency inverter technology for stable electric arc, minimal splashing, and strong welding ability.
- Үр ашигтай хөргөлт: Features multiple exhaust holes and a built-in high-efficiency cooling fan to dissipate heat and extend machine lifespan.
5. Тохиргоо
5.1 Эрчим хүчний холболт
- Машин дээрх цахилгаан унтраалга "OFF" байрлалд байгаа эсэхийг шалгаарай.
- Connect the power cable to a suitable 220V power outlet. The machine requires a stable power supply.
5.2 Газрын Clamp Холболт
- Газардуулга clamp cable to the appropriate terminal on the front panel of the welding machine.
- Газрыг хавсарганаamp Ажлын хэсэг эсвэл гагнуурын ширээн дээр найдвартай холбож, цахилгаантай сайн холбоо тогтооно.
5.3 Welding Wire Installation (MIG/MAG)
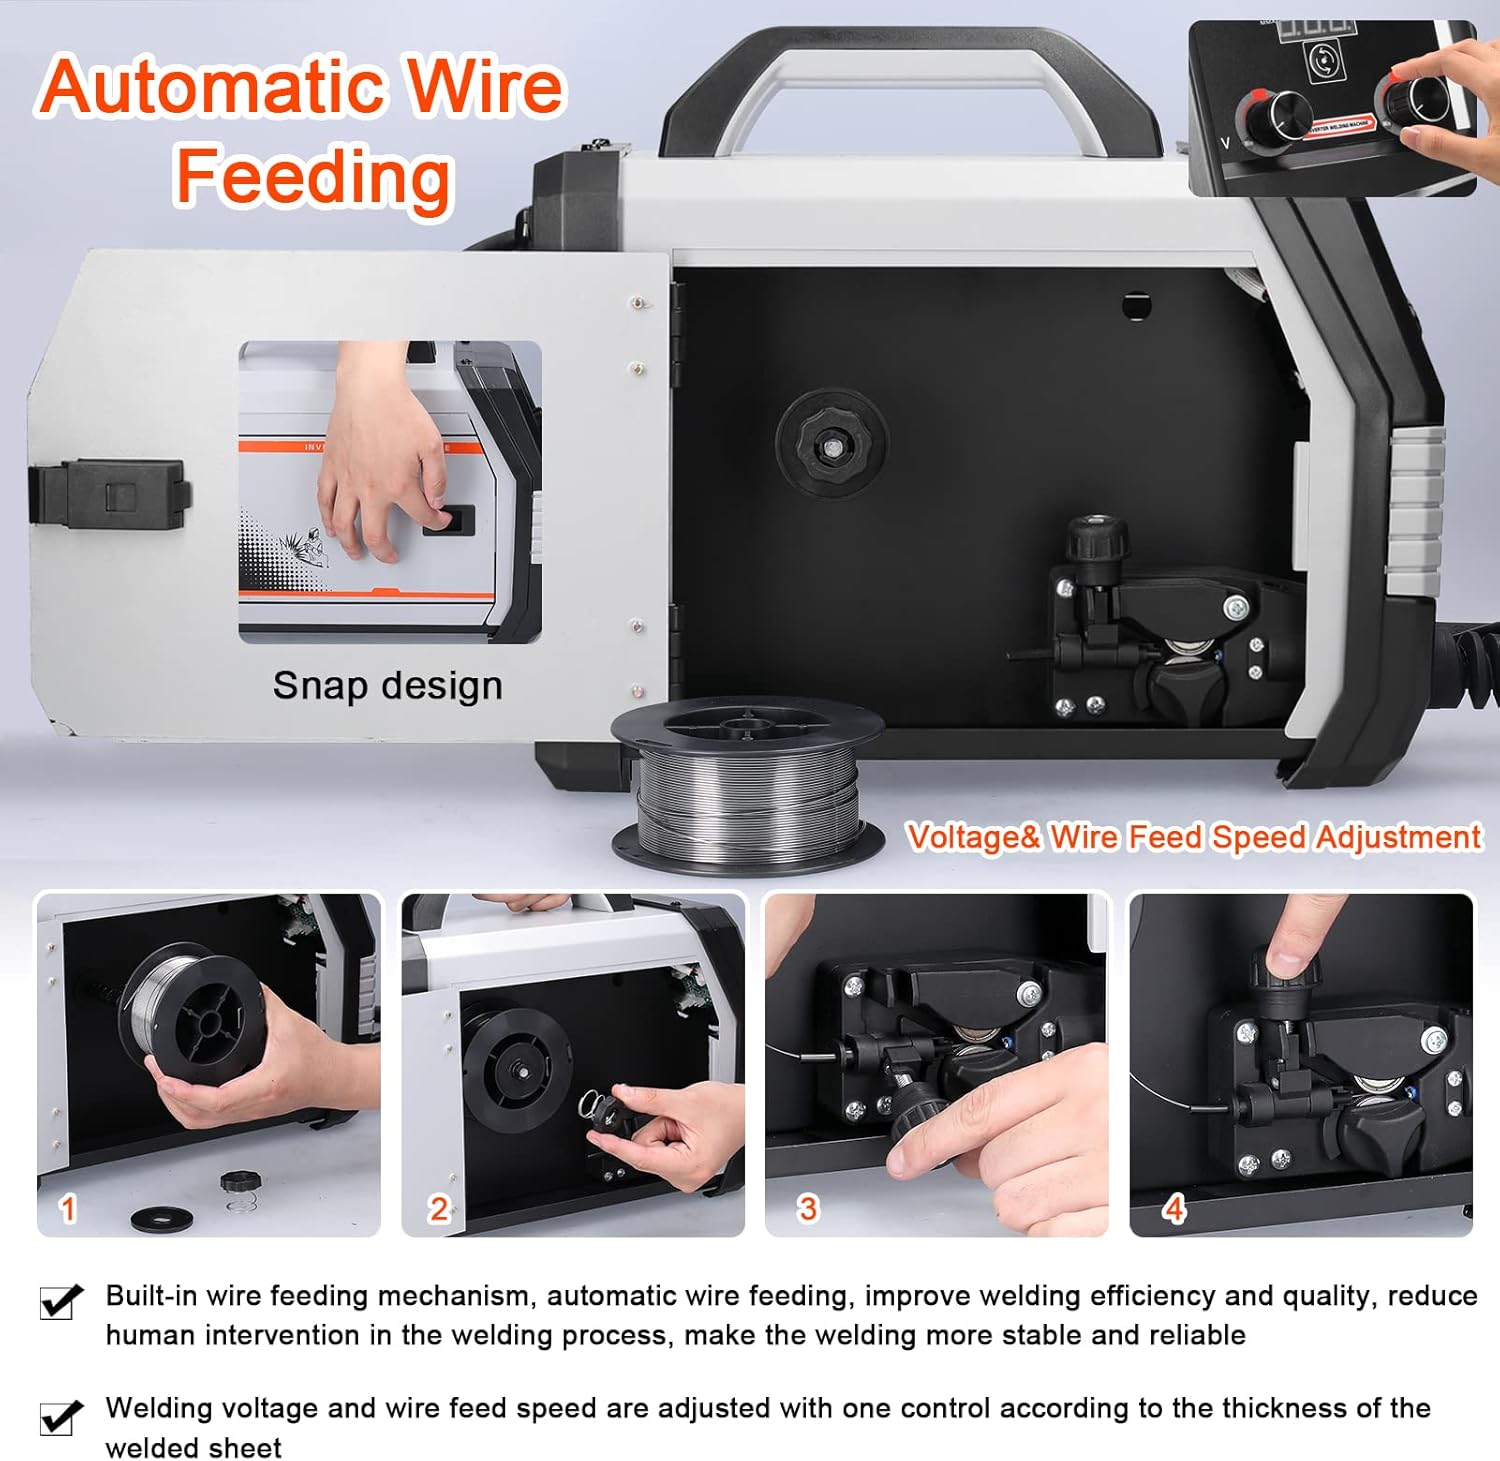
Figure 5.1: Automatic wire feeding mechanism and installation steps.
- Open the side cover of the machine to access the wire feeder compartment.
- Place the welding wire spool onto the spindle, ensuring it rotates freely.
- Thread the welding wire through the wire feeder mechanism, ensuring it passes through the drive rollers and into the liner.
- Утас гулсах, бутлахаас сэргийлж хөтчийн булны хурцадмал байдлыг тохируулна.
- Хажуугийн тагийг хаа.
5.4 Gas Connection (MIG/MAG with Gas)
- Connect the gas hose from your shielding gas cylinder (e.g., CO2 for MIG solid wire) to the gas input port on the rear of the welding machine.
- Хийн алдагдал гарахаас сэргийлж бүх холболтыг нягт байгаа эсэхийг шалгаарай.
- Open the gas cylinder valve and adjust the flow rate using a regulator.
6. Ашиглалтын заавар
6.1 Асаах болон горимыг сонгох

Figure 6.1: Front and rear panel controls.
- Turn the power switch to the "ON" position. The digital display will illuminate.
- Use the mode selection button (often labeled "MMA-TIG one piece switching" or similar) to choose your desired welding process: MIG, MMA, MAG, or TIG.
6.2 Параметрийн тохируулга
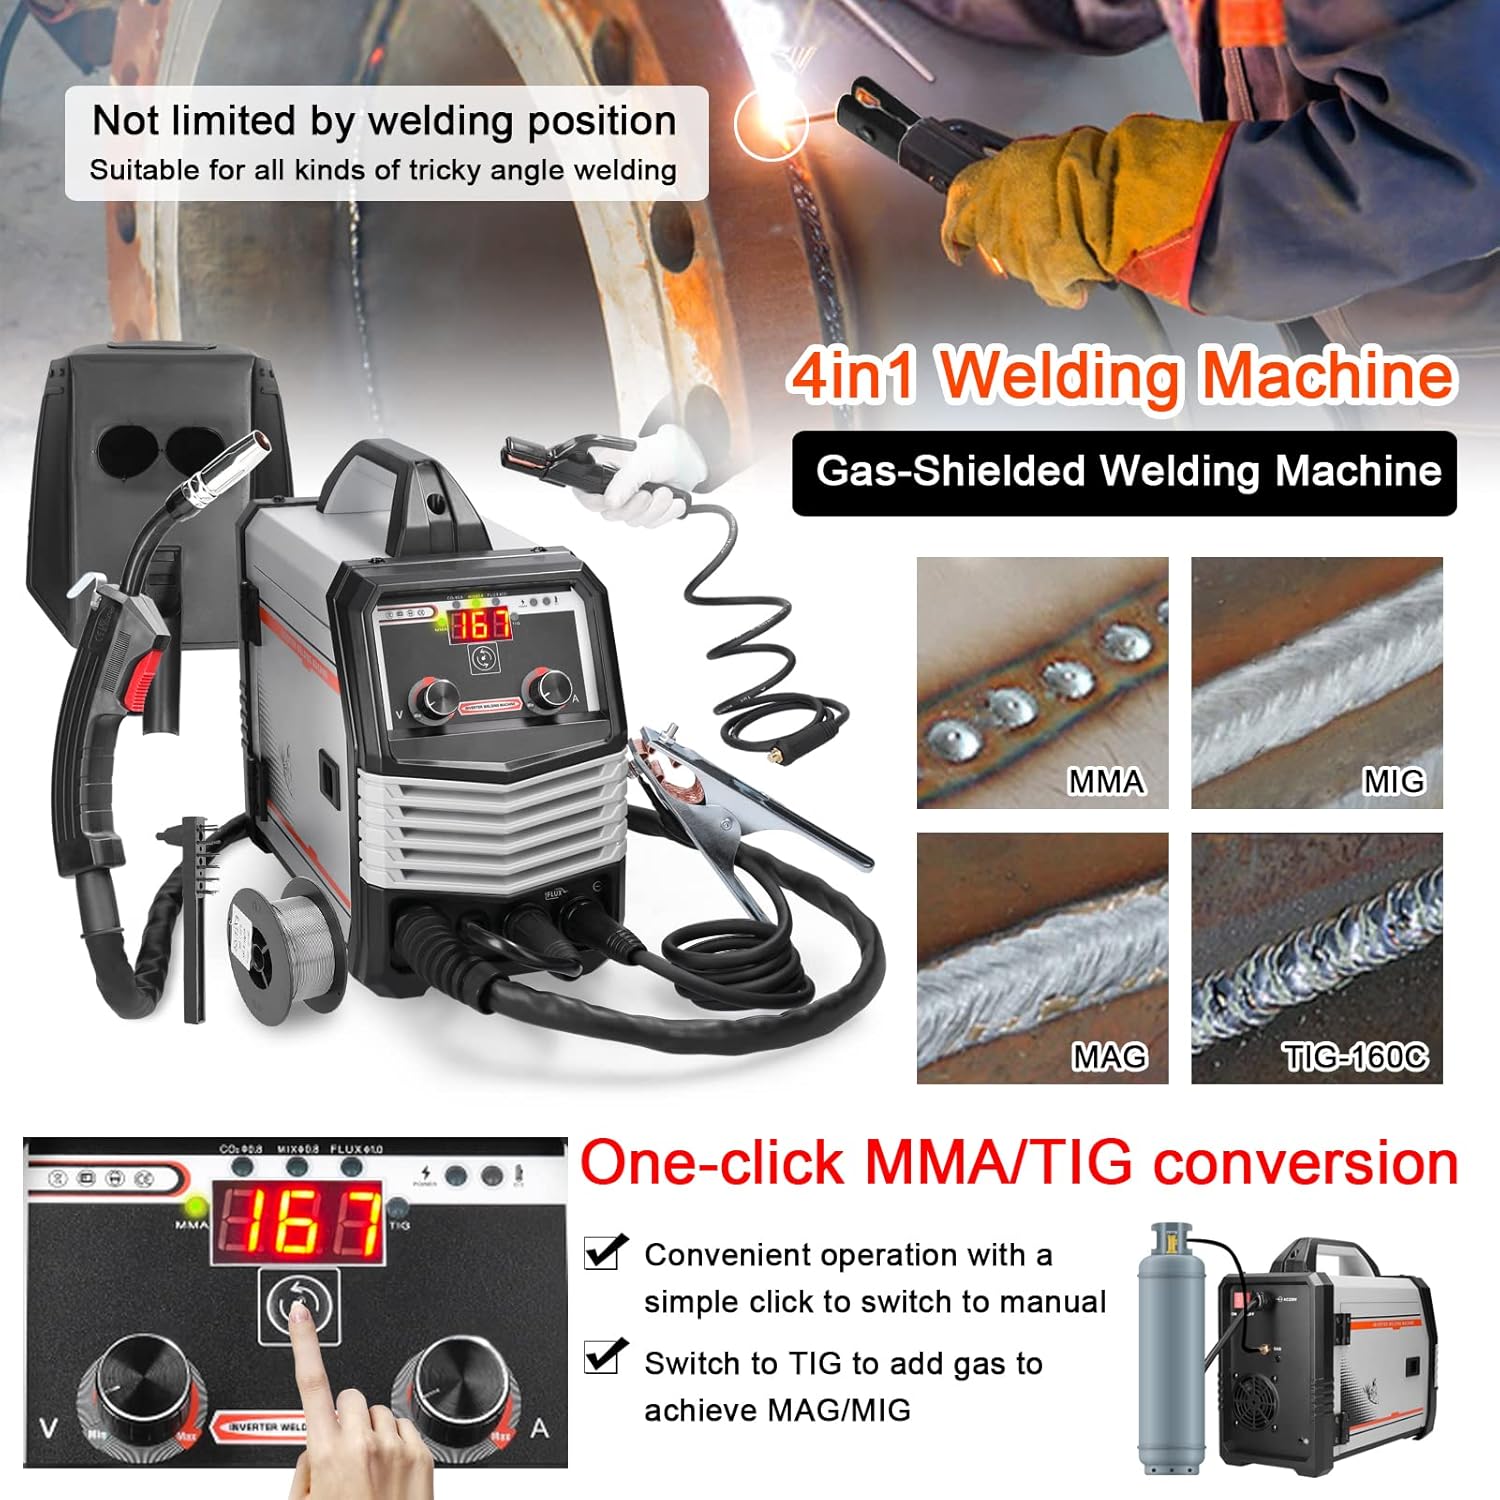
Figure 6.2: One-click mode conversion and weld examples.
- Одоогийн/ботьtage: Use the control knobs on the front panel to adjust the welding current (A) and voltage (V) according to the material thickness and welding process. The digital display will show the current settings.
- Wire Feed Speed (MIG/MAG): Adjust the wire feed speed knob. This is often linked to voltage for optimal MIG/MAG performance.
6.3 Welding Process Specifics
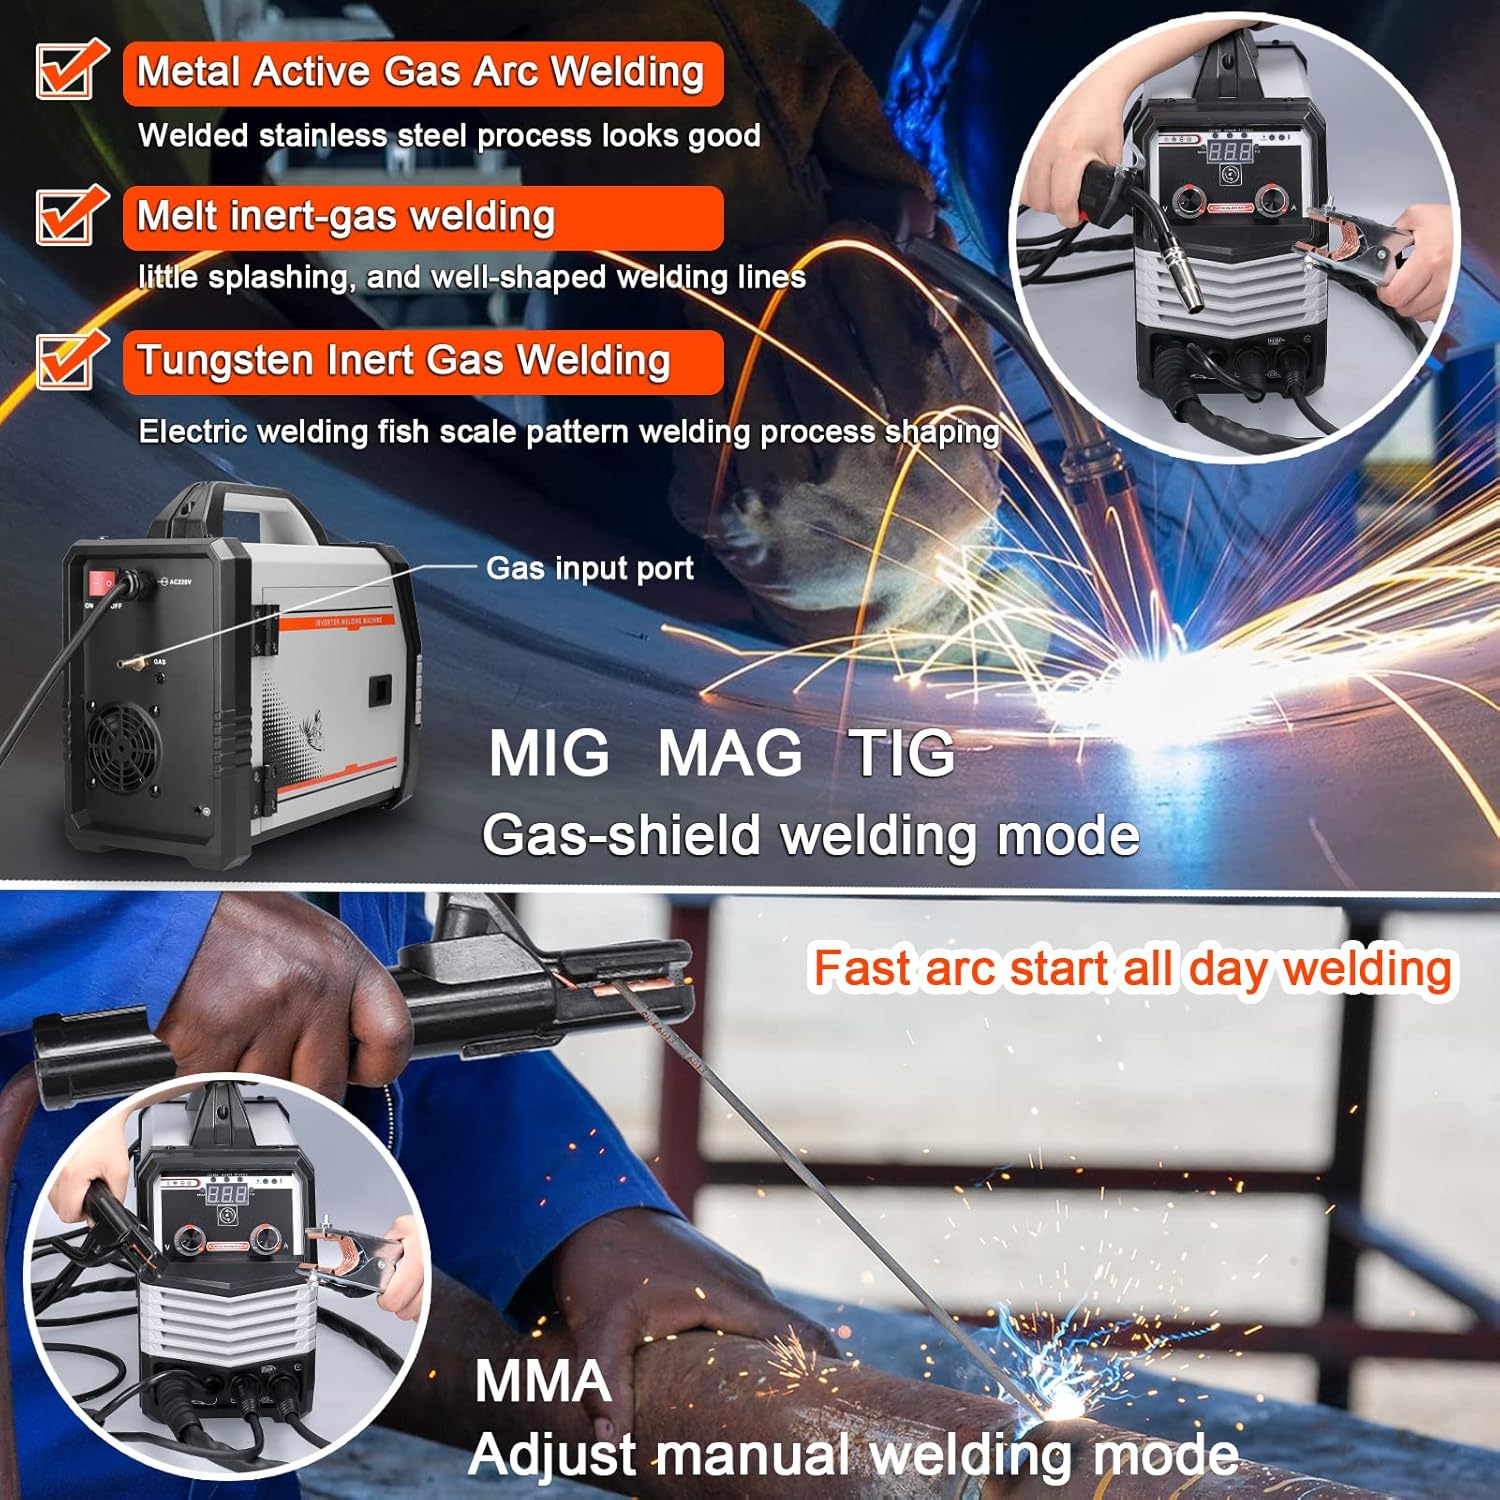
Figure 6.3: MIG/MAG/TIG and MMA welding in action.
6.3.1 MIG/MAG Welding (Gas-Shielded)
- Ensure gas cylinder is connected and gas flow is set.
- Use solid wire (e.g., 0.8mm for CO2 gas).
- Press the trigger on the MIG torch to initiate the arc and wire feed.
6.3.2 Gasless MIG Welding (Flux-Cored)
- No shielding gas required. Use flux-cored wire (e.g., 0.8mm - 1.0mm).
- Ensure polarity is set correctly for flux-cored wire (refer to wire manufacturer's instructions).
- Press the trigger on the MIG torch to initiate the arc and wire feed.
6.3.3 MMA (Stick) Welding
- Электродын эзэмшигчийн кабелийг эерэг (+) терминал болон газардуулгын холболттой холбоно ууamp to the negative (-) terminal (or vice-versa, depending on electrode type).
- Insert the electrode into the holder.
- Strike the arc by lightly touching and quickly lifting the electrode from the workpiece.
- Recommended electrode thickness: 1.6mm - 3.2mm.
6.3.4 TIG Welding
- Connect the TIG torch (not included in standard package) and gas supply (Argon).
- Ensure the tungsten electrode is properly ground.
- Initiate the arc (lift arc or high-frequency start, depending on machine features).
6.4 Welding Current Setting Reference
Refer to the table below for recommended welding current and voltage settings based on electrode diameter for MMA welding.

Figure 6.4: Reference table for welding current settings.
| Электродын диаметр. (мм) | Санал болгож буй гагнуурын гүйдэл (A) | Зөвлөмж болгож буй гагнуурын ботьtage (V) |
|---|---|---|
| 1.0 | 20~60 | 20.8~22.4 |
| 1.6 | 44~84 | 21.76~23.36 |
| 2.0 | 60~100 | 22.4~24.0 |
| 2.5 | 80~120 | 23.2~24.8 |
| 3.2 | 108~148 | 23.32~24.92 |
| 4.0 | 140~180 | 24.6~27.2 |
| 5.0 | 180~220 | 27.2~28.8 |
7. Засвар үйлчилгээ
Тогтмол засвар үйлчилгээ нь таны гагнуурын машины урт наслалт, аюулгүй ажиллагааг хангана.
- Цэвэрлэгээ: Regularly clean the machine's exterior with a dry cloth. Use compressed air to blow out dust from inside the machine, especially the cooling vents, at least once a month or more frequently in dusty environments. Ensure the machine is unplugged before cleaning.
- Кабелийн үзлэг: Inspect all welding cables, power cords, and gas hoses for cuts, abrasions, or loose connections before each use. Replace damaged components immediately.
- Утас тэжээгч: Clean the wire feeder rollers and guide tubes regularly to prevent wire feeding issues. Check for wear on the drive rollers.
- Torch/Electrode Holder: Clean the MIG torch nozzle and contact tip. Replace worn contact tips. Ensure the MMA electrode holder jaws are clean and grip electrodes securely.
- Хадгалах: Store the welding machine in a clean, dry environment when not in use.
8. Алдаа засах
Энэ хэсэгт танд тулгарч болох нийтлэг асуудлуудыг авч үзэх болно. Энд дурдаагүй асуудлуудын талаар хэрэглэгчийн дэмжлэгтэй холбогдоно уу.
| Асуудал | Боломжит шалтгаан | Шийдэл |
|---|---|---|
| Машин асахгүй байна | No power supply; Power switch off; Faulty power cable/plug | Check power outlet; Ensure switch is ON; Inspect and replace cable if damaged. |
| No welding arc (MMA) | Poor ground connection; Incorrect current setting; Wet electrode; Faulty electrode holder | Ensure good ground contact; Adjust current; Use dry electrodes; Check electrode holder. |
| Wire not feeding (MIG/MAG) | Wire spool tangled; Drive rollers loose/worn; Contact tip clogged; Liner blocked | Untangle wire; Adjust/replace rollers; Clean/replace contact tip; Clean/replace liner. |
| Гагнуурын чанар муу | Incorrect settings (current/voltage/wire speed); Improper technique; Contaminated workpiece; Insufficient gas flow (MIG/MAG) | Adjust settings; Practice technique; Clean workpiece; Check gas supply and flow rate. |
| Хэт халалтын хамгаалалт идэвхжсэн | Exceeded duty cycle; Insufficient ventilation; Blocked cooling vents | Allow machine to cool down; Ensure proper ventilation; Clean cooling vents. |
9. Техникийн үзүүлэлтүүд
Technical specifications for the Weytoll 4-in-1 Welding Machine.
| Параметр | Үнэ цэнэ |
|---|---|
| Загвар | Schweißgerät 4in1 |
| Оролтын хэмжээtage | 220 В |
| Гаралтын гүйдэл (A) | 20А-300А |
| Power Capacity (KVA) | 7.4 |
| Давтамж (HZ) | 50/60 |
| Гаралтын ботьtage (V) | 16.5-24 |
| Нэрлэсэн ажлын мөчлөг (%) | 60 |
| Эрчим хүчний хүчин зүйл | 0.85 |
| Үр ашиг (%) | 85 |
| Wire Feeding Style | Дотоод |
| Wire Feed Speed (m/min) | 3.6-12 |
| Post-Flux Time (S) | 0.5±1 |
| Тусгаарлалтын зэрэг | F |
| Housing Protection Index | IP21 |
| Max Wire Spool Size | Φ200 |
| Орчны температур | -10 хэмээс 40 хэм хүртэл |
| Өндөр | ≤ 1000 метр |
| Relative Humidity (40°C) | ≤ 50% |
| Relative Humidity (20°C) | ≤ 90% |
| Зүйлийн хэмжээ | 375 x 245 x 160 мм |
| Зүйлийн жин | 6740 гр |
| Багцын хэмжээ | 470 x 225 x 400 мм |
| Багцын жин | 7000 гр |
10. Баталгаат хугацаа ба дэмжлэг
For warranty information or technical support, please refer to the documentation provided with your purchase or contact the retailer/manufacturer directly. Keep your proof of purchase for warranty claims.
Manufacturer: Weytoll


