Танилцуулга
This manual provides detailed instructions for the setup, operation, and maintenance of your HOMVILLA Digital Mirror Alarm Clock, Model 8821. Please read this manual thoroughly before using the product to ensure proper function and longevity.
Багцын агуулга
Доор жагсаасан бүх зүйл таны багцад байгаа эсэхийг шалгаарай.
- HOMVILLA Digital Alarm Clock
- USB цахилгаан кабель
- Эрчим хүчний адаптер
- CR2032 Battery (for memory backup)
- Хэрэглэгчийн гарын авлага

Image: Package contents including the alarm clock, USB cable, adapter, CR2032 battery, and user manual.
Бүтээгдэхүүн дууссанview
The HOMVILLA Digital Mirror Alarm Clock features a large LED display with a mirror surface, dual alarms, multiple alarm schedules, adjustable brightness, and dual USB charging ports.
Гол онцлогууд:
- Large LED Mirror Display: 6.6 x 3 inch screen for clear time and day display.
- Dual Alarms with 3 Schedules: Set two independent alarms with options for daily, weekday, or weekend activation.
- Тохируулах гэрэлтүүлэг: 6 levels of manual dimming for optimal viewая тухтай байдал.
- Хос USB цэнэглэгч портууд: Conveniently charge other electronic devices.
- Залгах функц: Нэмэлт 5 минутын нойрыг хангана.
- 12 цаг/24 цагийн цагийн формат: Switch between preferred time display.
- Эрчим хүчний эх үүсвэр: AC powered with battery backup for settings.
Бүрэлдэхүүн хэсгүүдийн таних тэмдэг:

Зураг: дээд view of the alarm clock with labels for ALARM 1, ALARM 2, TIME SET, SNOOZE, BRIGHTNESS, UP, and DOWN buttons. Dimensions are also indicated.
- Time Set Button: Цаг тохируулах горимд орохын тулд дарна уу.
- Сэрүүлэг 1 товч: Press to set Alarm 1.
- Сэрүүлэг 2 товч: Press to set Alarm 2.
- Түр хойшлуулах товч: Activates snooze function when alarm sounds.
- Brightness товч: Дэлгэцийн тод байдлыг тохируулна.
- UP товчлуур: Increases values during setting.
- Доошлох товч: Тохиргоо хийх явцад утгыг бууруулдаг.
- USB цэнэглэх портууд: Located on the right side for device charging.
Тохиргоо
1. Цахилгааны холболт:
The alarm clock requires continuous AC power to operate. Connect the provided USB power cable to the clock and then to the power adapter. Plug the adapter into a standard wall outlet.
Note: The included CR2032 battery is for memory backup only. It preserves time and alarm settings during a power outage but does not power the display or alarm functions.

Image: The alarm clock is shown powered by a USB cable connected to a wall adapter, emphasizing that it requires continuous power.
2. Battery Installation (Memory Backup):
Open the battery compartment on the back of the clock and insert the CR2032 battery, ensuring correct polarity. This battery maintains your settings in case of a power interruption.
3. Base Installation (Optional):
The clock can be placed on a flat surface using the detachable base or mounted on a wall using the hanging hole on the back. To install the base, align it with the slot at the bottom of the clock and slide it into place.

Image: Step-by-step visual guide for installing the base, inserting the CR2032 battery, and connecting the power cable to the alarm clock.
Ашиглалтын заавар
1. Цагийг тохируулах:
- -г удаан дар ЦАГ ТОНОГЛОХ button (usually marked with a clock icon) until the hour digits flash.
- -г ашиглана уу UP болон ДООШ цагийг тохируулах товчлуурууд.
- дарна уу ЦАГ ТОНОГЛОХ again to confirm the hour and move to minute setting.
- -г ашиглана уу UP болон ДООШ минут тохируулах товчлуурууд.
- дарна уу ЦАГ ТОНОГЛОХ one more time to confirm and exit time setting mode.
- To switch between 12-hour and 24-hour format, briefly press the ЦАГ ТОНОГЛОХ button when not in setting mode.

Image: The alarm clock display showing both 12-hour (8:20 AM) and 24-hour (20:30) time formats, illustrating the switch function.
2. Сэрүүлэг тохируулах (Сэрүүлэг 1 & Сэрүүлэг 2):
The clock supports two independent alarms (Alarm 1 and Alarm 2) with three scheduling options.
- -г удаан дар Сэрүүлэг 1 or Сэрүүлэг 2 цагийн цифр анивчих хүртэл товчийг дарна уу.
- -г ашиглана уу UP болон ДООШ Сэрүүлгийн цагийг тохируулах товчлуурууд.
- Тусгай товчийг дарна уу СЭРҮҮЛЭГ button again to confirm the hour and move to minute setting.
- -г ашиглана уу UP болон ДООШ Сэрүүлгийн минутыг тохируулах товчлуурууд.
- дээр дарна уу СЭРҮҮЛЭГ button again to confirm minutes and select the alarm schedule:
- 1-5: Даваагаас Баасан гараг хүртэл
- 6-7: Бямба гарагаас Ням гараг хүртэл
- 1-7: Monday to Sunday (Daily)
- дээр дарна уу СЭРҮҮЛЭГ button one more time to confirm the schedule and exit alarm setting mode.
- Сэрүүлгийг идэвхжүүлэх/идэвхгүй болгохын тулд товчийг дарна уу Сэрүүлэг 1 or Сэрүүлэг 2 button when not in setting mode. An alarm icon will appear/disappear on the display.

Image: The alarm clock showing different alarm schedules (1-5, 6-7, 1-7) for weekdays, weekends, and daily alarms.
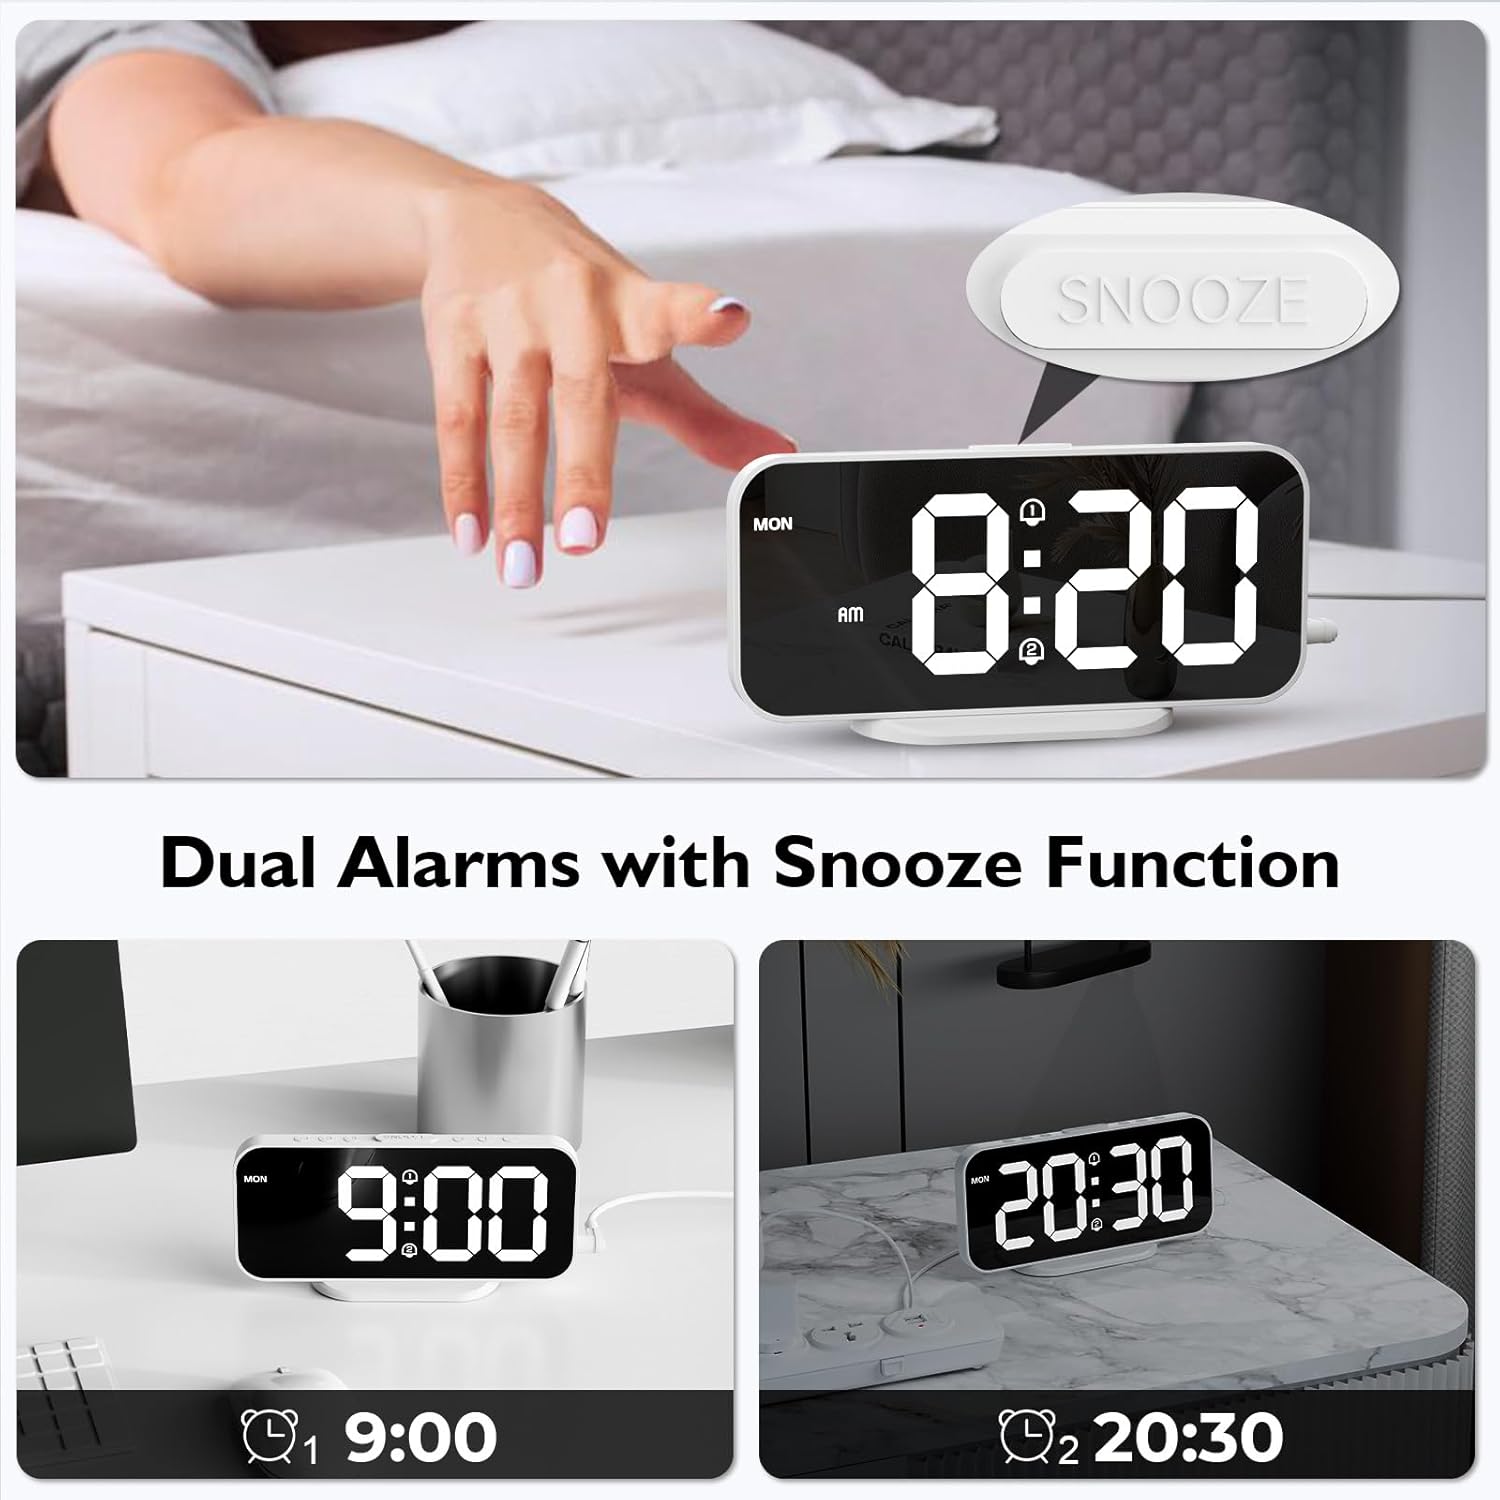
Image: The alarm clock displaying two separate alarm times (9:00 and 20:30), indicating the dual alarm functionality.
3. Түр хойшлуулах функц:
Сэрүүлэг дуугарах үед том товчлуурыг дар УНТАХ button located on the top of the clock. The alarm will pause for 5 minutes and then sound again. To turn off the alarm completely, press any other button.

Image: A hand pressing the SNOOZE button on the alarm clock, illustrating the 5-minute snooze feature.
4. Гэрэлт байдлыг тохируулах:
The display has 6 levels of brightness. Briefly press the ГЭРЭЛТ button (usually marked with a sun icon) to cycle through the brightness levels, from brightest to dimmest, and then off.

Image: A visual representation of the alarm clock's display at six different brightness levels, from off to maximum brightness.
5. USB цэнэглэх портууд:
The two USB ports on the right side of the clock can be used to charge other electronic devices (e.g., smartphones, earbuds). Connect your device's USB charging cable to one of these ports. The output is 5V/1A.

Image: The alarm clock with a smartphone and wireless earbuds connected to its dual USB charging ports, demonstrating their use.
Засвар үйлчилгээ
- Цэвэрлэгээ: Цагийг зөөлөн, хуурай даавуугаар арчина. Зүлгүүрийн цэвэрлэгч, уусгагчийг бүү ашигла.
- Толин тусгал гадаргуу: Handle the mirror surface carefully to avoid scratches.
- Эрчим хүч: Цагийг цэвэрлэхийн өмнө эсвэл удаан хугацаагаар ашиглахгүй бол цахилгаан адаптерийг үргэлж салгаж байгаарай.
- Зай: Replace the CR2032 backup battery annually or if settings are not retained during power outages.
Алдааг олж засварлах
| Асуудал | Боломжит шалтгаан | Шийдэл |
|---|---|---|
| Display is off or blank. | Цахилгаан холболт байхгүй. | Ensure the USB power cable and adapter are securely connected to the clock and a working power outlet. The clock requires continuous AC power. |
| Цахилгаан унтраасны дараа тохиргоо алдагдсанtage. | CR2032 нөөц батарей дууссан эсвэл байхгүй байна. | Replace the CR2032 battery in the battery compartment. Ensure correct polarity. |
| Сэрүүлэг дуугарахгүй байна. | Alarm is not activated or incorrect alarm schedule. | Ensure the alarm icon is displayed, indicating activation. Check the alarm schedule (daily, weekday, weekend). |
| USB charging ports not working. | Clock not powered. Device cable faulty. Device incompatible. | Ensure the alarm clock is powered. Try a different USB cable or device. |
| Display too dim or too bright. | Гэрэлтүүлгийн түвшинг тохируулах шаардлагатай. | дээр дарна уу ГЭРЭЛТ button to cycle through the 6 brightness levels. |
Үзүүлэлтүүд
| Брэнд | ХОМВИЛЛА |
| Загварын дугаар | 8821 |
| Өнгө | Цагаан |
| Хэмжээ (L x W x H) | 16.8 см x 7.6 см x 3.81 см (6.61 x 2.99 x 1.5 инч) |
| Жин | 105 грамм (0.23 фунт) |
| Дэлгэцийн төрөл | Толин тусгал гадаргуутай дижитал LED |
| Эрчим хүчний эх үүсвэр | AC Powered (USB Cable & Adapter included) |
| Нөөц батерей | 1 x CR2032 (included, for memory backup only) |
| USB гаралт | 2 ports, 5V/1A each |
| Онцлог шинж чанарууд | Dual Alarms, Snooze Function, 6 Brightness Levels, 12/24H Format, Wall Mountable |
Баталгаат болон дэмжлэг
For warranty information or technical support, please refer to the contact details provided in the original product packaging or visit the official HOMVILLA webсайт. Баталгаат заргад зориулж худалдан авалтаа нотлох баримтаа үлдээнэ үү.
If you encounter any issues not covered in this manual, please contact HOMVILLA customer service for assistance.


