Танилцуулга
This manual provides detailed instructions for the installation, operation, and maintenance of your Diyeeni B75 MS Mini ITX Motherboard. Please read this manual thoroughly before proceeding with installation to ensure proper setup and functionality.
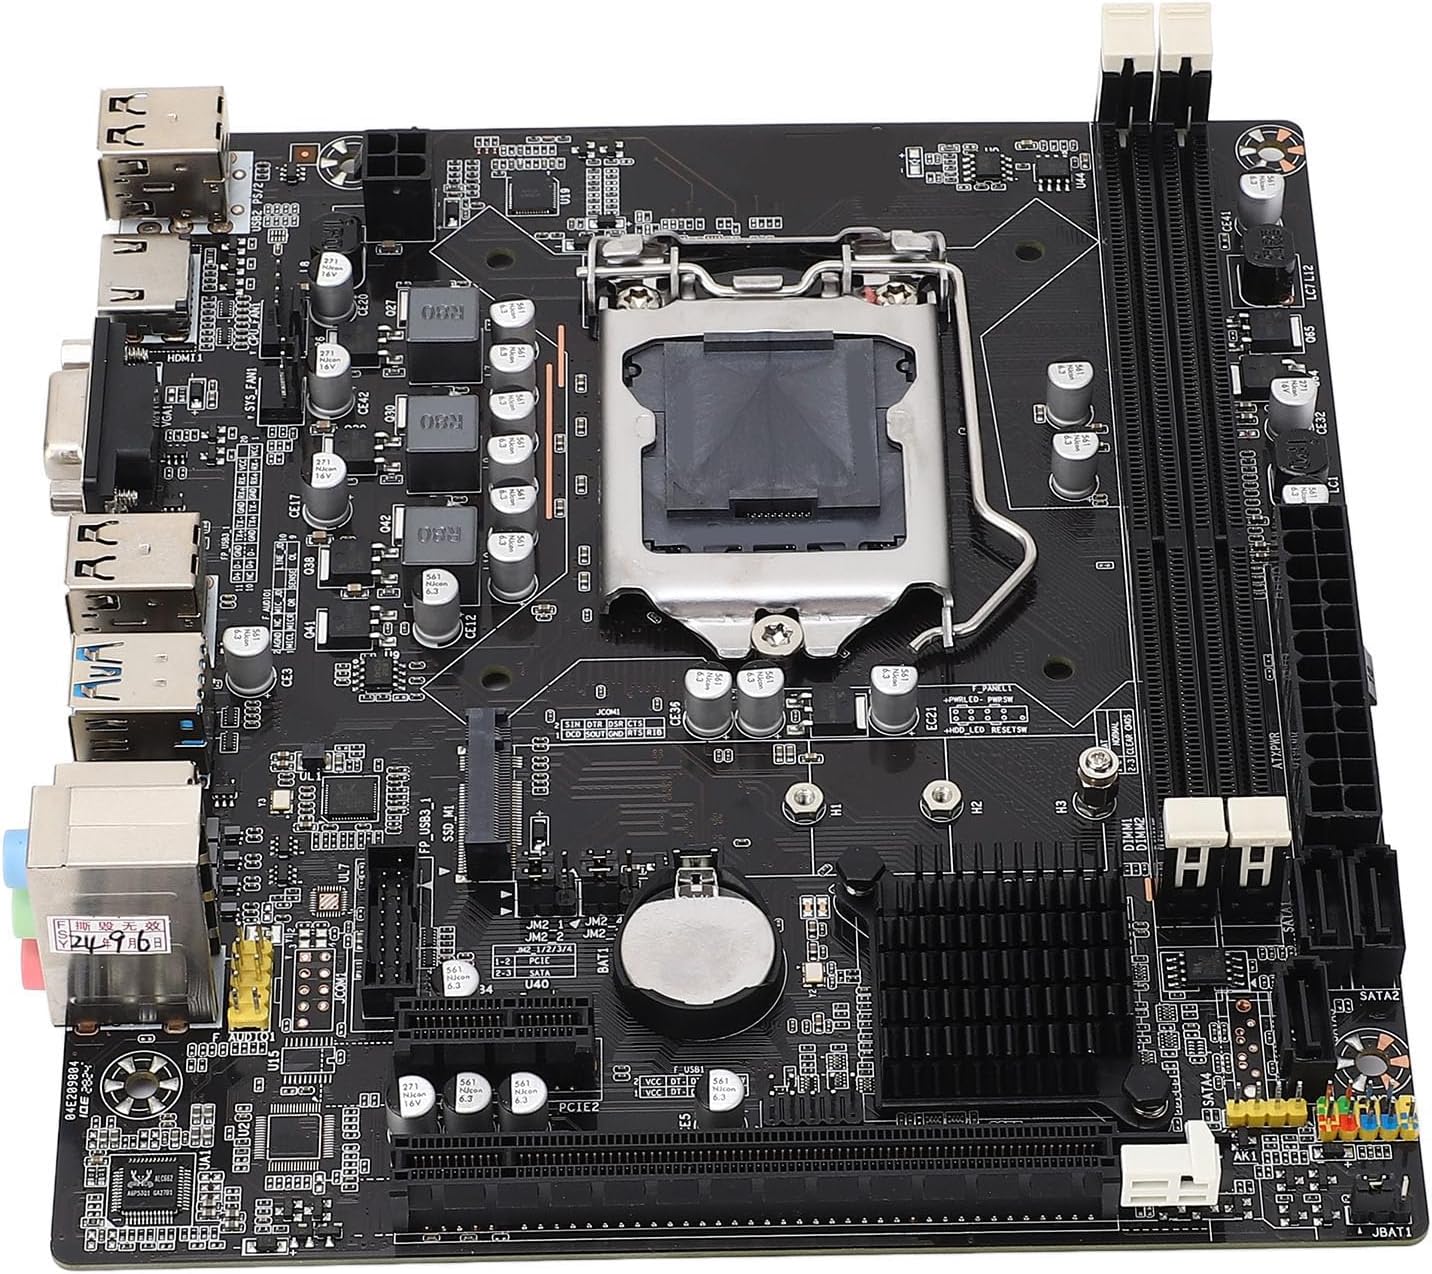
Зураг: дээрээс доош view of the Diyeeni B75 MS Mini ITX Motherboard, highlighting the CPU socket, RAM slots, and various connectors.
Аюулгүй байдлын мэдээлэл
- Бүрэлдэхүүн хэсгүүдийг суулгах эсвэл салгахаасаа өмнө компьютерийнхээ хүчийг үргэлж салга.
- Бүрэлдэхүүн хэсгүүдэд цахилгаан гүйдэл (ESD) гэмтэхээс сэргийлэхийн тулд эсрэг статик бугуйн оосор зүү.
- Эмзэг бүрэлдэхүүн хэсгүүдэд хүрэхээс зайлсхийхийн тулд эх хавтанг ирмэгээр нь барь.
- Хэт халалтаас урьдчилан сэргийлэхийн тулд компьютерийн гэр доторх агааржуулалтыг сайтар ханга.
Багцын агуулга
Бүх зүйл багцад байгаа эсэхийг шалгана уу:
- 1 x Diyeeni B75 MS Motherboard
- 1 x Connection Cable (SATA cable)
- 1 x Metal Plate (I/O Shield)
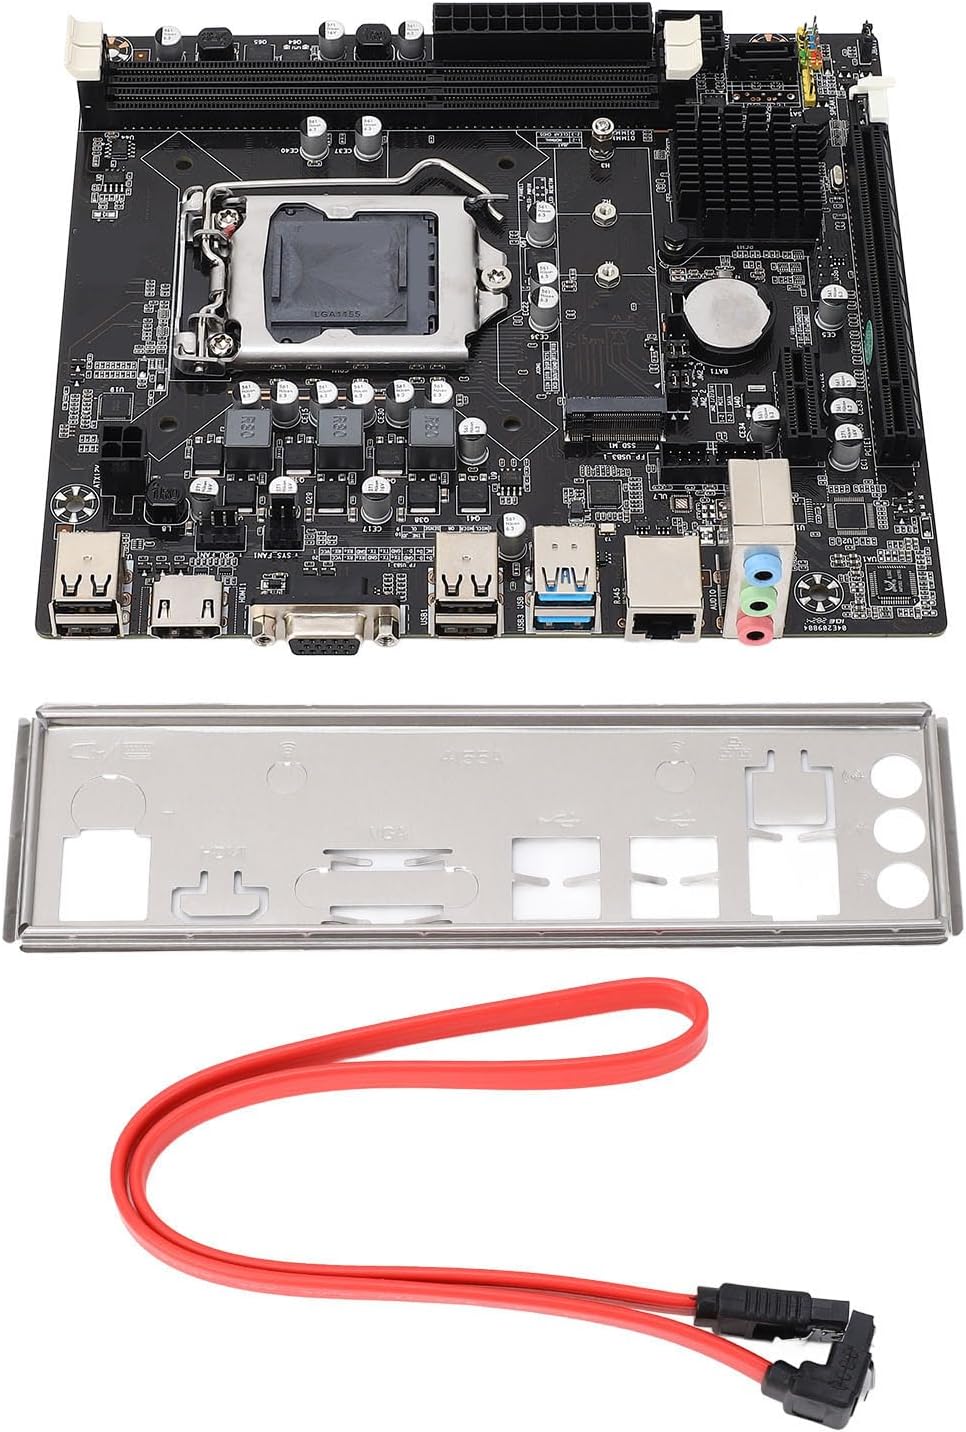
Image: The Diyeeni B75 MS Motherboard displayed alongside its included accessories, a red SATA data cable, and a silver I/O shield.
Үзүүлэлтүүд
| Онцлог | Дэлгэрэнгүй |
|---|---|
| Эх хавтангийн загвар | B75 MS |
| Удирдах зөвлөлийн төрөл | ITX |
| CPU залгуурын төрөл | LGA 1155 |
| Тохиромжтой процессорууд | Intel Pentium, Intel Core i3/i5 (2nd and 3rd Generation) |
| Чипсетийн төрөл | Intel B75 Express |
| Санах ойн оролт | 2 x DDR3 DIMM |
| Memory Capacity Peak | 16 ГБ |
| Санах ойн цагийн хурд | 1066/1333/1600/1866 МГц |
| SATA интерфэйс | 1 x SATA3.0, 3 x SATA2.0 |
| Graphics Card Slot | 1 x PCI E 16X |
| USB интерфейс | 4 x USB3.0 (2 rear, 2 via internal header), 6 x USB2.0 (2 rear, 4 via internal headers) |
| Видео гаралт | 1 x VGA, 1 x HDMI |
| Өргөтгөх интерфейс | NVME M.2, M.2 (for WiFi/BT or additional M.2) |
| Сүлжээний карт | 100 Mbps Ethernet |
| Дууны карт | Realtek ALC662 аудио кодлогч |
| Баригдсан батерей | 1 x CR2032 240mAh |
Тохируулах гарын авлага
1. CPU-ийн суурилуулалт (LGA 1155)
- Эх хавтан дээрх LGA 1155 залгуурыг олоорой.
- Gently push down the load lever and pull it away from the socket to open the CPU retention frame.
- Align the triangular mark on your Intel LGA 1155 CPU with the corresponding mark on the socket. Carefully place the CPU into the socket without forcing it.
- Хадгалах хүрээг хааж, ачааны хөшүүргийг түгжигдсэн байрлал руу буцаана.
- CPU-д дулааны оо түрхээд CPU хөргөгчийг суулгана.

Зураг: Нарийвчилсан view of the LGA 1155 CPU socket on the motherboard, showing the retention mechanism.
2. Санах ой (RAM) суурилуулах
- Хоёр DDR3 DIMM үүрийг олоорой.
- Санах ойн үүрний хоёр төгсгөлд байгаа хавчааруудыг нээнэ үү.
- DDR3 санах ойн модулийн ховилыг DIMM үүрний түлхүүртэй зэрэгцүүлнэ.
- Санах ойн модулийг хавчаарууд нь бэхлэх хүртэл үүрэнд сайтар оруулна.
3. Storage Device Installation (SATA & NVME M.2)
- SATA хөтчүүд: Connect your SATA SSDs or HDDs to the SATA3.0 (1 port) or SATA2.0 (3 ports) connectors using SATA data cables. Connect the power cable from your power supply to the drive.
- NVME M.2 SSD: Locate the NVME M.2 slot. Insert the M.2 SSD at an angle into the slot and then gently push it down. Secure it with the provided screw.
4. График карт суурилуулах
- Locate the PCI E 16X slot.
- Слотын төгсгөлд хадгалах хавчаарыг нээ.
- График картаа үүртэй зэрэгцүүлж, байрандаа орж, хадгалах хавчаар хаагдах хүртэл чанга дарна уу.
- Secure the graphics card to your computer case with screws.
5. Захын төхөөрөмж болон цахилгааныг холбох
- 24 зүү ATX тэжээлийн холбогч болон 4 зүү CPU тэжээлийн холбогчийг тэжээлийн эх үүсвэрээс эх хавтан руу холбоно уу.
- Connect USB devices to the available USB 3.0 and USB 2.0 ports.
- Connect your monitor to the VGA or HDMI port.
- Сүлжээнд нэвтрэхийн тулд Ethernet кабелиа LAN порт руу холбоно уу.
- Connect front panel connectors (power button, reset button, USB, audio) according to your case manual and motherboard labels.
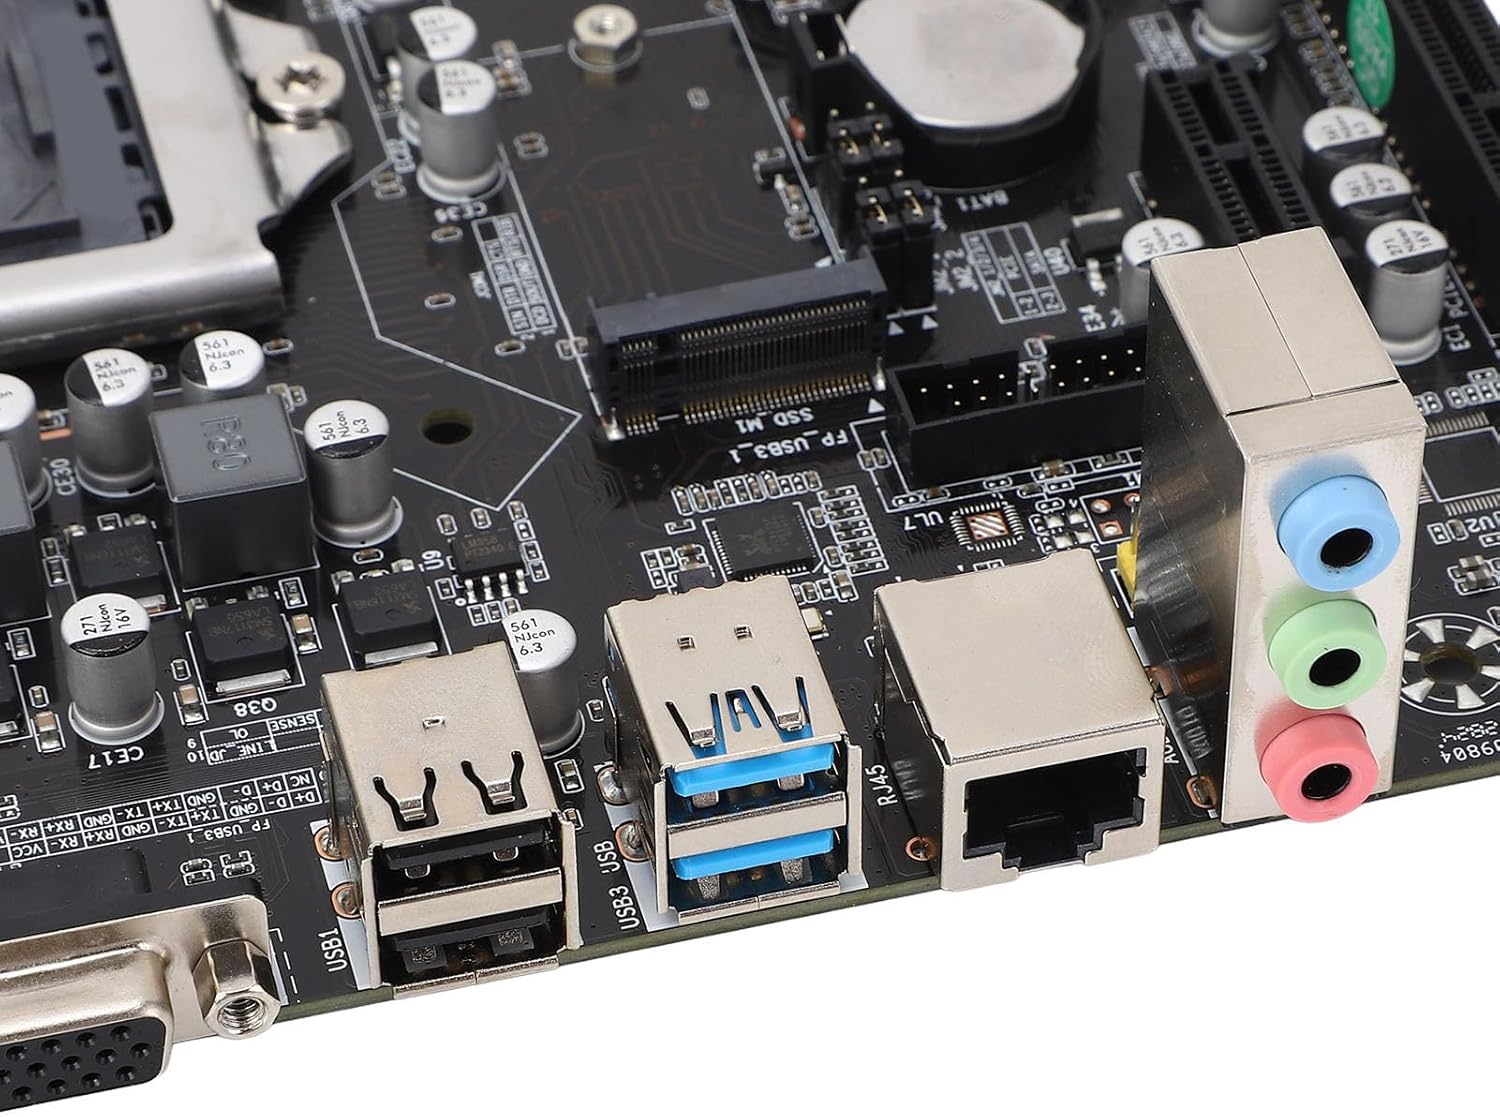
Image: A close-up of the motherboard's rear input/output panel, featuring USB 3.0, USB 2.0, VGA, HDMI, Ethernet, and audio ports.
Ашиглалтын заавар
- After all components are installed and connected, close your computer case.
- Connect the power cord to your power supply and turn on the power switch.
- Компьютерийн гэрийнхээ цахилгаан товчийг дарна уу.
- During startup, you can press the designated key (usually ДЭЛ or F2) to enter the BIOS/UEFI setup utility to configure system settings, boot order, and other advanced options.
- Өөрийн дуртай үйлдлийн системээ (жишээ нь, Windows, Linux) ачаалах боломжтой USB диск эсвэл DVD-ээс суулгана уу.
Засвар үйлчилгээ
- Тоос арилгах: Компьютерийн гэр болон эх хавтангийн эд ангиудын доторх тоосыг шахсан агаараар тогтмол цэвэрлэж байгаарай. Цэвэрлэхийн өмнө системийг унтрааж, залгуураас нь салгасан эсэхээ шалгаарай.
- BIOS-ийн шинэчлэлтүүд: Үйлдвэрлэгчийг шалгана уу website for BIOS updates. Only update the BIOS if necessary and follow the instructions carefully to avoid system instability.
- Бүрэлдэхүүн хэсгүүдийн шалгалт: Periodically check all cable connections (power, data) to ensure they are secure.
Алдааг олж засварлах
- Эрчим хүчгүй: Бүх тэжээлийн кабель (24 зүү ATX, 4 зүү CPU) найдвартай холбогдсон эсэхийг шалгаарай. Цахилгаан хангамжийн нэгж (PSU) болон ханын залгуураа шалгана уу.
- Дэлгэц байхгүй: Verify that your monitor is connected to the correct video output (VGA or HDMI) on the motherboard or dedicated graphics card. Reseat the graphics card and RAM modules.
- Системийн тогтворгүй байдал/гацалт: This can be caused by incompatible RAM, overheating, or faulty components. Check RAM compatibility and ensure CPU cooler is properly installed.
- Ачаалах төхөөрөмж олдсонгүй: Check SATA/NVME cable connections. Verify boot order in BIOS/UEFI settings.
- Form Factor Note: While listed as ITX, some users have reported challenges with dual-slot video cards in certain mini-ITX cases. Always verify case compatibility with your chosen components before final assembly.
Баталгаат болон дэмжлэг
For warranty information and technical support, please refer to the documentation provided with your purchase or visit the official Diyeeni webсайт. Баталгаат нэхэмжлэл гаргахын тулд худалдан авалтаа нотлох баримтаа хадгалаарай.
You can visit the Diyeeni store for more products and support: Diyeeni Store