1. Оршил ба түүнээс дээшview
The Idatalink Maestro HRN-SR-VW2 T-Harness is designed to facilitate the replacement of a factory radio with an aftermarket head unit in select Volkswagen vehicles manufactured between 2016 and 2020. This harness works in conjunction with the Idatalink Maestro ADS-MSR module (sold separately) to retain essential factory features such as steering wheel controls and the use of the factory ampнастан.
This manual provides detailed instructions for the proper installation and understanding of the HRN-SR-VW2 T-Harness, ensuring seamless integration with your vehicle's existing systems.
2. Бүтээгдэхүүний онцлог
- Хялбаршуулсан суурилуулалт: Designed to simplify radio replacement in compatible Volkswagen vehicles when used with the iDatalink Maestro ADS-MSR module.
- Steering Wheel Control Retention: Retains original steering wheel controls for functions like volume adjustment and track seeking with an aftermarket radio.
- Үйлдвэр AmpӨргөгч Хадгалалт: Maintains functionality of the factory amplifier, including turn-on, fader, and gain control.
- Backup Camera Retention: Retains the factory backup camera with parking guidelines.
- Retained Accessory Power (RAP): The vehicle's Retained Accessory Power feature is maintained.
- Навигацийн гаралт: Provides outputs for Parking Brake, Reverse Light, and Vehicle Speed Sense (VSS) for aftermarket navigation systems.
- Accessory Power Output: Offers a 12V/15A accessory power output.
- Illumination Output: Provides an illumination output for aftermarket head units.
3. Тохиромжтой байдал
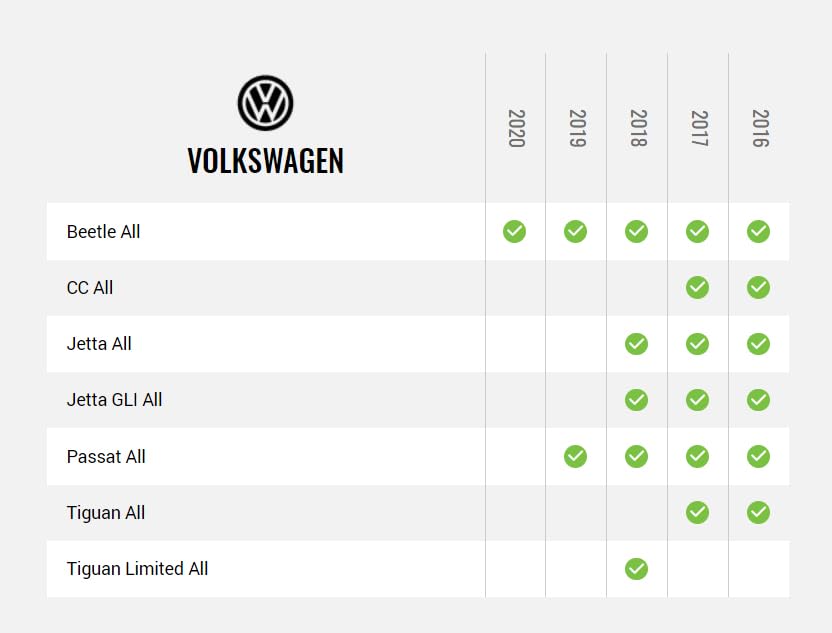
The HRN-SR-VW2 T-Harness is compatible with the following Volkswagen vehicles when used in conjunction with the iDatalink Maestro ADS-MSR module:

Зураг 3.1: Compatibility chart showing supported Volkswagen models and years (2016-2020) for the HRN-SR-VW2 T-Harness. Models include Beetle, CC, Jetta, Jetta GLI, Passat, Tiguan, and Tiguan Limited.
Please refer to the chart above for specific model and year compatibility. An iDatalink Maestro ADS-MSR module is required for full functionality.
4. Суурилуулалтын шаардлага
Successful installation of the HRN-SR-VW2 T-Harness requires the following components (sold separately):
- iDatalink Maestro ADS-MSR Module: This interface module is essential for retaining factory features and communicating with the vehicle's systems.
- Corresponding Idatalink Maestro Car Stereo Head-Unit ACC-HU Series T-Harness: A specific head-unit harness is required to connect the Maestro module to your aftermarket radio. ExampҮүнд:
- ACC-HU-ALP1 (Alpine)
- ACC-HU-PIO1 (Pioneer)
- ACC-HU-SON1 (Sony)
- ACC-HU-KEN1 (Kenwood/JVC with 22-Pin Connector)
- ACC-HU-KEN2 (Kenwood/JVC with 16-Pin Connector)
- ACC-HU-KEN3 (2024 & Newer Kenwood/JVC with 22-Pin Connector)
- ACC-HU-BOS1 (BOSS Radio)
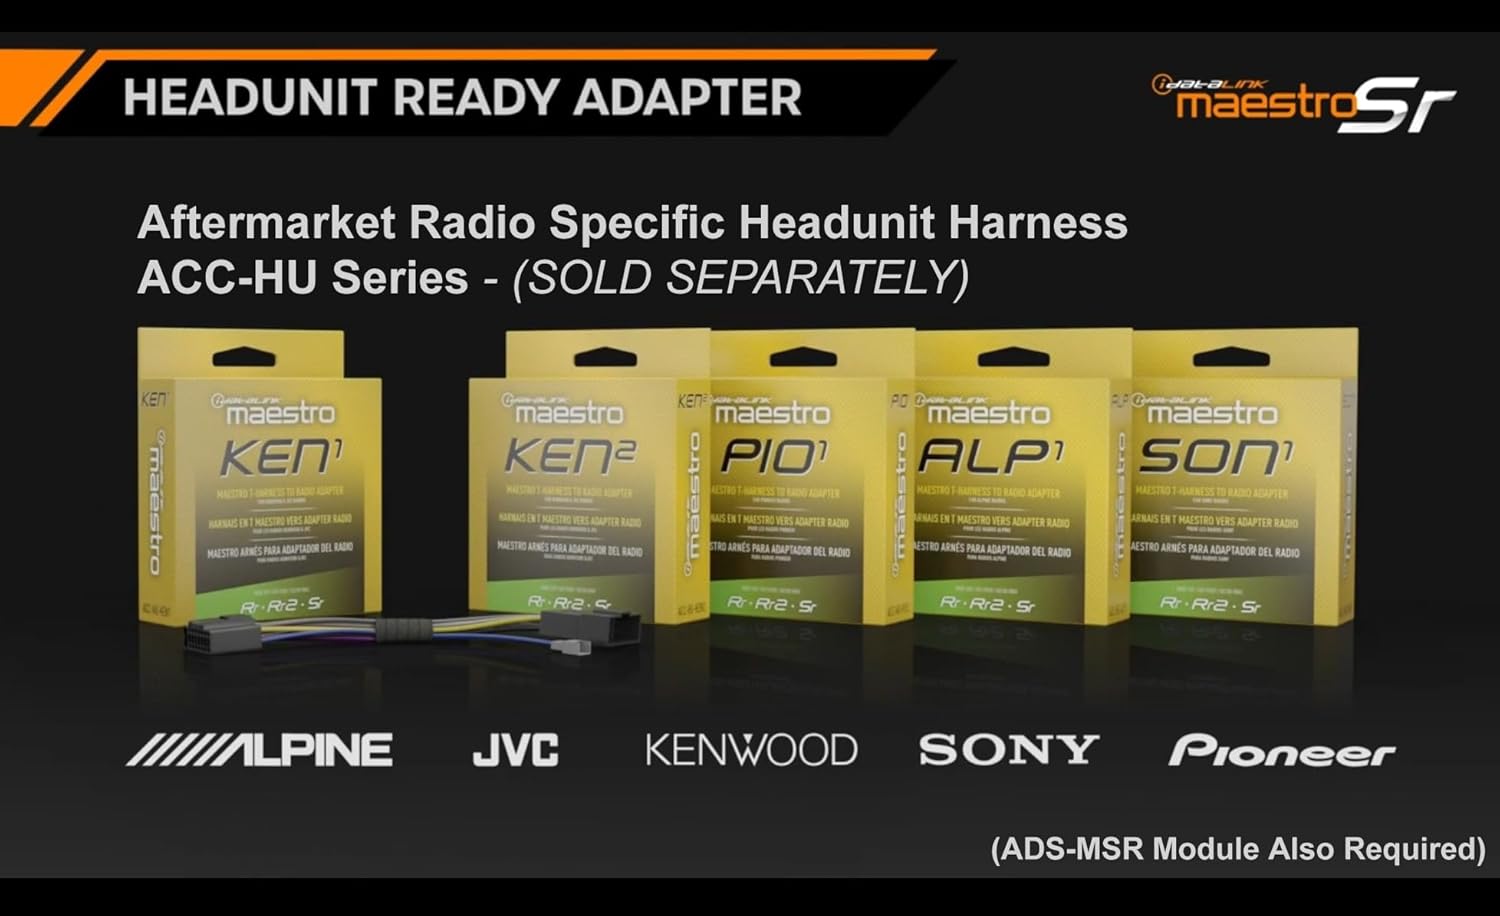
Зураг 4.1: Display of various Idatalink Maestro ACC-HU series head unit specific harnesses, which are required to connect the Maestro module to different brands of aftermarket radios.

Зураг 4.2: Нэг гаруйview of Idatalink Maestro vehicle-specific T-harnesses, illustrating how they simplify the installation process. The HRN-SR-VW2 is part of this series.
5. Тохиргоо ба суулгах гарын авлага
Чухал: Before beginning installation, ensure your iDatalink Maestro ADS-MSR module is flashed with the correct firmware using the Weblink Desktop application. Refer to the ADS-MSR module's instruction manual for detailed flashing procedures.

Зураг 5.1: The Idatalink Maestro HRN-SR-VW2 T-Harness, shown with its packaging, illustrating the main components of the product.
Зураг 5.2: Нарийвчилсан view of the HRN-SR-VW2 T-Harness, highlighting the various connectors and labeled wires for proper connection.
Суулгах алхамууд:
- Тээврийн хэрэгслийн батерейг салгах: Always disconnect the negative terminal of your vehicle's battery before starting any electrical work to prevent short circuits or damage.
- Үйлдвэрийн радио устгах: Carefully remove the factory radio from the dashboard. Refer to your vehicle's service manual for specific instructions on radio removal.
- Connect HRN-SR-VW2 T-Harness:
- Connect the vehicle-specific connector of the HRN-SR-VW2 T-Harness to the corresponding harness in your Volkswagen vehicle.
- Connect the other end of the HRN-SR-VW2 T-Harness to the iDatalink Maestro ADS-MSR module.
- Connect Head-Unit Specific Harness: Connect the appropriate ACC-HU series harness (e.g., ACC-HU-ALP1 for Alpine) to the iDatalink Maestro ADS-MSR module.
- Aftermarket Radio-г холбох: Connect the head-unit specific harness to your aftermarket radio. Ensure all connections are secure.
- Wire Connections (if applicable): If your aftermarket radio requires additional connections not covered by the plug-and-play harnesses (e.g., parking brake, reverse, VSS for navigation), utilize the labeled wires on the HRN-SR-VW2 T-Harness.
- Туршилтын холболтууд: Before reassembling the dashboard, temporarily reconnect the vehicle battery and test the functionality of the aftermarket radio, steering wheel controls, factory amplifier, and backup camera.
- Аюулгүй холболт болон дахин угсралт: Once all functions are verified, neatly secure all wiring to prevent rattles or interference. Reassemble the dashboard components.
- Эцсийн шалгалт: Perform a final check of all retained features and radio functions.
For detailed wiring diagrams and specific vehicle integration instructions, please visit the official iDatalink Maestro webсайт: iDatalink Maestro Support
6. Operating Retained Features
Once the HRN-SR-VW2 T-Harness and ADS-MSR module are correctly installed and configured, the following factory features will operate with your aftermarket radio:
- Жолооны хүрдний удирдлага: The buttons on your steering wheel will control basic functions of your aftermarket radio, such as volume up/down, track forward/back, and mode selection. Specific button assignments may be configurable through the aftermarket radio's settings or the Maestro module's programming.
- Үйлдвэр Ampамь нас: үйлдвэр amplifier will power your vehicle's speakers. Fader and gain controls will typically be managed through the aftermarket radio's audio settings.
- Нөөц камер: When the vehicle is shifted into reverse, the factory backup camera image will display on your aftermarket radio screen, complete with parking guidelines.
- Retained Accessory Power (RAP): The aftermarket radio will remain powered for a short period after the ignition is turned off, similar to the factory radio's behavior, until a door is opened.
7. Алдаа засах
Суулгасны дараа асуудал гарвал дараах алдааг олж засварлах алхмуудыг авч үзнэ үү.
- Радио руу цахилгаан байхгүй:
- Check all power connections to the aftermarket radio and the Maestro module.
- Ensure the vehicle battery is fully charged and properly connected.
- Verify that the ADS-MSR module is correctly flashed and powered.
- Жолооны хүрдний удирдлага ажиллахгүй байна:
- Confirm the ADS-MSR module is flashed with the correct firmware for your vehicle and aftermarket radio.
- Check the connection between the HRN-SR-VW2, ADS-MSR module, and the head-unit specific harness.
- Consult the aftermarket radio's manual for steering wheel control setup options.
- Дуу чимээ алга эсвэл гажуудсан аудио:
- Verify all speaker connections are secure and correctly polarized.
- Үйлдвэрийг баталгаажуул amplifier is receiving power and turn-on signal from the Maestro module.
- Check the audio output settings on your aftermarket radio.
- Нөөц камер харагдахгүй байна:
- Confirm the camera input is correctly connected to the aftermarket radio.
- Ensure the reverse trigger wire from the HRN-SR-VW2 is connected to the aftermarket radio's reverse input.
- Verify the ADS-MSR module is configured to retain the factory camera.
For further assistance, refer to the iDatalink Maestro support resources or contact their technical support.
8. Техникийн үзүүлэлтүүд
| Загварын дугаар | HRN-SR-VW2 |
| Брэнд | Idatalink Maestro |
| Тохиромжтой байдал | Select Volkswagen Vehicles (2016-2020) |
| Required Module | iDatalink Maestro ADS-MSR (Sold Separately) |
| Материал | Акрилонитрил бүхий бутадиен стирол |
| Бүтээгдэхүүний хэмжээс | 7 x 4.75 x 1.5 инч |
| Зүйлийн жин | 0.13 килограмм (4.59 унц) |
| Холбогч төрөл | OBD-II, Volkswagen-specific Connectors |
9. Хайрцагт юу байна
The HRN-SR-VW2 package includes:
- 1x Idatalink Maestro HRN-SR-VW2 T-Harness
Please ensure all components are present upon opening the package.
10. Дэмжлэг ба баталгаа
For technical support, detailed wiring diagrams, or additional information regarding the iDatalink Maestro HRN-SR-VW2 T-Harness, please visit the official iDatalink Maestro webсайт эсвэл харилцагчийн үйлчилгээний хэлтэстэй холбогдоно уу.
Warranty information is typically provided with the product packaging or available on the manufacturer's official webсайт. Баталгаат заргад зориулж худалдан авалтаа нотлох баримтаа үлдээнэ үү.


