Jaguar 190S электрон оёдлын машины хэрэглэгчийн гарын авлага
Загвар: 190S
Танилцуулга
This manual provides comprehensive instructions for the safe and efficient operation, setup, and maintenance of your Jaguar 190S Electronic Sewing Machine. Designed for both beginners and experienced users, the Jaguar 190S offers a wide range of features for various sewing and quilting projects. Please read this manual thoroughly before using the machine to ensure optimal performance and longevity.
1. Тохиргоо
1.1 Савлах ба байрлуулах
- Машиныг сав баглаа боодолоос нь болгоомжтой авч хая.
- Place the machine on a stable, flat surface. Ensure adequate space around the machine for comfortable operation.
- Connect the foot pedal and power cord to the machine and a suitable power outlet (220 Volts).

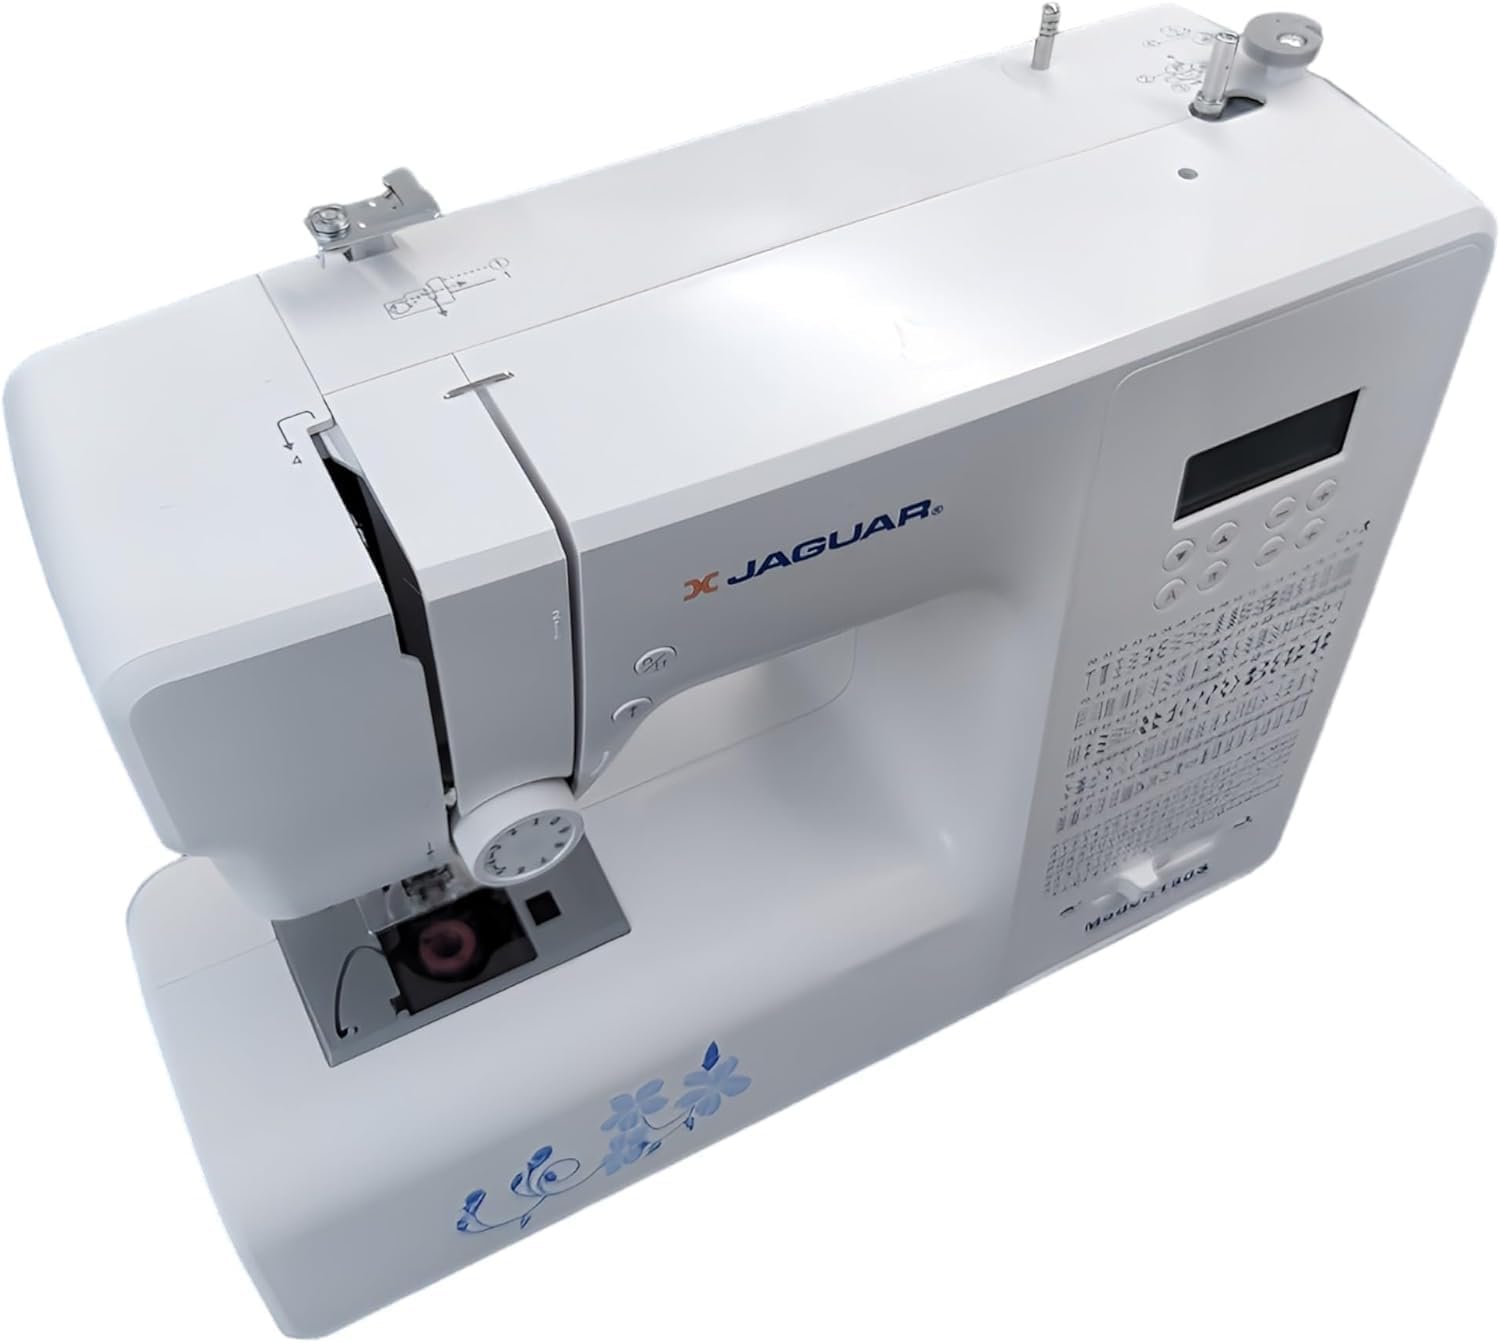
Зураг 1: Урд view of the Jaguar 190S Electronic Sewing Machine. This image shows the main body of the machine, including the needle area, presser foot, stitch selection panel, and LCD screen.
1.2 Ороомгийг ороох
- Дамрын зүү дээр ороомог утас байрлуул.
- Утсыг дээд утасны чиглүүлэгчээр болон ороомгийн ороомгийн чангалах дискийг тойруулан чиглүүлнэ.
- Хоосон ороомог ороомгийн ороомгийн буланд байрлуул.
- Wrap the thread clockwise a few times around the bobbin.
- Ороогч ороомгийн голыг баруун тийш түлхэнэ.
- Start the machine (using the foot pedal or start/stop button) to wind the bobbin. Stop when the bobbin is full.
- Утасыг хайчилж, голыг зүүн тийш нь буцааж түлхэнэ.
1.3 Машинд утас оруулах
- Даралтын хөлийн хөшүүргийг дээшлүүлнэ үү.
- Утасны ороомгийг ороомгийн зүү дээр байрлуул.
- Машин дээр заасан дугаарлагдсан утас нэхэх замыг дагаж, утас нь бүх чиглүүлэгч болон авах хөшүүргээр дамжин өнгөрөхийг баталгаажуулна уу.
- Use the automatic needle threader for quick and easy needle threading.
- Шархны ороомгийг ороомгийн хайрцагт хийж, утас нь чангалах пүршээр зөв орж байгаа эсэхийг шалгаарай.
Зураг 2: Дээрээс доош view of the Jaguar 190S, illustrating the upper threading path and bobbin winding area. This view helps in understanding how to correctly thread the machine.
1.4 Attaching the Needle
- Зүүг хамгийн өндөр байрлалд хүргэхийн тулд гарны хүрдийг эргүүлнэ.
- Зүү cl -ийг суллаamp шураг.
- Insert the new needle with the flat side facing the back of the machine, pushing it up as far as it will go.
- Зүүг чангалах clamp найдвартай шураг.
1.5 Attaching the Presser Foot
- Хөлийн шахагчийг өргөх.
- Press the release button on the back of the presser foot holder to remove the current foot.
- Align the desired presser foot with the holder and lower the presser foot lifter until it snaps into place.
2. Ашиглалтын заавар
2.1 Үндсэн удирдлага
- LCD дэлгэц: Displays selected stitch number, length, and width.
- Оёдол сонгох товчлуурууд: Use the '+' and '-' buttons to navigate through the 200 available stitches.
- Speed Control Slider: Adjusts sewing speed from 150 to 700 stitches per minute.
- Эхлэх/зогсоох товч: Operates the machine without the foot pedal.
- Урвуу товчлуур: Оёдлын эхэн ба төгсгөлд оёдлыг бэхжүүлэх зориулалттай.
- Зүүг дээш/доошлуулах товчлуур: Positions the needle either fully up or fully down.
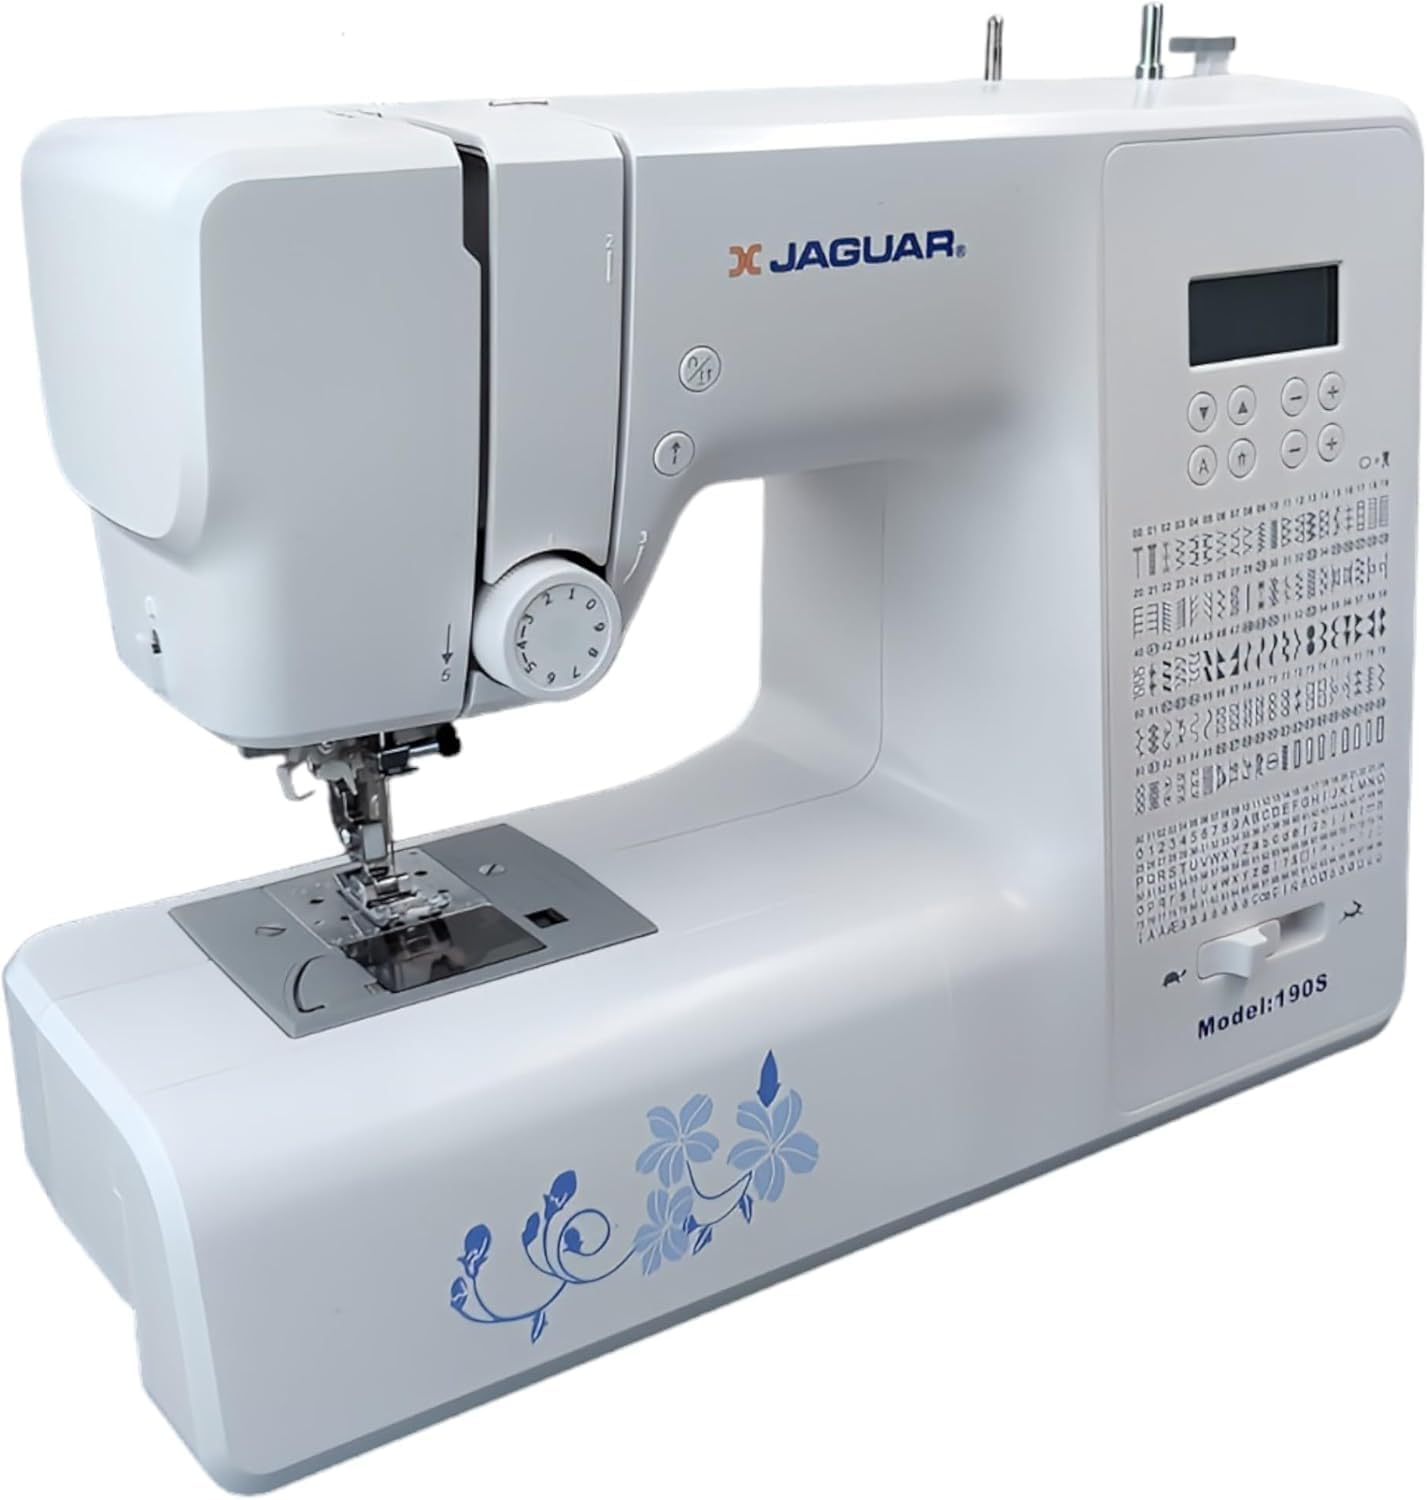
Figure 3: Close-up of the Jaguar 190S control panel and LCD screen. This image highlights the buttons for stitch selection, speed control, and needle positioning.
2.2 Оёдол сонгох ба тохируулах
- Turn on the machine. The default stitch (usually a straight stitch) will appear on the LCD.
- Use the stitch selection buttons to choose from the 200 built-in stitches, including utility, decorative, and alphanumeric options.
- The machine automatically sets optimal stitch length and width for the selected stitch. These can be manually adjusted using dedicated buttons if desired (Length: 0-7mm, Width: 0-4.5mm).
2.3 Автомат зүү залгагч
- Зүү нь хамгийн өндөр байрлалд байгаа эсэхийг шалгаарай.
- Lower the needle threader lever completely.
- Guide the thread as instructed by the markings near the needle.
- Release the lever slowly; a loop of thread will be pulled through the needle eye.
2.4 Автомат товчны нүхнүүд
- Attach the one-step buttonhole foot.
- Place the button you intend to use into the buttonhole foot's size guide.
- Select one of the 8 automatic buttonhole styles from the stitch menu.
- Товшуурын хөшүүргийг доошлуул.
- Start sewing; the machine will automatically create the buttonhole to the correct size.
2.5 Free-Motion Sewing and Quilting
- To engage free-motion sewing or quilting, lower the feed dogs using the lever located at the back of the needle plate area.
- Attach a darning or free-motion quilting foot (not included, may be purchased separately).
- Manually guide the fabric to create your desired stitches.
2.6 Утасны таталтыг тохируулах
- The machine features an adjustable thread tension lever.
- Adjust the tension setting based on the fabric type and thread used. Correct tension results in balanced stitches on both sides of the fabric.
- Test on a scrap piece of fabric before sewing your project.
3. Засвар үйлчилгээ
3.1 Машиныг цэвэрлэх
- Цэвэрлэхийн өмнө машиныг үргэлж салга.
- Regularly clean lint and dust from the bobbin area, feed dogs, and needle plate using the provided brush.
- Wipe the exterior of the machine with a soft, dry cloth. Avoid using harsh chemicals.
3.2 Зүү солих
- Change the needle frequently, especially after 8-10 hours of sewing or if it becomes bent or dull. A dull needle can cause skipped stitches or fabric damage.
- Refer to section 1.4 for detailed instructions on attaching a new needle.
3.3 Хадгалалт
- Ашиглаагүй үед тоосноос хамгаалахын тулд машиныг таглана.
- Нарны шууд тусгалаас хол хуурай сэрүүн газар хадгална.
4. Алдаа засах
Энэ хэсэгт танд тулгарч болох нийтлэг асуудлуудыг авч үзэх болно. Энд дурдаагүй асуудлуудын талаар хэрэглэгчийн дэмжлэгтэй холбогдоно уу.
4.1 Алгассан оёдол
- Ensure the needle is inserted correctly and is not bent or dull. Replace if necessary.
- Check that the machine is properly threaded, both upper and bobbin threads.
- Use the correct needle type and size for your fabric.
4.2 Урсгал таслах
- Verify correct threading and bobbin winding.
- Adjust upper thread tension. Too high tension can cause thread breakage.
- Зүүний хавтан эсвэл ороомгийн хайрцаг дээр бүдгэрсэн эсвэл барзгар толбо байгаа эсэхийг шалгана уу.
- Ensure the needle is not bent or dull.
4.3 Uneven Stitches / Poor Stitch Quality
- Check and adjust thread tension for both upper and bobbin threads.
- Ensure the machine is threaded correctly.
- Сайн чанарын утас хэрэглээрэй.
- Clean the bobbin area from lint and debris.
5. Техникийн үзүүлэлтүүд
| Онцлог | Дэлгэрэнгүй |
|---|---|
| Брэнд | ЖАГУАР |
| Загварын дугаар | 190S |
| Stitch Programs | 200 (including 100 alphanumeric, 8 automatic buttonholes) |
| Оёдлын урт | 0 мм - 7 мм |
| Оёдлын өргөн | 0 мм - 4.5 мм |
| Зүү утас | Автомат |
| Бобины систем | Quick-insert horizontal hook with automatic winding |
| Дэлгэц | Арын гэрэлтүүлэгтэй LCD |
| Хурдны хяналт | Electronic, 150 to 700 stitches/minute |
| Гэрэлтүүлэг | Нэгдсэн LED |
| Хүч | 35 ватт |
| Ботьtage | 220 вольт |
| Хэмжээ (L x W x H) | 43 x 23 x 35 см (ойролцоогоор 16.9 x 9.1 x 13.8 инч) |
| Жин | 5 килограмм (ойролцоогоор 11 фунт) |
| Материал | Хуванцар |
6. Дагалдах хэрэгсэл
The Jaguar 190S comes with a comprehensive set of accessories to get you started:
- Standard Zigzag Foot
- One-Step Buttonhole Foot
- Сатин оёдолтой хөл
- Сохор хормой хөл
- Товчлуурын хөл
- Electronic Foot Pedal
- Needles (3 pieces)
- Хос зүү
- Дамрын таг
- Bobbin Holder
- Screwdrivers (small + for needle plate)
- Bobbins (4 total, one pre-installed)
- Туслах дамар зүү
- Seam Ripper / Brush

Figure 4: A selection of the accessories included with the Jaguar 190S, such as various presser feet, bobbins, needles, and the foot pedal.
7. Баталгаат хугацаа ба дэмжлэг
Your Jaguar 190S Electronic Sewing Machine is covered by a 1 жилийн баталгаат хугацаа for parts and manufacturing defects. Please retain your proof of purchase for warranty claims.
For technical assistance, troubleshooting beyond this manual, or warranty service, please contact your retailer or the official Jaguar customer support. Contact information can typically be found on the product packaging or the manufacturer's webсайт.


