1. Аюулгүй байдлын чухал мэдээлэл
Суурилуулалтыг эхлүүлэхийн өмнө бүх зааврыг уншиж, ойлгоно уу. Эдгээр зааврыг дагаж мөрдөөгүй тохиолдолд цахилгаанд цохиулах, гал түймэр гарах эсвэл хүний биед гэмтэл учруулж болзошгүй.
- Суурилуулалт, засвар үйлчилгээ хийхээс өмнө цахилгаан таслагчийн хүчийг унтраасан эсэхийг шалгаарай.
- Бүх утаснууд нь үндэсний болон орон нутгийн цахилгааны дүрэмд нийцсэн байх ёстой.
- The ceiling fan must be mounted to a structure capable of supporting a minimum of 35 lbs (15.9 kg).
- Гэмтсэн ир, орон сууцтай сэнсийг ажиллуулж болохгүй.
- Сэнс ажиллаж байх үед гар, хувцас болон бусад зүйлийг сэнсний ирээс хол байлга.
- Энэхүү сэнс нь зөвхөн дотоод орчинд ашиглах зориулалттай.
2. Багцын агуулга
Verify that all components listed below are included in your package. If any parts are missing or damaged, contact LEDLUX customer support before proceeding with installation.
- Моторын орон сууцны угсралт
- Сэнсний ир (8 ширхэг)
- Downrods (4.5", 12", 24" options)
- Хаалт суурилуулах
- Алсын удирдлага ба хүлээн авагч
- Тоног төхөөрөмжийн багц (эрэг, угаагч, утас самар)
- Зааварчилгааны гарын авлага
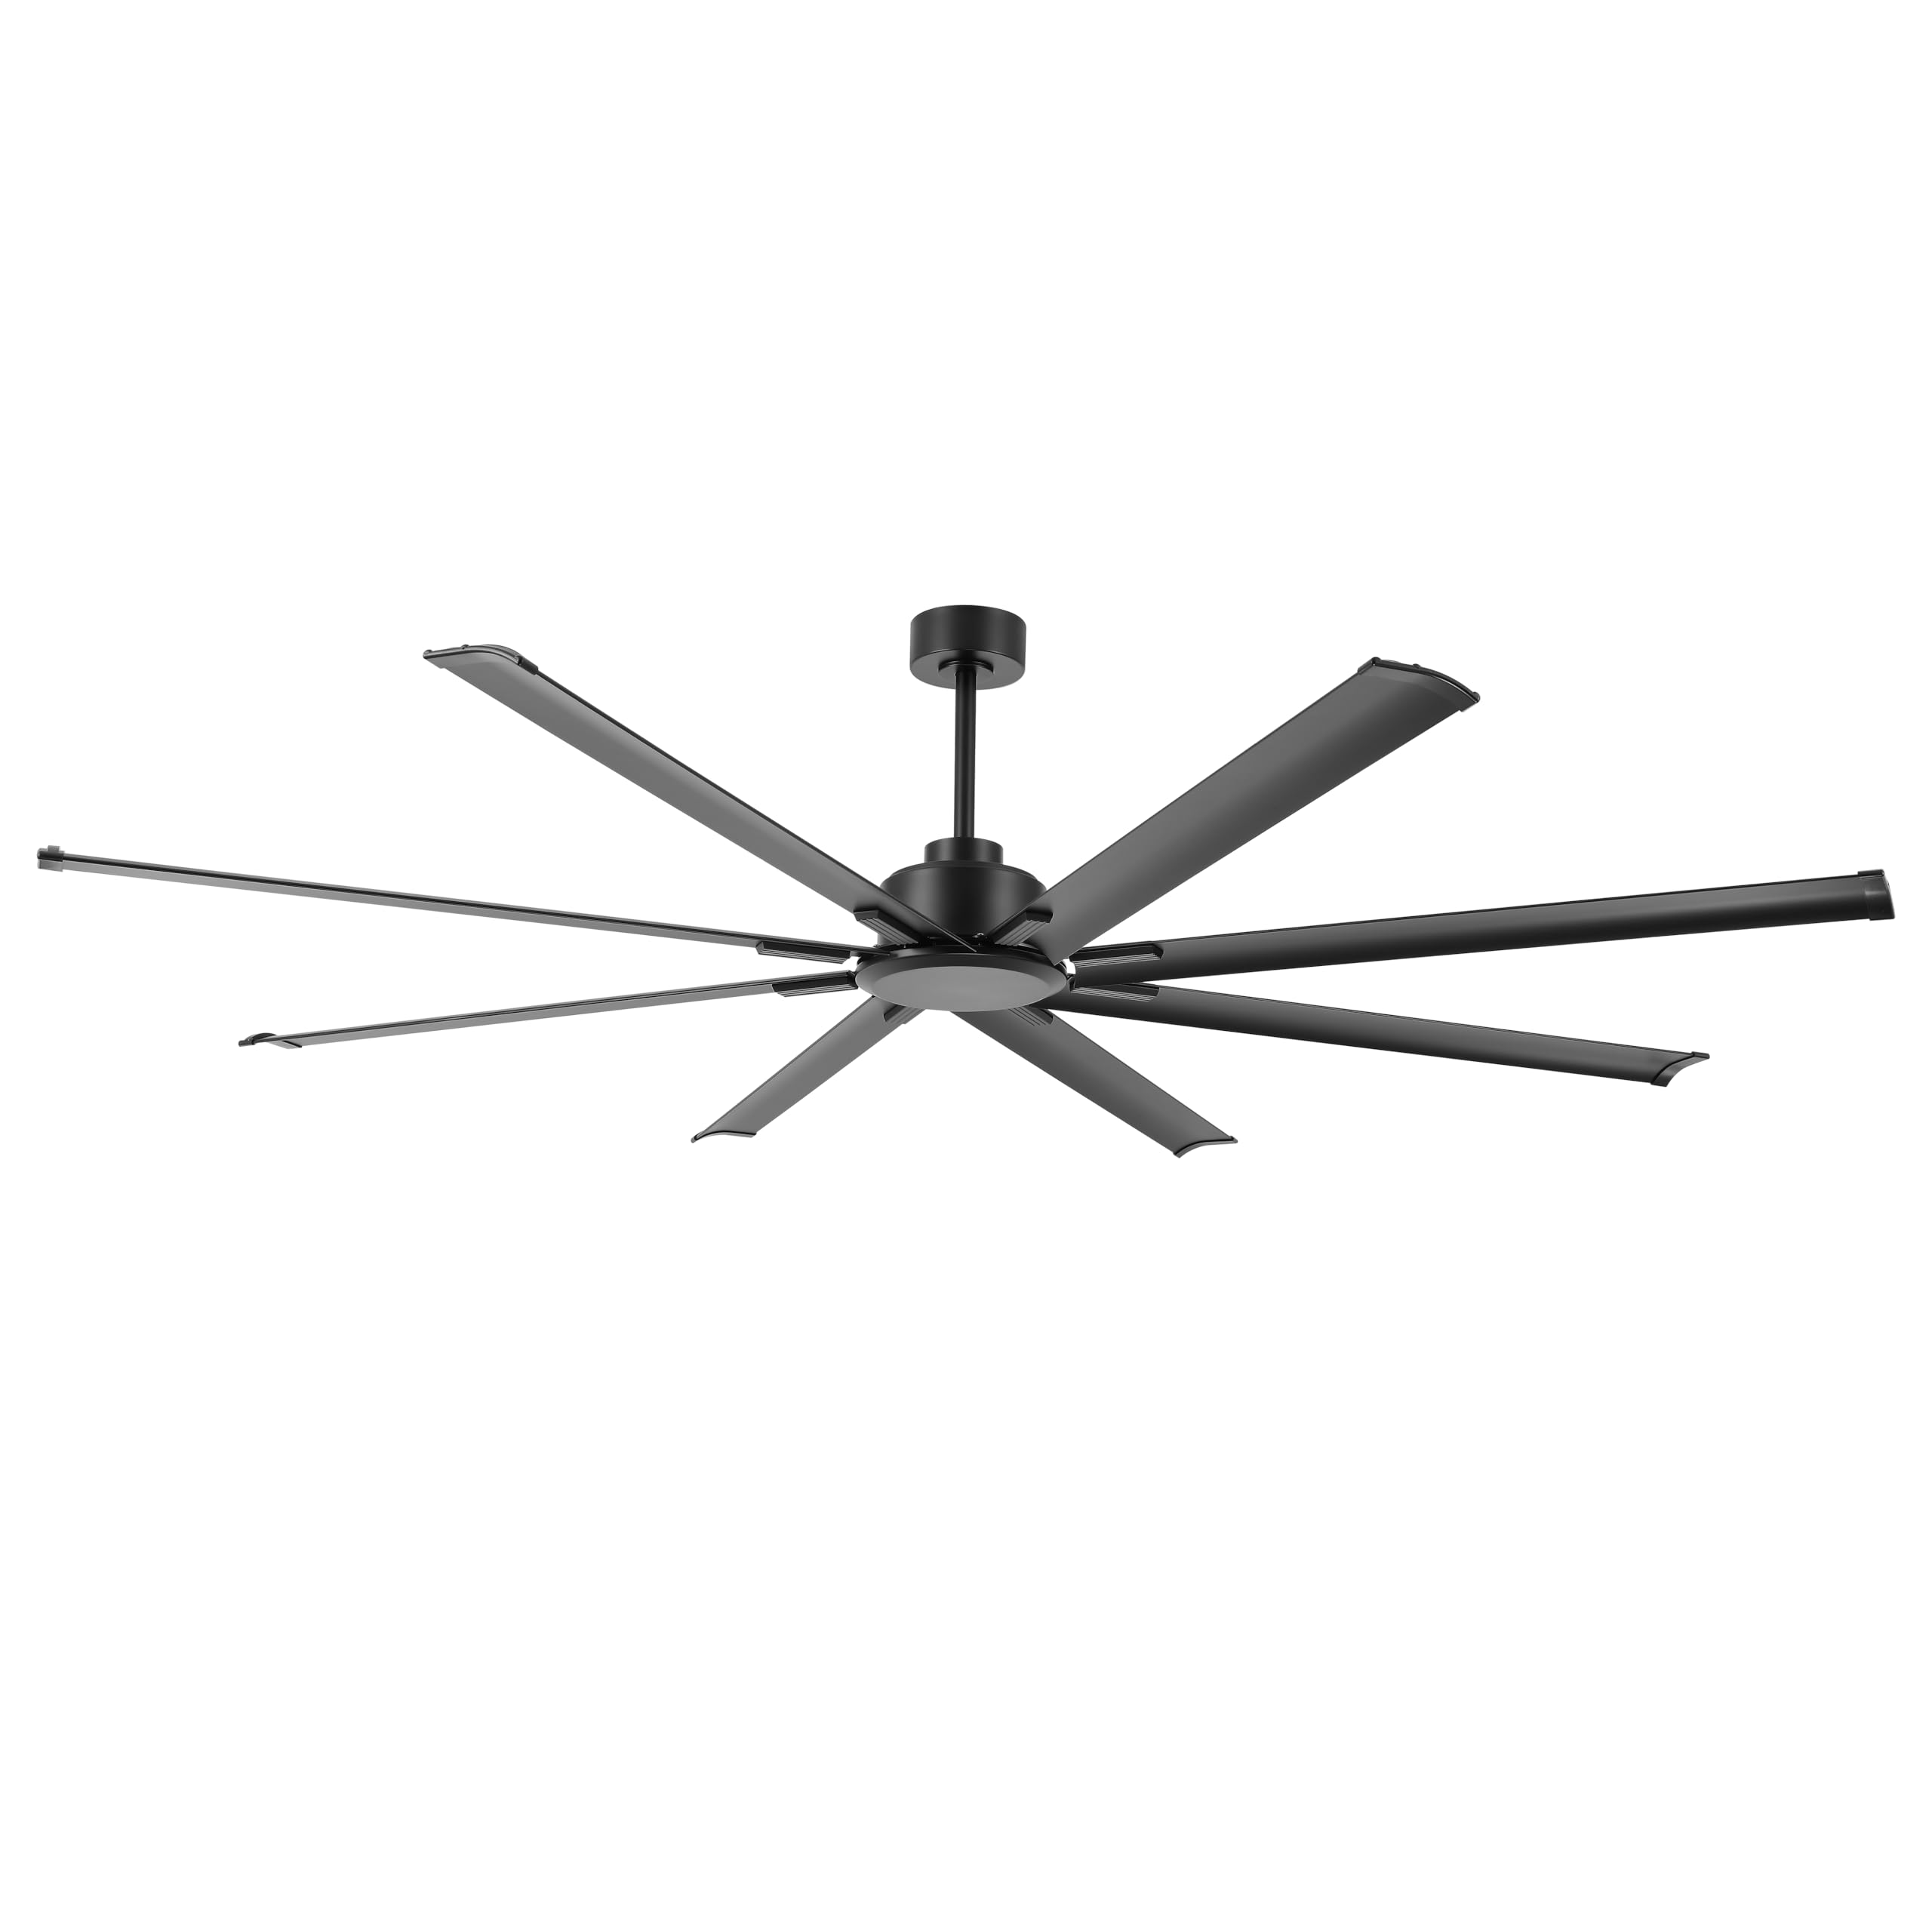
Image: The LEDLUX 96-inch ceiling fan, showcasing its eight black aluminum blades, central motor housing, and the included remote control. This image provides an overview бүтээгдэхүүний үндсэн бүрэлдэхүүн хэсгүүдийн талаар.
3. Тохиргоо ба суурилуулалт
Follow these steps carefully for proper installation of your LEDLUX ceiling fan.
3.1 Суулгахаас өмнөх шалгах хуудас
- Үндсэн хэлхээний таслагчийн хүчийг унтраа.
- Суурилуулах байршил нь сэнсний жинг тэсвэрлэх чадвартай эсэхийг шалгаарай.
- Шаардлагатай багаж хэрэгслийг (халив, утас хуулагч, шат гэх мэт) цуглуул.
3.2 Сэнс суурилуулах
- Attach the mounting bracket to the ceiling junction box. Ensure it is securely fastened to a structural beam.
- Select the appropriate downrod (4.5", 12", or 24") for your ceiling height.
- Feed the fan wires through the chosen downrod.
- Бууруулах савааг моторын их биед бэхлэнэ.
- Сэнсний угсралтыг болгоомжтой өргөж, бэхэлгээний хаалтанд өлгө.

Image: A diagram illustrating the overall dimensions of the 96-inch ceiling fan, including its width and height with different downrod lengths (12.7", 20.3", 32.5"). It also shows how the fan can be mounted on both flat and sloped ceilings, along with the three included downrod sizes (4.5", 12", 24").

Image: This image displays the LEDLUX ceiling fan installed in three different room settings: a high ceiling, a low ceiling, and a slanted ceiling, demonstrating its versatility for various architectural styles.
3.3 утас холболт
- Connect the fan's wires to the household wiring according to the wiring diagram provided in the full manual. Use wire nuts to secure connections.
- Install the remote receiver into the mounting bracket canopy.
- Connect the receiver wires to the fan and household wires as instructed.
3.4 Attaching Blades
- Attach each of the 8 fan blades to the motor housing using the provided screws and washers. Ensure all screws are tightened securely.
4. Ашиглалтын заавар
Your LEDLUX ceiling fan is controlled by the included remote control. Ensure batteries are installed correctly in the remote.
4.1 Алсын удирдлагын функцууд

Зураг: Нарийвчилсан view of the remote control for the LEDLUX ceiling fan, highlighting buttons for speed adjustment (1-6), fan on/off, forward/reverse function, natural wind mode, and timer settings (1H/2H/4H/8H).
- Асаах/унтраах товч: Сэнсийг асаах эсвэл унтраах.
- Хурдны товчлуурууд (1-6): Сэнсний хурдыг бага (1)-ээс өндөр (6) хүртэл тохируулна.
- Урагш/Ухрах товчлуур: Хутганы эргэлтийн чиглэлийг өөрчилдөг.
- Timer Buttons (1H/2H/4H/8H): Сонгосон хугацааны дараа сэнсийг автоматаар унтрахаар тохируулна.
- Natural Wind Button: Simulates a natural breeze by cycling through various speeds.
4.2 Буцаах функц (Зун/Өвлийн горим)
The fan features a reversible DC motor, allowing for year-round use to optimize air circulation.
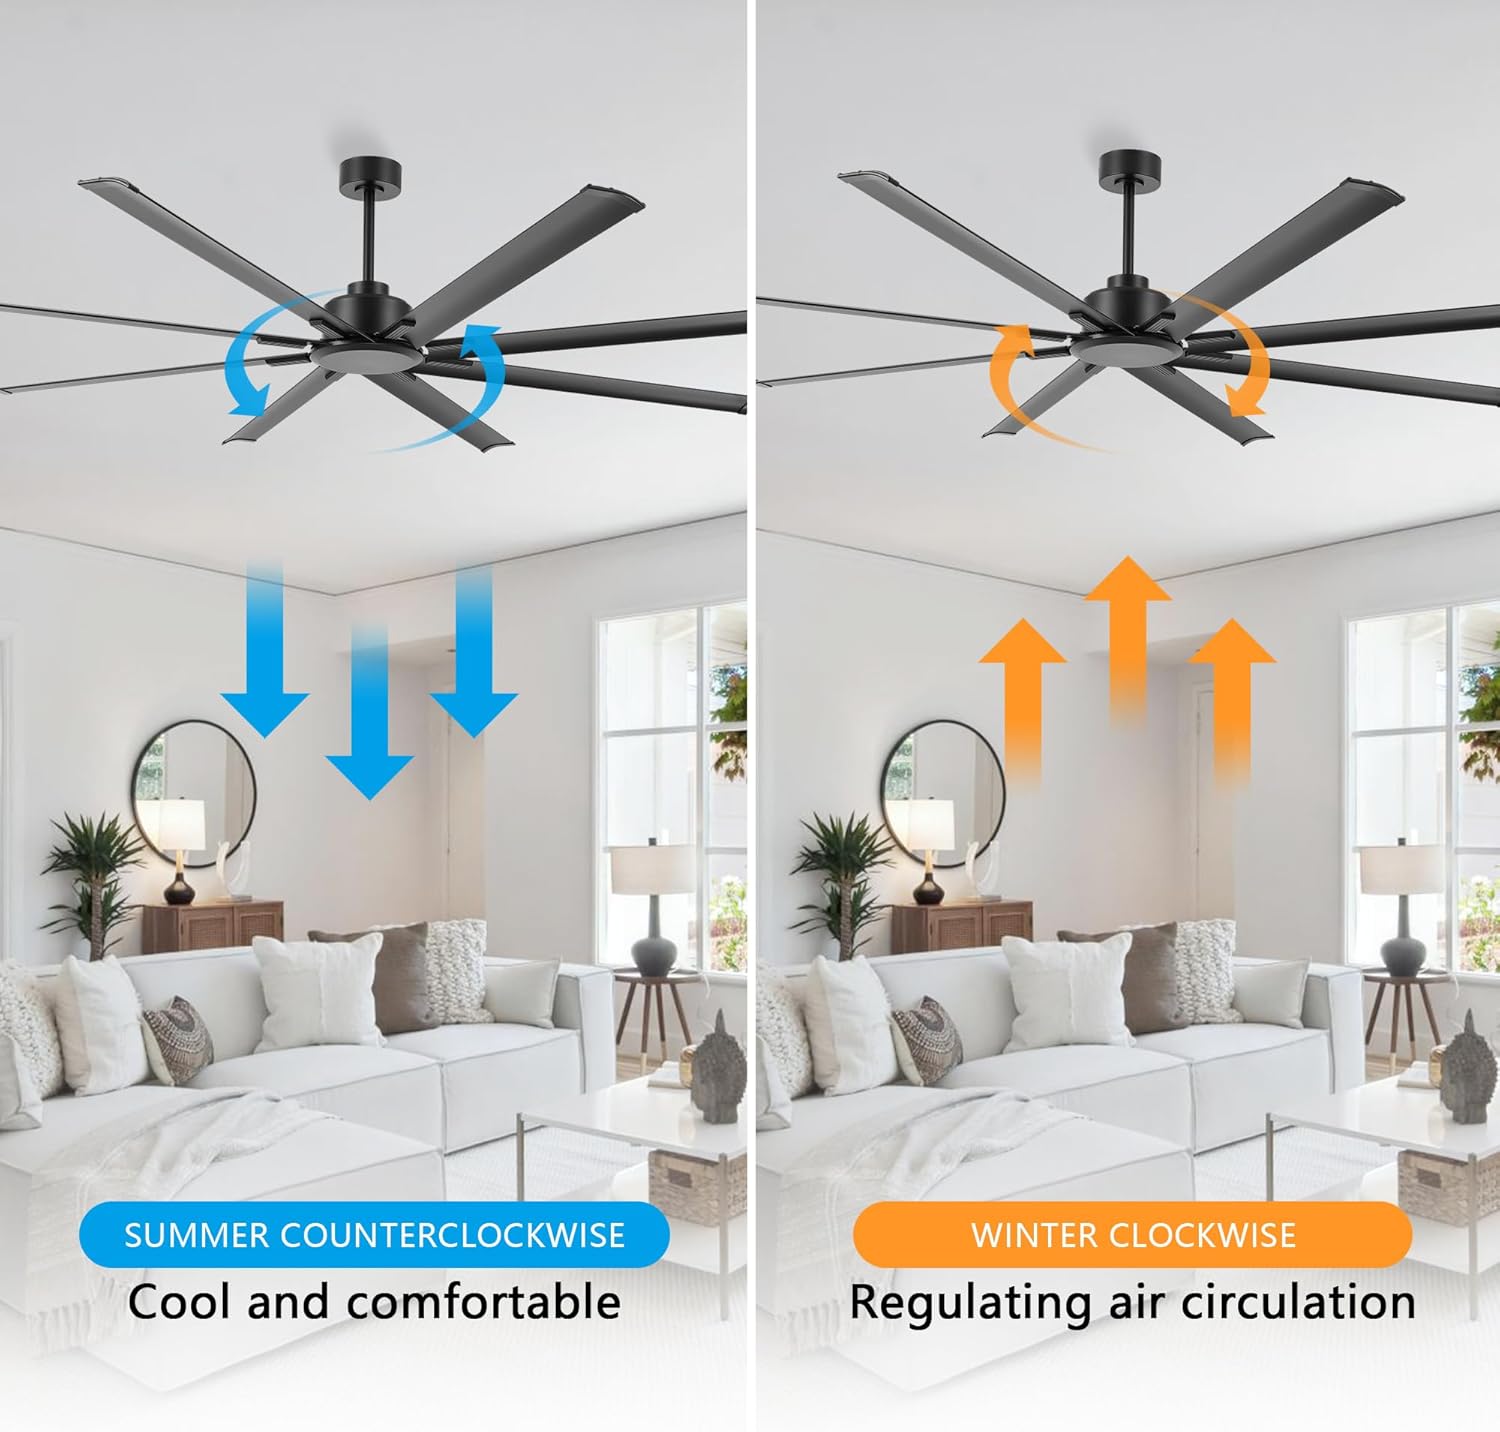
Image: This image illustrates the reversible function of the ceiling fan. On the left, blue arrows indicate counter-clockwise rotation for a cooling downdraft in summer. On the right, orange arrows show clockwise rotation for an updraft to circulate warm air in winter.
- Зуны горим (цагийн зүүний эсрэг): Press the reverse button to make the blades rotate counter-clockwise, creating a downward airflow that produces a cooling effect.
- Өвлийн горим (цагийн зүүний дагуу): Press the reverse button again to make the blades rotate clockwise, creating an upward airflow that helps circulate warm air trapped near the ceiling.
4.3 Таймер функц
Use the timer buttons on the remote control to set the fan to operate for a specific duration before automatically turning off.

Image: This graphic highlights the silent operation of the fan, stating sound is less than 35dB, and illustrates the available timer settings: 1 hour, 2 hours, 4 hours, and 8 hours.
- Press the 1H, 2H, 4H, or 8H button to activate the timer. The fan will run for the selected time and then shut off.
- To cancel the timer, press the fan On/Off button or select a different timer setting.
5. Засвар үйлчилгээ
Тогтмол засвар үйлчилгээ нь таазны сэнсний оновчтой гүйцэтгэл, удаан эдэлгээтэй байдлыг баталгаажуулдаг.
- Цэвэрлэгээ: Үе үе сэнсний ир болон моторын гэрийг зөөлөн, damp даавуу. Зүлгүүрийн цэвэрлэгч, уусгагчийг бүү ашигла.
- Шургийг чангалах: Check all screws on the fan blades and mounting hardware annually to ensure they are secure.
- Хутганы тэнцвэр: Хэрэв сэнс найгавал бүх ирийг найдвартай бэхэлсэн эсэхийг шалгаад, шаардлагатай бол ирийг тэнцвэржүүлэх хэрэгсэл (дагалдахгүй) ашиглах талаар бодож үзээрэй.
6. Алдаа засах
Хэрэв та фэнтэйгээ холбоотой асуудалтай тулгарвал дараах нийтлэг асуудал, шийдлүүдийг үзнэ үү.
| Асуудал | Боломжит шалтгаан | Шийдэл |
|---|---|---|
| Сэнс эхлэхгүй байна | Сэнсний хүч байхгүй | Check circuit breaker and wall switch. Ensure all wiring connections are secure. |
| Алсын удирдлага ажиллахгүй байна | Dead batteries or incorrect pairing | Replace remote batteries. Refer to the full manual for remote pairing instructions. |
| Сэнс хэт их хөдөлдөг | Loose blades or unbalanced blades | Ensure all blade screws are tight. Check for bent blades. Use a blade balancing kit if needed. |
| Дуу чимээтэй ажиллагаа | Loose screws or motor issues | Tighten all screws. If noise persists, contact customer support. |
7. Техникийн үзүүлэлтүүд
| Онцлог | Дэлгэрэнгүй |
|---|---|
| Брэнд | LEDLUX |
| Загварын дугаар | SYCF9605 |
| Өнгө | Хар |
| Суурилуулах төрөл | Таазны бэхэлгээ |
| Хурдны тоо | 6 |
| Ботьtage | 12 вольт (ДС) |
| Дотор/гадаа ашиглах | Дотор |
| Хяналтын арга | Алсын удирдлага |
| Үр ашиг | Өндөр бүтээмжтэй |
| Хутганы тоо | 8 |
| Хутганы материал | Хөнгөн цагаан |
8. Баталгаат хугацаа ба дэмжлэг
LEDLUX stands behind the quality of its products.

Image: A graphic detailing the LEDLUX "Worry-Free Promise," which includes a 3-Year Full Warranty on all parts and a 10-Year Motor Warranty.
- Моторын баталгаа: The DC motor is covered by a 10-year free replacement warranty.
- Сэлбэгийн баталгаа: All other parts of the fan are covered by a full 3-year warranty.
For warranty claims, technical assistance, or missing parts, please contact LEDLUX customer support through the retailer where the product was purchased or visit the official LEDLUX webсайт.