Танилцуулга
Welcome to the ACEMAGIC Vista V1 Mini PC user manual. This guide provides essential information for setting up, operating, maintaining, and troubleshooting your new mini PC. Please read thoroughly to ensure optimal performance and longevity of your device.
Хайрцагт юу байна
Your ACEMAGIC Vista V1 Mini PC package includes:
- 1 x V1 Twin Lake N150 Mini PC
- 1 x HDMI кабель
- 1 х хэрэглэгчийн гарын авлага
- 1 x тэжээлийн адаптер
- 1 x VESA Mount with Screws
Бүтээгдэхүүн дууссанview
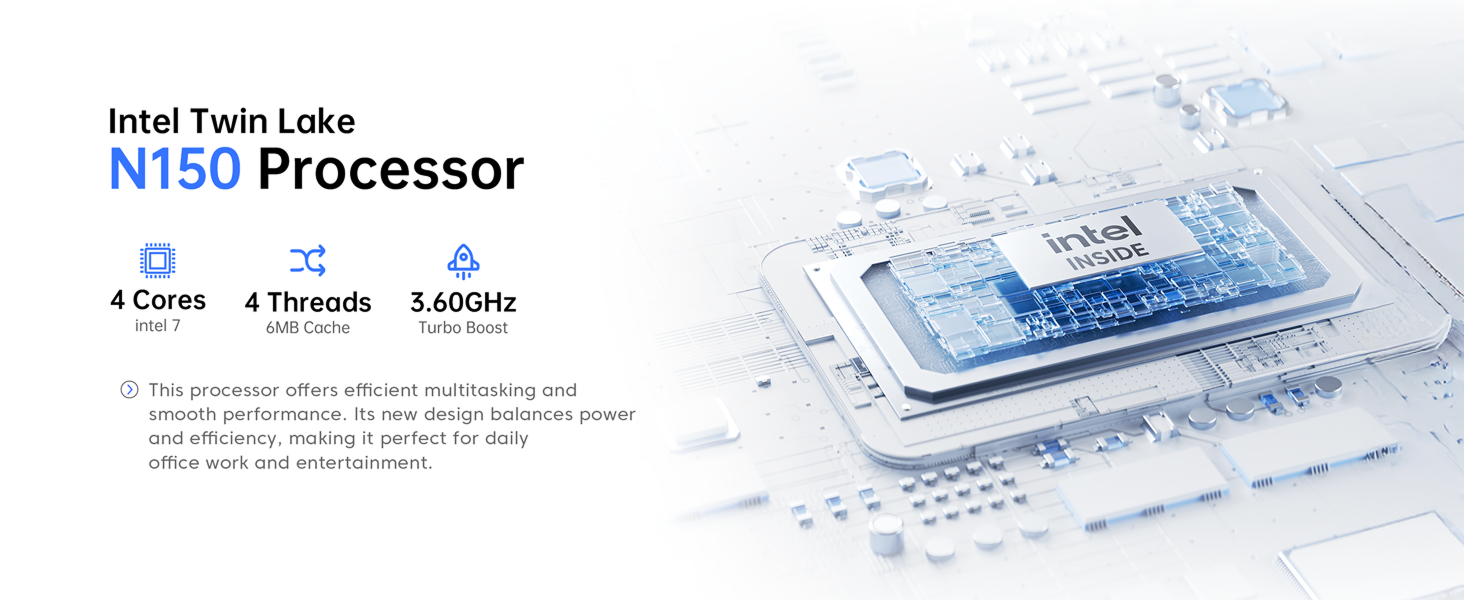
The ACEMAGIC Vista V1 Mini PC is a compact and powerful computing solution designed for various tasks, from office work to 4K streaming. It features a 13th Gen Intel N150 processor, ample memory, and versatile connectivity options.

This image highlights the seven key advantages of the ACEMAGIC Vista V1 Mini PC, including its Intel N150 processor, 16GB DDR4 RAM, 256GB M.2 SSD, versatile ports, compact size, Intel UHD Graphics, pre-installed Windows 11 Pro, and dual exhaust cooling.
Тохируулах гарын авлага
1. Initial Power On and BIOS Settings
To power on your ACEMAGIC Vista V1 Mini PC and access BIOS settings, follow these steps:
- Power on the device and press the Дэл key to enter the BIOS settings. Use the arrow keys (↑, ↓, ←, →) to adjust the cursor.
- руу шилжих Ачаалах section using the right arrow key. Press Оруулна уу.
- Adjust the cursor to "S0 State" to enable automatic power-on.
- After making modifications, select the "Save Exit and Restart" option. Confirm by selecting "Yes" хадгалах, гарах.
This video demonstrates the process of powering on the ACEMAGIC Vista V1 Mini PC and configuring BIOS settings for automatic power-on.
2. VESA угсралт
The ACEMAGIC Vista V1 Mini PC supports VESA mounting for flexible placement behind a monitor or on a wall.
- Prepare tools and materials: Ensure you have a suitable mounting bracket for your mini PC and display. A screwdriver and other necessary tools should be ready.
- Install the mounting bracket on the back of the display: Follow the instructions provided with your mounting bracket. Typically, this involves using a screwdriver to secure the bracket onto the VESA mounting holes of the display (if the display supports VESA mounting).
- Mount the mini PC on the bracket: Align the back of the mini PC with the corresponding part of the bracket and use screws or other fastening devices to fix it onto the bracket.
This video illustrates the steps for mounting the ACEMAGIC Vista V1 Mini PC onto a monitor using a VESA bracket.
3. Захын төхөөрөмжүүдийг холбох
Connect your keyboard, mouse, monitor, and other peripherals to the available ports.
This image details the various ports available on the ACEMAGIC Vista V1 Mini PC, including USB 3.2 Gen2, USB 2.0, HDMI 2.0, DisplayPort 1.4, 3.5mm Audio Jack, LAN, and DC Jack.
Ашиглалтын заавар
1. Асаах болон анх ачаалах
Once all connections are secure, press the power button on the front of the mini PC. The system will boot into the pre-installed Windows 11 Pro operating system.
2. Dual Screen Display
The Vista V1 supports 4K@60Hz dual displays via HDMI and DisplayPort, enhancing productivity and viewтуршлага.
This video demonstrates the dual-screen display capabilities of the ACEMAGIC Vista V1 Mini PC, showcasing 4K resolution output.
3. Гүйцэтгэлийн хэт өндөр үзүүлэлтview
Equipped with a 13th Gen Intel N150 processor, 16GB DDR4 RAM, and a 256GB M.2 SSD, the mini PC delivers efficient performance for daily office tasks, multimedia consumption, and light photo editing.
Засвар үйлчилгээ, шинэчлэлт
1. Хөргөлтийн систем
The mini PC features an upgraded cooling design with internal cooling technology and an axial fan to ensure stable performance and quiet operation.

This image illustrates the internal cooling technology and upgraded axial fan of the ACEMAGIC Vista V1 Mini PC, designed for efficient heat dissipation.
2. Хадгалалтын өргөтгөл
The 256GB M.2 SSD can be expanded up to 2TB (additional storage not included) to accommodate growing storage needs.
This image shows the internal layout of the ACEMAGIC Vista V1 Mini PC, highlighting the 16GB DDR4 RAM and the 256GB M.2 SSD, with an indication of expandable storage.
Алдааг олж засварлах
If you encounter any issues with your ACEMAGIC Vista V1 Mini PC, please refer to the following common solutions or contact customer support.
- Дэлгэц байхгүй: Ensure all video cables (HDMI/DP) are securely connected to both the mini PC and the monitor. Verify the monitor is set to the correct input source.
- Эрчим хүчгүй: Check that the power adapter is correctly plugged into the mini PC and a working power outlet.
- Удаан гүйцэтгэл: Close unnecessary applications. Check for available Windows updates. Consider expanding storage if the current drive is nearly full.
- Холболтын асуудал: For Wi-Fi, ensure the antenna is connected (if applicable) and the device is within range of your router. For Ethernet, check the cable connection.
Техникийн үзүүлэлтүүд
| Онцлог | Дэлгэрэнгүй |
|---|---|
| Процессор | 13th Gen Intel N150 (up to 3.6 GHz) |
| RAM | 16 ГБ DDR4 |
| Хадгалах | 256 GB M.2 SSD (Expandable up to 2TB) |
| График | Intel UHD график |
| Дэлгэцийн гаралт | HDMI 2.0 (4K@60Hz), DisplayPort 1.4 (4K@60Hz) |
| Холболт | Dual-band Wi-Fi, Bluetooth 4.2, Gigabit Ethernet (RJ45) |
| Портууд | 2x USB 3.2 Gen2, 2x USB 2.0, 1x 3.5mm Audio Jack, 1x DC Jack |
| Үйлдлийн систем | Windows 11 Pro |
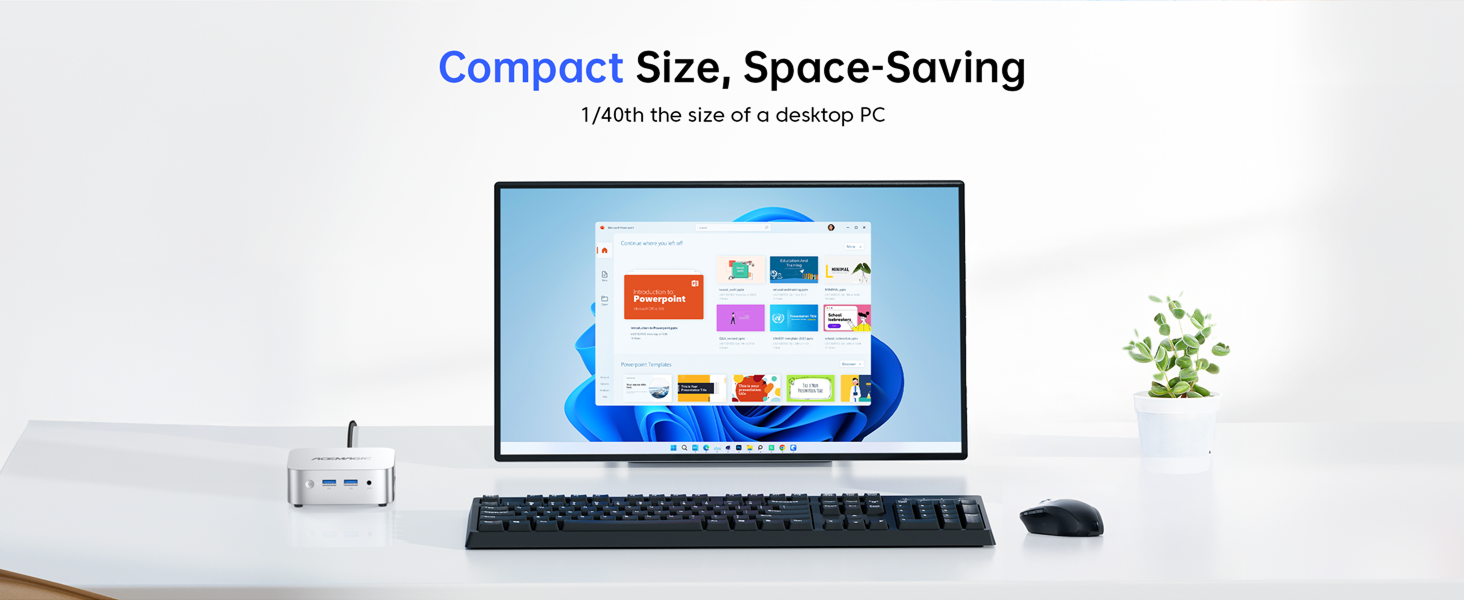
| Хэмжээ | 5 x 4.5 x 1.5 инч |
| Жин | 1.39 фунт |
Баталгаат болон дэмжлэг
The ACEMAGIC Vista V1 N150 Mini PC comes with a 1-year limited warranty. For technical assistance or warranty claims, please contact ACEMAGIC customer support.
Холбоо барих мэдээлэл:
- Amazon Buyer Account: Log in, find your order, and click "Get Help".
- Дэмжлэгийн имэйл: service@acemagicians.com
- Telephone (US): +1 800 908 1980
This image provides contact details for ACEMAGIC customer support, including Amazon's "Get Help" option, support email, and a US telephone number.


